Ever wondered how to mix science, creativity, and a dash of spooky fun? 🎃 A Monster Lava Lamp is the perfect way to do it! With just a few kitchen supplies, kids (and adults!) can whip up a bubbling, glowing jar of monster magic. According to STEM educators, hands-on experiments boost curiosity and learning by over 70%—and this one is guaranteed to get “wow!” reactions. Let’s dive into making your very own monster lamp and discover why it’s both fun and educational!
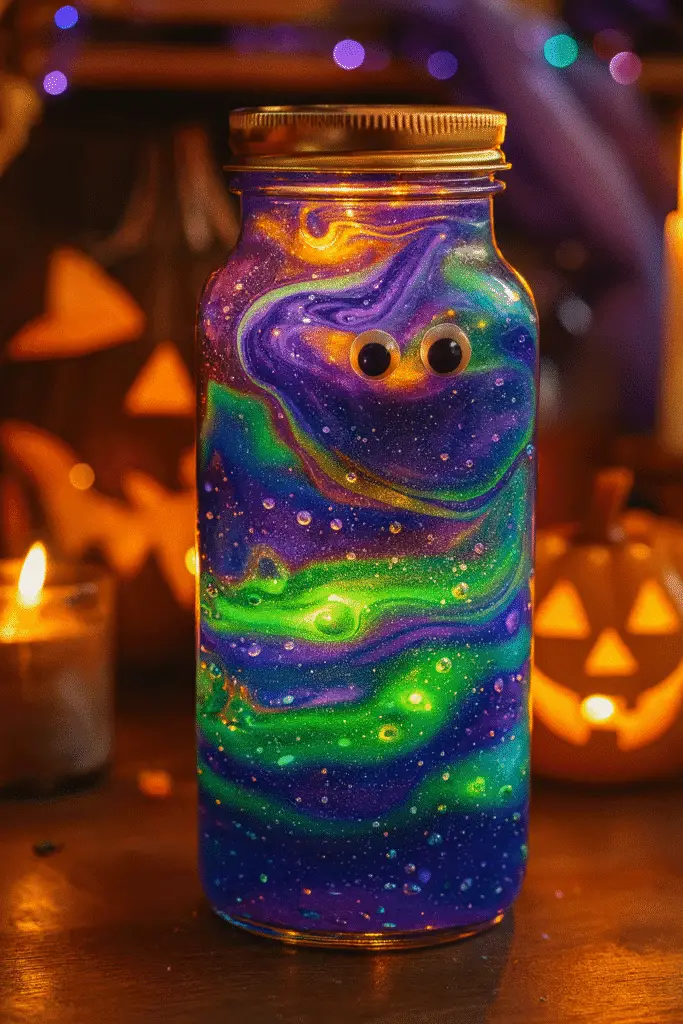
What You’ll Need for Your DIY Monster Lava Lamp
I’ll be real with you—I learned the hard way that having all your stuff laid out before you start makes this project a whole lot less messy. The first time I tried making a Monster Lava Lamp with my kids, I didn’t even grab a funnel. Bad move. Let’s just say my kitchen counter looked like a swamp monster had exploded on it. 😂
Basic Supplies
- Clear jar or bottle (16–20 oz): A mason jar works great, but honestly, even a recycled water bottle does the trick.
- Vegetable oil (2/3 cup): Baby oil makes it look clearer, but I usually just grab what’s in the pantry.
- Warm water (1/3 cup): Cold water won’t bubble as well—it slows things down.
- Food coloring (8–10 drops): Green for a slimy monster vibe, purple for something witchy, or orange for that Halloween glow.
The Magic Ingredient
- Fizzing antacid tablet (like Alka-Seltzer): This is where the real show starts. Break it into small pieces so you can make the bubbling last longer. The smaller the chunk, the quicker the fizz, so you can kind of control the “lava” action.
Optional Fun Stuff
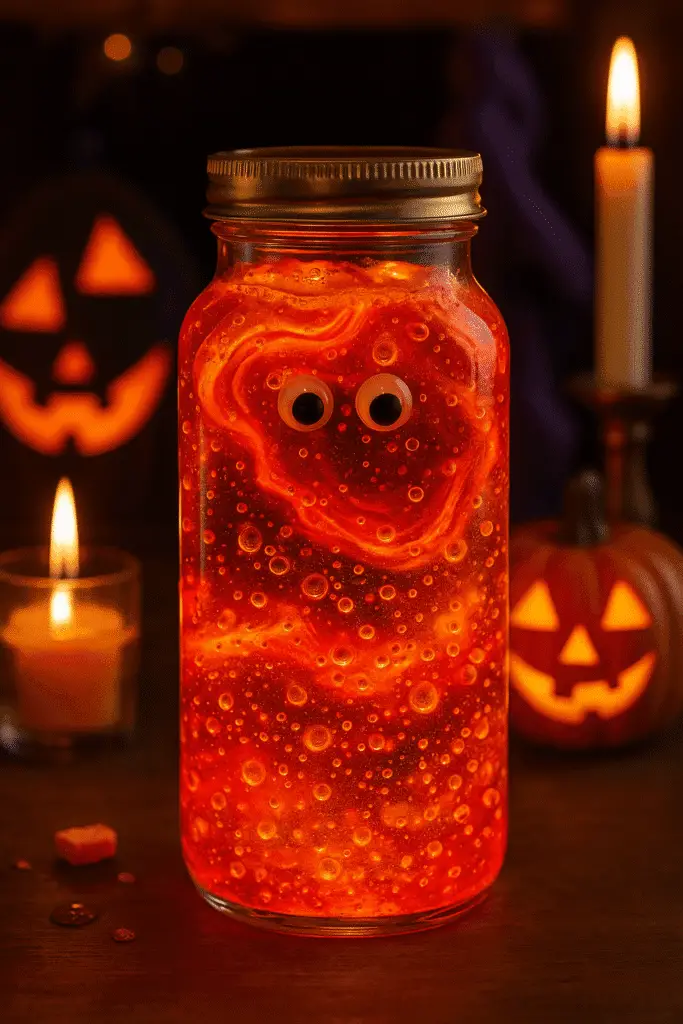
- Googly eyes: Stick them on the outside of the jar, or toss a couple inside if you want your monster to look like it’s floating.
- Tiny monster charms: I found some at the dollar store once, and my daughter swore the lamp looked like it had little monsters dancing inside.
- Tray or towel: Seriously, don’t skip this. You’ll thank yourself when that fizzing gets a little too wild.
Honestly, having everything ready makes the whole experiment feel more like a “mad scientist lab” than a messy kitchen. And kids eat that up—they love the idea of turning ordinary ingredients into something spooky and alive.
Step-by-Step Guide to Making a Monster Lava Lamp
The first time I tried this, I thought it would be as simple as “pour, drop, and done.” Nope. If you rush, the whole thing just looks like murky swamp water. The trick is patience—and letting the kids do the “wow” parts while you handle the spill-prone stuff.
Step 1: Fill with Oil
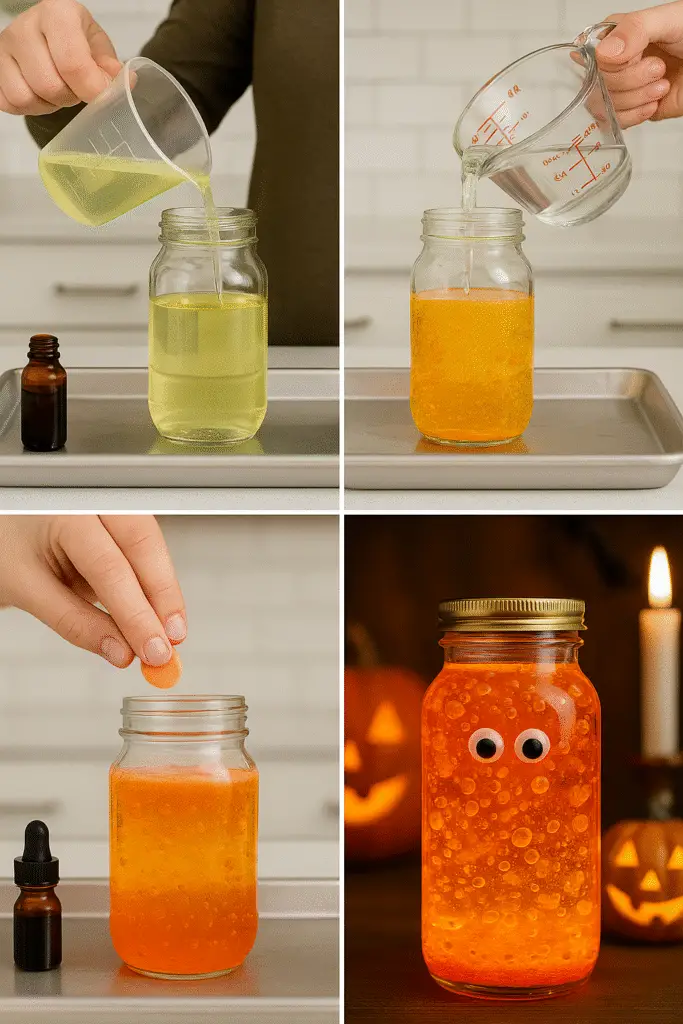
Grab your jar and fill it about two-thirds with vegetable oil. It feels weird, right? Like, shouldn’t it be water first? But trust me—oil always goes in first. If you skip this, you’ll end up with a cloudy mess that doesn’t bubble right.
Step 2: Add Warm Water Slowly
This is where the funnel saves your sanity. Pour the warm water in nice and easy. Watch it drop straight through the oil and settle at the bottom. My kids always gasp here—it’s like magic before the real magic even starts.
Step 3: Monster Colors
Now for the fun part: pick your monster’s “slime.” Ten drops of food coloring is about right, but you can mix colors for something wild. We did green and purple once, and it looked like a swamp witch’s potion bubbling in the jar.
Step 4: Let It Fizz
Break up that antacid tablet and drop in a chunk. Immediately, you’ll see little colored blobs rising and falling like lava. The smaller the tablet piece, the faster it fizzes, so I usually keep extras nearby to keep the show going. The kids fight over who gets to drop the next piece in.
Step 5: Monster Makeover
Stick googly eyes on the outside, or toss in a couple of plastic monster charms if you’ve got them. One time I glued felt “horns” to the lid and called it our “Frankenstein Lamp.” The kids loved it so much they begged to keep it glowing on the porch for Halloween night.
💡 Quick Tip: If the bubbles slow down, don’t panic. Just add another piece of tablet and the monster party starts right back up.
The Science Behind Lava Lamps
I’ll be honest, the first time I made one of these Monster Lava Lamps, I had zero clue why it actually worked. It was just fizzy and cool. But then my son asked me, “Mom, why doesn’t the water mix with the oil?” And you know that moment when you realize you should’ve paid more attention in science class? Yeah, that was me. 😅
Turns out, there’s some pretty fun science hiding inside this little kitchen experiment. And once you understand it, the whole bubbling monster thing makes even more sense—and way more fun to explain to kids.
Oil vs. Water: A Sticky Situation
Here’s the thing: oil and water don’t get along. They’re like that pair of kids in class who can’t sit next to each other without causing chaos. Oil is less dense than water, so it floats right on top. Plus, oil molecules and water molecules just don’t mix—they literally repel each other. That’s why when you pour the warm water into the oil, it sinks straight to the bottom instead of blending together.
One time, I accidentally poured the water in too fast, and it splashed everywhere inside the jar. It still settled at the bottom, but the layers looked cloudy for a while. Pro tip: slow and steady makes for a cleaner look.
The Magic Fizz Reaction
Okay, here’s where the fun really starts. When you drop in the Alka-Seltzer (or any fizzing antacid tablet), it reacts with the water at the bottom of the jar. That reaction releases carbon dioxide gas—yep, the same stuff that makes soda fizzy.
Those little gas bubbles attach themselves to the colored water, making it lighter than the oil above. So the blobs of color rise up through the oil like lava. Once the gas escapes at the top, the blobs sink back down. It’s like watching a never-ending monster dance party.
I still remember the first time my daughter saw the bubbles sink after rising. She looked at me with these big eyes and said, “It’s alive!” Honestly, I couldn’t have scripted a better spooky moment if I tried.
Why Warm Water Works Best
Here’s a sneaky detail I didn’t realize at first: warm water works way better than cold. Cold water slows down the fizz reaction, so the bubbles kind of limp their way up. Warm water, though, gives the gas more energy, so the whole thing looks brighter, faster, and way more dramatic.
If you want to make it last longer, though, slightly cooler water will keep the fizz from burning out too quickly. It’s all about trade-offs—big show versus long show.
A Quick Science Lesson for Kids
Whenever I explain this to kids, I like to call it “monster gas power.” The gas makes the monster slime float, then when it runs out of gas, the slime sinks back down. They crack up every single time, and honestly, they remember it way better than any textbook explanation.
💡 Tip for Parents/Teachers: Use this moment to sneak in a mini science lesson. Kids learn faster when they’re having fun. And nothing says “fun” like a bubbling monster lamp in your kitchen.
So yeah, your Monster Lava Lamp isn’t just a craft—it’s a spooky little science lab in a jar. And the best part? The kids won’t even realize they’re learning while they’re laughing at their monster slime bubbling away.
Fun Monster Decoration Ideas
Now, let’s be real—the bubbling is cool on its own, but the monster makeover is what makes these lava lamps scream “Halloween fun.” The first time I made one, I just left it plain. Big mistake. My kids basically gave me the side-eye like, “That’s it?” So, I raided the craft drawer, slapped some googly eyes on the jar, and boom—it went from “eh” to “monster masterpiece.”
Googly Eyes Galore
You can’t go wrong with googly eyes. Seriously, they turn anything into a monster. Stick them on the outside of the jar for a quick fix. Want to take it up a notch? Drop a couple inside the jar before you add the oil. They’ll float around like creepy little eyeballs in monster slime. My son called his “Eyeball Soup,” and honestly, it gave me the chills—but the kids couldn’t stop laughing.
Glow Stick Magic
Want to kick up the spooky vibes? Snap a glow stick and slide it into the jar. The light shining through the bubbling colors looks like a monster cauldron straight out of a Halloween movie. One year, I used a green glow stick, and the kids swore it looked like Frankenstein’s brain bubbling away. If you’re hosting a Halloween party, this trick makes the lamps double as glowing decorations.
Monster Faces & Costumes
Don’t stop at eyes—give your lamp a whole face! Use black tape or construction paper to cut out mouths, fangs, or even Frankenstein-style stitches. My daughter once made hers into a “Vampire Lamp,” complete with paper bat wings taped to the sides. Another time, we glued yarn on top to make wild “monster hair.” It was ridiculous, but it stole the show at her class Halloween party.
Spooky Stickers & Charms
Dollar stores are goldmines for this stuff. Grab a pack of Halloween stickers—ghosts, pumpkins, zombies, whatever—and stick them all over the jar. If you want to go fancier, toss in some little plastic charms. I found mini skeletons once, and watching them float in the bubbling slime was both hilarious and kind of gross.
Seasonal Themes
Here’s a fun twist: don’t limit yourself to monsters. For fall, you can make “Pumpkin Potion Lamps” with orange food coloring and jack-o’-lantern faces. In winter, swap to blue dye, snowflake stickers, and call it a “Frozen Lava Lamp.” My kids actually beg to remake them for different holidays—it’s become a family tradition.
Quick Tips from Experience
- Hot glue works best for attaching decorations if you want them to last. Tape is fine, but trust me, googly eyes will start falling off mid-party.
- Use plastic jars for kids under 6. Mason jars look nice, but little ones and glass don’t always mix.
- Keep it simple for younger kids. Sometimes less is more—they’re just excited to see anything with monster eyes.
I swear, once you start decorating, it’s hard to stop. Half the fun is watching the kids’ imaginations go wild. Every lamp ends up with its own personality—some goofy, some spooky, some downright terrifying. And honestly, that’s the magic of it.
Tips for a Safe and Fun Experiment with Kids
Here’s the thing about Monster Lava Lamps—they’re simple, but they can also get really messy if you don’t plan ahead. The first time I let my kids try this unsupervised, my kitchen turned into something out of a ghostbusters movie. Oil puddles on the counter, fizzing water dripping down the cabinets… it wasn’t pretty. So, yeah, I learned pretty fast that a few ground rules make this experiment a whole lot safer (and way more fun).
Always Use a Tray or Towel
I cannot stress this enough—set the jar on a tray, baking sheet, or even just an old towel. When that fizz kicks in, the bubbling can get overexcited and spill over the edges. Once, we skipped the tray, and the oil-water mix dripped onto the floor. Let’s just say, oil + kitchen tiles = the slipperiest disaster I’ve ever mopped.
Adult Supervision Is a Must
Even though this feels like a “kids’ activity,” it’s best if an adult is hovering nearby. Not to ruin the fun, but because the ingredients can get messy. Plus, antacid tablets aren’t toys—they shouldn’t end up in little mouths. I usually let the kids do the decorating and tablet dropping, but I handle the pouring. It keeps things safe and cuts down on cleanup later.
Use Plastic Jars for Little Ones
Mason jars look fancy, but for kids under 6, stick with a sturdy plastic bottle. I learned the hard way when my youngest dropped a glass jar on the counter mid-experiment. We had broken glass and oil everywhere. Plastic bottles work just as well, and nobody cries when they hit the floor.
Control the Fizz Show
Here’s a fun tip: break the antacid tablet into small chunks. The kids get more turns to drop pieces in, and the bubbling lasts longer. If you toss the whole thing in at once, it’s over in 30 seconds. My kids always argue over who gets to “restart the monster,” so smaller chunks solve that problem.
Keep the Science Going Safely
If you want to reuse the lamp, just screw the lid on tight and set it aside. It won’t stay bubbly forever, but you can relaunch it later with more tablet pieces. Just make sure the lid’s closed before shaking it up, or you’ll get monster juice everywhere (yep, been there, done that).
Quick Do’s and Don’ts
- ✅ Do set it up in a well-lit spot so the colors really shine.
- ✅ Do make cleanup part of the activity—it teaches kids responsibility.
- ❌ Don’t let kids drink from the jars (you’d think it’s obvious, but trust me, younger ones get curious).
- ❌ Don’t store it where pets can knock it over. My cat once turned one into a glowing mess on the carpet.
In the end, these Monster Lava Lamps are totally safe when you set some boundaries. The kids feel like mad scientists, and you get peace of mind knowing you’ve dodged a potential kitchen disaster. Honestly, with a tray, a towel, and a little prep, you’ll be set for hours of fizzing fun without the headache of spills or accidents.
And there you have it—your very own Monster Lava Lamp! Who knew that a little oil, water, food coloring, and a fizzing tablet could create something that looks like it belongs in a mad scientist’s lab? The best part is, it’s not just a Halloween decoration or a quick craft—it’s a bubbling, glowing science lesson that kids won’t forget.
Every time I do this activity with my kids, I’m reminded of how something so simple can spark such huge reactions. They laugh, they gasp, they argue over who gets to drop the next tablet—it’s pure magic. And while they’re having fun, they’re also learning about density, chemical reactions, and why oil and water don’t mix. It’s sneaky education at its finest.
The decorations are just the cherry on top. A few googly eyes, a glow stick, maybe a monster face taped to the jar—and suddenly you’ve got a bubbling creature straight out of a spooky storybook. Honestly, no two Monster Lava Lamps ever turn out the same. Each one has its own “personality,” and that’s what makes them so special.
If you’re planning a Halloween party, these are guaranteed to be a hit. They double as science experiments and glowing table decorations. If you’re just looking for a rainy-day activity, they’ll keep the kids busy and giggling for hours. And the best part? You don’t need fancy supplies—everything comes from the kitchen or dollar store.
So, go ahead and gather your supplies, set out a tray, and let the bubbling begin. Make a Frankenstein lamp, a vampire lamp, or a glowing eyeball lamp—whatever your kids’ imaginations cook up. Then sit back, watch the fizz, and enjoy the spooky fun together.
🎃 If you loved this activity, don’t forget to share it on Pinterest so other families can join in on the monster-making fun. Trust me—this is one of those projects that deserves a spot on every parent’s “Halloween must-try” list.


