Ever wondered how to make your own candy that looks store-bought but tastes even better? You’re in for a treat! These Homemade Kool-Aid Licorice Ropes are not just a colorful burst of flavor—they’re also a fun activity for kids and adults alike. Whether you’re planning a party, crafting edible gifts, or just craving something sweet and nostalgic, this recipe has you covered.
With just a few pantry staples and your favorite Kool-Aid flavor, you’ll whip up chewy, fruity ropes that twist and pop with color. And did you know? Making candy at home can actually help teach kids a bit of kitchen chemistry—how cool is that? So let’s dive into this sticky-sweet science project turned snack.
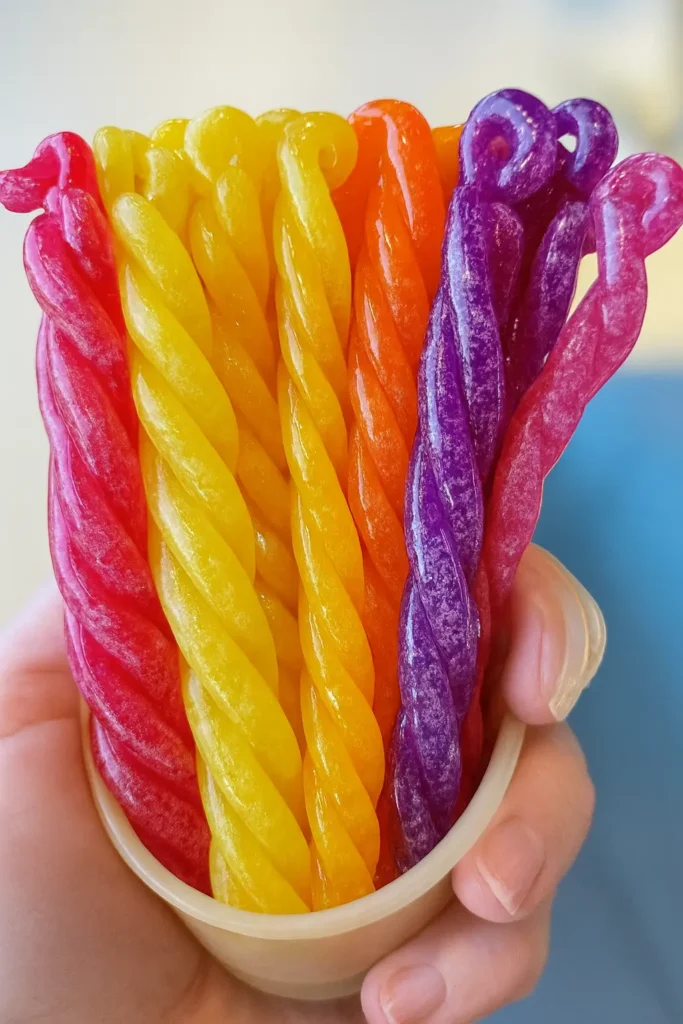
Ingredients You’ll Need for DIY Licorice Ropes
Man, the first time I made Homemade Kool-Aid Licorice Ropes, I had no idea how simple the ingredients were. Honestly, I figured I’d need some fancy candy-making stuff, but nope—it’s mostly pantry staples and one bright packet of Kool-Aid. That’s what makes it so fun for a rainy day or even a last-minute party prep.
Let’s Talk About the Kool-Aid
This is the star of the show. Any flavor works, but cherry and blue raspberry hit different—sweet, tangy, and super vibrant. Grape is also a classic. I tried lemon-lime once… wasn’t my best choice, but hey, it’s all part of the experiment.
If you want that punch of color and flavor, don’t go light-handed with the powder. One full packet per batch gives you that fruity explosion. I’ve even tossed in a second packet when I wanted the ropes to be extra bold—totally worth it.
Sugar, Corn Syrup, and Water — The Sticky Trifecta
These are your candy base. Sugar gives the sweetness and structure, corn syrup keeps the mixture smooth (no crystal drama), and water helps get it all going.
A little warning though: don’t eyeball these. Get those measuring cups out. One time I added too much water, and the whole batch turned out limp and dull. Boo.
Cornstarch—The Unsung Hero
At first, I skipped this. Huge mistake. Without it, things get way too sticky, and you’ll have candy glued to everything from your hands to your sink. Just a tablespoon does the trick—trust me, don’t leave it out.
Vanilla Extract (Totally Optional)
You don’t need it, but a dash adds this warm, almost buttery undertone. It rounds things out, especially if you’re using a strong Kool-Aid flavor. I usually add it when I want the ropes to taste more “gourmet” (which feels weird saying about Kool-Aid candy, but you get me).
Grease and Paper Stuff
You’ll need parchment paper or a silicone mat so you don’t end up chiseling candy off a tray. And grease—either cooking spray or butter. Grease your tray and your hands. No exceptions. One time I skipped greasing my hands, and I ended up with pink sugar claws for an hour.
Step-by-Step Candy-Making Instructions
Alright, buckle up—this part is fun, messy, and slightly chaotic the first time. But after a batch or two, you’ll be flying through it like a candy pro.
1. Prep Like Your Life Depends on It
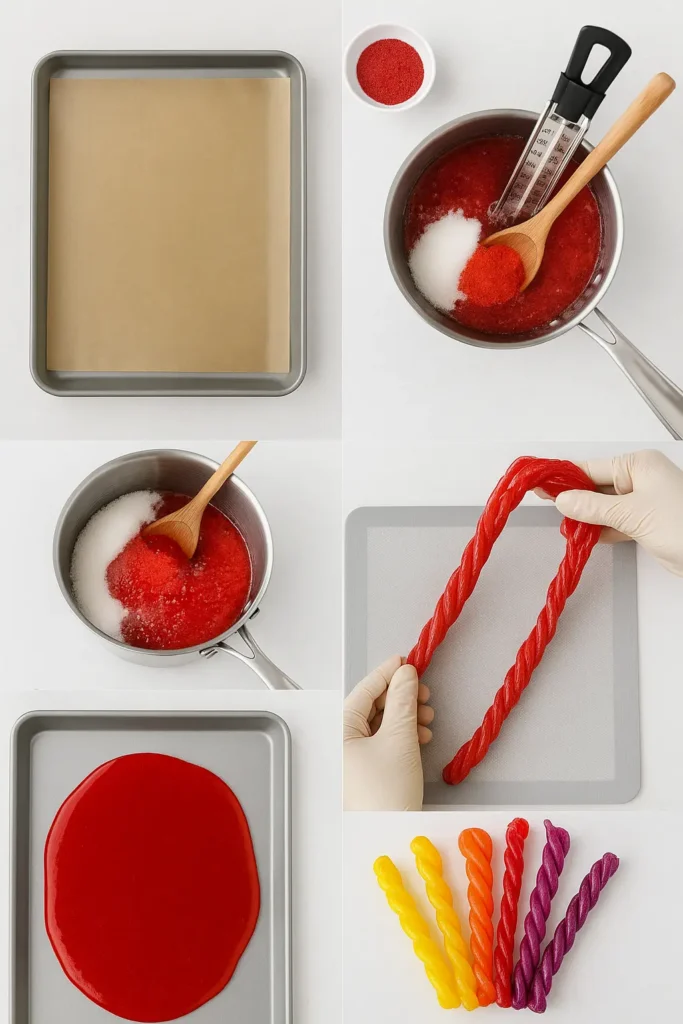
Before you even think about turning on the stove, line your baking sheet with parchment paper or, if you’ve got it, a silicone mat. I forgot to do this once… and let me tell you, chiseling hardened candy off a bare sheet pan is not it. Also, grease everything. I mean hands, tools, the parchment. I use cooking spray, but butter works too if you want that rich smell.
2. Mix It All Together (But Don’t Stir Later)
Throw your sugar, corn syrup, water, and Kool-Aid powder into a medium saucepan. Give it a good stir before it heats up. Once it’s on the stove? Hands off. No more stirring or it could mess with the crystallization. I learned that the hard way when my first batch turned into weird, grainy lava.
Pro Tip: Use a heavy-bottomed pan if you’ve got one. It distributes heat better, so you don’t end up with burnt corners and undercooked centers.
3. Heat Until the “Hard Crack” Stage (aka 300°F)
You need a candy thermometer here—no way around it. You’re aiming for 300°F. That’s the “hard crack” stage. I know it sounds dramatic, but it’s just candy talk for “this stuff will break like glass when cooled.”
I once tried guessing the temp, thinking “eh, this looks hot enough.” Rookie mistake. The ropes ended up soft and sticky like taffy—not the chewy snap I wanted.
Be patient. It usually takes about 10–12 minutes over medium-high heat. Don’t rush it or you’ll burn the sugars. Trust the thermometer.
4. Optional Flavor Boost—Add Vanilla
When you hit 300°F, immediately remove the pan from heat. If you’re using vanilla extract, this is when you add it. Be careful—it might bubble up for a second. Stir it in quickly and move on.
5. Pour and Cool… But Not Too Long!
Pour the hot mixture onto your prepared sheet. You’ve got a tiny window here. Wait about 1–2 minutes until it’s cool enough to touch but still bendy. If you wait too long, it’ll harden up like a Jolly Rancher, and good luck twisting that.
I once waited “just a bit longer” while I cleaned a spoon—big mistake. Candy was a brick.
6. Twist Like a Pro (or Pretend to Be One)
Now the fun part! Grease your hands (again), grab a hunk of candy, and start pulling and twisting. It’s a little like taffy pulling—stretch, fold, stretch again. Then shape them into long ropes. You can twist two flavors together if you want to be fancy.
Work fast though—after about 5 minutes, it starts to set and becomes way harder to shape.
7. Let It Set and Snap!
Once you’ve got your licorice ropes shaped, just let them chill at room temp. In about 15–20 minutes, they’ll firm up and have that chewy, satisfying texture.
After that, you’re good to eat ’em, bag ’em, or show off on Instagram. Or Pinterest. Or, let’s be real, just snack while you clean the kitchen.
Tips for Perfect Texture and Flavor
This is the part where I spill all the stuff I wish I’d known before batch one. Making Homemade Kool-Aid Licorice Ropes is way easier once you know the little tricks. It’s not just mixing sugar and Kool-Aid—there’s some finesse to getting that perfect chew and flavor pop.
Use a Candy Thermometer… Every. Single. Time.
I know I already said it, but it’s worth repeating. Your thermometer is your BFF here. If you go under 300°F, the ropes will be soft and sticky. Go over, and suddenly you’re gnawing on sugar shards. Been there.
Mine hit 310°F once because I got distracted answering a text—bad move. It looked right but tasted burnt, like caramelized cherry smoke. Yikes.
Grease Everything Like You’re Prepping for a Slip ‘n Slide
Seriously. Grease your hands, your spatula, your parchment paper, the bowl you might use to hold the candy ropes—everything. I used butter the first time for a more natural feel, but I gotta say, cooking spray is faster and less messy.
Once, I skipped greasing my fingers and had bright red candy glued to my nails for two days. It looked like I lost a fight with a cherry slushie.
Add Extra Kool-Aid (If You Like It Loud)
One packet is the standard, but if you want ropes that scream flavor, toss in a second one. I did that with Tropical Punch once and the flavor was 🔥. It also boosts the color, which is fun if you’re making these for party favors or themed events.
Don’t go nuts, though—three packets made mine taste like straight citric acid. My tongue was numb.
Vanilla Adds Warmth (But Skip It If You Want Pure Fruit)
I love vanilla in cherry and grape batches—it softens the flavor a bit and makes it feel like an actual candy shop treat. But in something like lemon-lime or blue raspberry? It gets weird. So keep it optional and trust your flavor instincts.
Work Fast, Not Frantic
You only get about 5 minutes to shape the ropes before they start firming up. So yeah, move with purpose, but don’t panic. If it starts hardening too quick, warm it in your hands or hit it with a hair dryer for like 5 seconds. (Learned that trick while fixing a botched batch—life saver.)
Creative Ideas for Gifting and Serving
Okay, now that you’ve got these colorful, chewy Homemade Kool-Aid Licorice Ropes ready to go, let’s talk presentation. Because if there’s one thing I’ve learned—it’s that people love cute, edible gifts. And let’s be real, these ropes are basically edible art.
Party Favors That Actually Get Eaten
First time I made these for my kid’s birthday party, I tossed them into clear treat bags with a twist tie. Instant hit. The kids went nuts over the bright colors, and parents kept asking me, “Wait, you made these?” Like, yes Karen, and I didn’t even burn myself this time.
Add a little ribbon or a personalized label and boom—store-bought who?
Candy Jars = Centerpiece Goals
For a baby shower, I layered different flavored ropes in big mason jars. Grape, cherry, tropical punch—rainbow vibes all the way. They looked so good on the dessert table and were gone within the hour. Everyone thought I paid some boutique candy shop. I didn’t. Just me, my stove, and some Kool-Aid.
You can even use tiny jars for individual gifts. Tie on a tag that says “Twist Me!”—cute and punny.
Personalized Name Tags
If you’ve got time, make little name tags for each rope and hand them out as place cards at a dinner or event. I did this once for a “candy night” with friends. Cheap, colorful, and actually memorable. One friend still has hers taped to her fridge. No joke.
Make a Candy Bar at Home
Grab a couple big bowls or jars, fill them with assorted homemade ropes, and let everyone build their own candy bag. Add mini tongs or scoopers if you’re feelin’ fancy. It’s like the bulk candy store, but in your kitchen—and you know exactly what’s in it.
One time I added gummy bears and marshmallows to the mix. It turned into a sugar buffet, but hey, no regrets.
Mix & Match Flavors for a Rainbow Effect
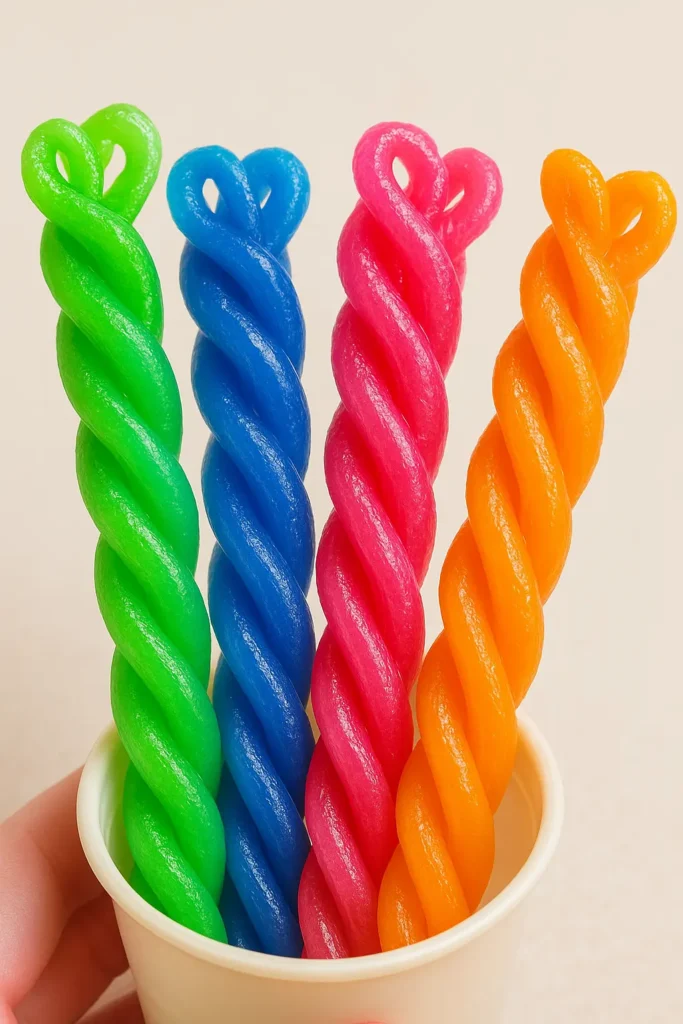
Twist two different flavored ropes together—grape and cherry, blue raspberry and lemon-lime, whatever. The combo ropes are so pretty and give you that multi-flavor bite like the fancy candy brands do.
Bonus: Kids love doing this part. My niece calls them “twisty wands” and legit thinks they’re magic.
Science Meets Sweets – Fun Facts About Candy Chemistry
Look, I never thought I’d be the kind of person to get excited about sugar temperatures… but making Homemade Kool-Aid Licorice Ropes turned me into a candy nerd real quick. There’s actual science going on here, and it’s honestly kinda fascinating. Plus, if you’ve got kids, this is a sneaky way to drop a little kitchen chemistry lesson without the school vibes.
The “Hard Crack Stage” Isn’t Just Candy Drama
This is the magic number: 300°F. That’s the temp where your syrup goes from sticky-goo to that glossy, snap-when-you-bite-it texture. Too low? You get limp ropes. Too high? It’s burnt sugar city. I’ve hit both ends of that spectrum.
I remember once, I pulled the syrup at 280°F because I was impatient (and okay, a little scared of burning it). The result? Sad, taffy-like noodles that tasted like Kool-Aid-flavored bubblegum. Not what we were going for.
A good candy thermometer is worth every penny here. Mine cost $10 at the grocery store and hasn’t let me down yet.
Why Kool-Aid Works (Spoiler: It’s Not Just Flavor)
So, besides giving your candy a bold punch of flavor, Kool-Aid brings in citric acid and color. That acid adds a little tang, which balances out the sugar overload. It also helps the color pop—especially in stuff like cherry and blue raspberry.
One batch I made without Kool-Aid (I tried flavoring with just extract) looked like sad beige taffy. Tasted okay, but it had zero visual wow factor. Kool-Aid = the secret weapon.
Sugar’s Transformation Is Legit Cool
Watching sugar go from grainy crystals to bubbling lava is honestly like a magic show. It melts, boils, thickens—and if you do it right—sets into perfect ropes. That transition is called caramelization and it’s chemistry at work.
If you’ve got curious kids (or you just geek out on this stuff like me), you can talk about how the sugar molecules break down and reform at high temps. Or you can just say, “Watch this sugar turn into candy!” and enjoy the ‘oohs’ and ‘aahs.’
And that’s a wrap—literally and figuratively. Making Homemade Kool-Aid Licorice Ropes is like mixing science class, craft time, and dessert into one ridiculously fun kitchen project. You don’t need fancy equipment, a ton of experience, or even a candy store budget. Just a packet of Kool-Aid, some sugar, and a willingness to get a little sticky.
From the hard crack stage drama to the candy-pulling chaos, every batch brings its own surprises (and usually a sugar high). You’ll mess up a batch or two—trust me, I’ve made some sad syrup pancakes—but once you nail it? You’ll be twisting ropes like a candy wizard.
So grab your favorite flavor, fire up the stove, and give it a shot. If nothing else, you’ll end up with a sweet, chewy treat that looks impressive and tastes even better.
📌 If you loved this DIY, share it on Pinterest! Pin a photo of your candy masterpiece and help someone else discover the joy of homemade licorice ropes. Let’s make the internet a little more fruity.
PrintHow to Make Homemade Kool-Aid Licorice Ropes in 2025: A Fun, Fruity DIY Candy Recipe
These Homemade Kool-Aid Licorice Ropes are chewy, fruity, and insanely fun to make—perfect for parties, edible gifts, or just a rainy day kitchen project with a colorful twist.
Ingredients
- 2 cups granulated sugar
- 1/2 cup light corn syrup
- 1/2 cup water
- 1 packet Kool-Aid (any flavor)
- 1 tbsp cornstarch
- 1/2 tsp vanilla extract (optional)
- Cooking spray or butter (for greasing)
- Parchment paper or silicone mat
Instructions
- Line a baking sheet with parchment paper or a silicone mat, and grease it well. Also grease your hands and tools.
- In a medium saucepan, mix sugar, corn syrup, water, and Kool-Aid powder. Stir only before heating.
- Heat the mixture to 300°F (hard crack stage) using a candy thermometer. Do not stir while heating.
- Remove from heat immediately at 300°F and stir in vanilla extract if using.
- Pour the hot candy onto the prepared sheet. Let it cool for 1–2 minutes until safe to touch but still pliable.
- Grease your hands again and pull, stretch, and twist the candy into ropes. Work quickly before it sets.
- Let the ropes cool completely at room temperature for about 15–20 minutes until firm and chewy.
Notes
Add a second Kool-Aid packet for bolder flavor and color. Use a candy thermometer every time for perfect texture. Grease everything well to avoid stickiness.




There aren’t any measurements to go by!,
No need to stress about exact amounts—just mix and shape until it looks and feels right. That’s the fun of DIY candy!