Ever wondered how those chewy, poppable pieces of joy are made? You’re not alone! Making homemade bubble gum has become one of my favorite rainy-day activities with the kids. It’s messy, colorful, and downright delicious. Plus, it’s a cool science-meets-snack experiment that teaches a bit of chemistry without anyone realizing they’re learning. Did you know the average American chews over 300 sticks of gum every year? Why not make it from scratch, save money, and have a blast doing it? Let me show you how!
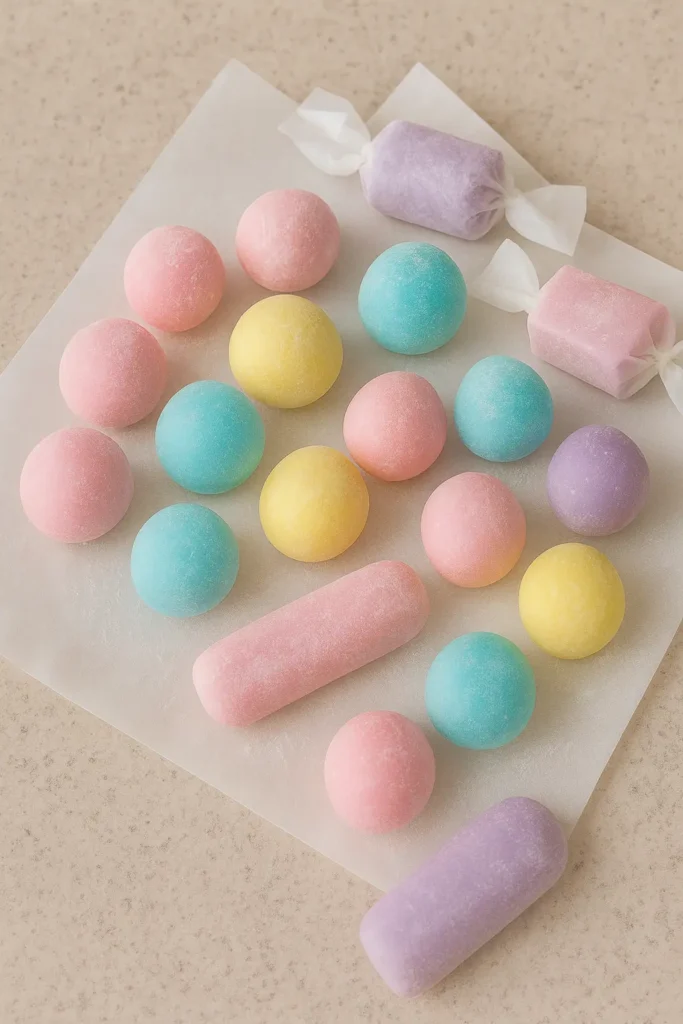
What You Need to Make Homemade Bubble Gum
The Day I Raided My Pantry (and Found Gold)
So the first time I tried making homemade bubble gum, I honestly thought I’d need some wild, hard-to-pronounce ingredients—maybe something you’d only find in a science lab. Nope. Turns out, I had almost everything already sitting in my kitchen. That was both surprising and kind of thrilling.
All I needed was granulated sugar, corn syrup, a little gelatin, and citric acid. That last one? I had to dig for it. It was hiding in the back of my spice cabinet behind some paprika I never use. If you’ve never used citric acid before, it gives gum that little tangy punch—it’s optional, but I swear it makes the flavor pop. Oh, and powdered sugar—can’t skip that or you’ll have a sticky nightmare on your hands (literally).
Grab These Tools (Trust Me, You’ll Thank Yourself)
You’ll want a saucepan that doesn’t stick. My first batch scorched a little because I got distracted—classic me. Use a rubber spatula and something to stir with that won’t melt or bend. And don’t forget a flat, clean surface for kneading. I once used a cutting board, and half the gum stuck to the wood grain. Big mistake.
If your kids are helping, prep that surface with extra powdered sugar—and maybe tape down some parchment paper unless you want them to get creative with your countertops.
A Note on Flavors and Colors
Here’s where things get fun. You can use flavoring extracts like strawberry, peppermint, or good old bubblegum. I tried banana once. Regret. But mint? Surprisingly refreshing. For color, I use gel-based food coloring—the liquid kind makes everything too runny and weak.
Start with one drop. Just one. I made neon blue gum once by being a little too heavy-handed. The kids loved it, but it stained their mouths (and clothes… and the dog’s fur).
Quick Pro Tips (Learned the Hard Way)
- Keep your ingredients measured out before you start. Sugar boils fast, and you don’t want to scramble for the gelatin packet while your syrup’s turning into candy glass.
- Go light on the flavor at first. You can always add more when you knead.
- Avoid metal spoons—they get hot, fast. Silicone or wood is your friend.
At the end of the day, prepping to make homemade bubble gum is like gearing up for a kitchen adventure. If you’ve got the basics and a bit of patience, you’re golden.
Step-by-Step Instructions for Making Your Own Bubble Gum
When Things Got Sticky… Real Fast
Alright, buckle up—because this is where the real magic (and mess) happens. The first time I made homemade bubble gum, I followed the instructions like I was defusing a bomb. Spoiler: it still got messy. But hey, that’s half the fun, right?
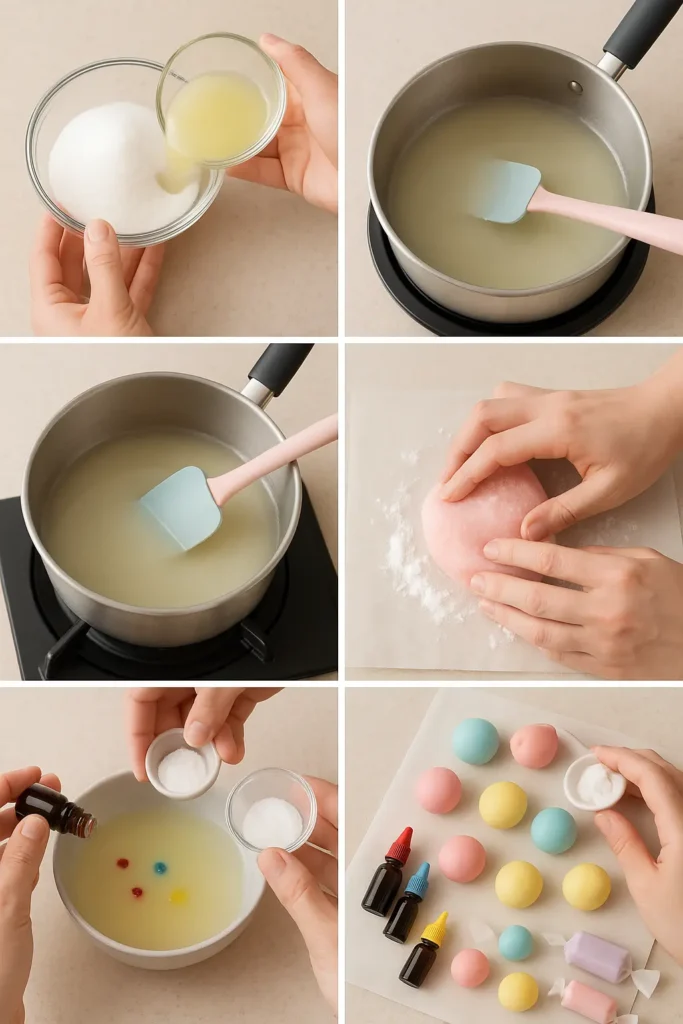
You start by combining sugar and corn syrup in a saucepan over medium-low heat. Sounds easy, and it is—just don’t turn your back. That mixture can go from syrupy goodness to caramel cement if you’re not watching. I stirred it gently until everything melted together like a thick golden lava. Don’t let it bubble too much—just a gentle heat to dissolve everything smoothly.
Stir in the Secret Sauce (aka Gelatin & Citric Acid)
Once it’s all smooth and dreamy, you toss in the gelatin and a pinch of citric acid. That’s where things started to smell like actual bubble gum, and I may or may not have let out a little squeal. Stir like your life depends on it—this stuff sets fast.
I let the mixture cool for about 5 minutes—do NOT skip this. I learned the hard way that adding flavoring while it’s piping hot just makes the scent disappear. You want it warm, not volcanic.
Add Flavor & Color (aka The Fun Part)
Now’s your moment to get wild. Drop in your flavoring extract and food coloring. A few drops of peppermint, and boom—you’ve got gum that tastes like Christmas. I usually go with classic pink, but my daughter insists on purple every time. If you’re feeling brave, swirl in two colors and see what happens. Just don’t blame me if it turns into brown sludge. Been there.
Stir until it’s thick and hard to move around—that means it’s time to transfer.
Time to Knead (and Get Powdery)
Lay down a surface dusted with powdered sugar like you’re prepping for a baking show. Pour out the gum base—it’s gonna look like a sugary blob—and start kneading. Honestly, this part reminds me of playdough meets taffy.
It’s sticky at first, but the more you work it, the smoother it gets. Give it 5–10 minutes, and you’ll have a nice, chewy consistency that actually feels like gum. My first attempt? I gave up at 3 minutes and ended up with rock candy. Patience, people!
Shape It How You Want
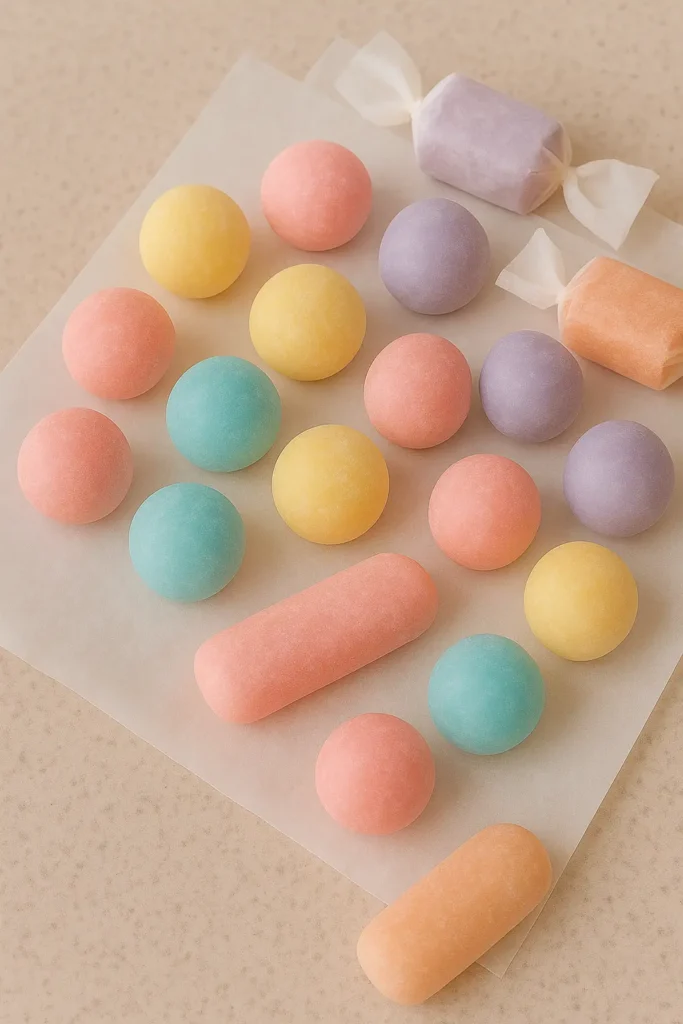
Once it’s pliable and doesn’t stick to your fingers, you’re good. Roll it into balls, squish it into hearts, or twist it like a candy cane. There’s no wrong way. Unless you put glitter on it. Don’t do that.
Fun Flavor Ideas and Color Combos
The Time I Made Pickle-Flavored Gum (Yeah… That Happened)
Let me just say this right off the bat—not all flavor ideas are good ones. I got a little too confident one afternoon and decided to make pickle-flavored gum. Why? I truly don’t know. Curiosity? Boredom? Anyway, huge mistake. But that disaster led to some epic wins with more reasonable flavors, and now I’ve got a whole go-to list for gum experiments.
Tried-and-True Flavors That Just Work
The classics are classics for a reason. Strawberry, classic bubblegum, peppermint, and watermelon are always crowd-pleasers. I’ve also had success with grape and cotton candy, especially for birthday parties. Kids lose their minds over cotton candy.
Oh—and here’s a trick: mix a drop of vanilla into fruit flavors. It adds this creamy vibe that makes the gum feel store-bought. I discovered that by accident while trying to “fix” a too-strong peppermint batch, and now I do it almost every time.
Cool Combos That Taste Amazing
If you’re feeling adventurous but still want to stay on the safe side, here are a few combos that actually taste amazing:
- Strawberry + Vanilla = like strawberry milkshake
- Orange + Mint = kind of creamsicle, kind of breath-freshening
- Watermelon + Lime = surprisingly refreshing
- Bubblegum + Banana = very 90s, but it slaps
Just go easy on the extracts. A little goes a long way, especially with citrus or mint.
Let’s Talk Colors
So, here’s the thing with food coloring—kids want it neon, but I’ve learned the hard way that three drops of red don’t make pink… they make something that stains your hands, your counter, and your soul. I now use gel-based colors, and I stick to pastels for easier cleanup and better vibes.
Some winning combos:
- Pink + Purple = unicorn swirl
- Blue + Green = ocean vibes
- Yellow + Orange = sunshine gum (my favorite)
- Red + White = peppermint twist
If you wanna go all-natural, try using beet powder for pink or spirulina for green. Doesn’t mess with the taste much, and it feels a bit fancier.
Don’t Overdo It
I once tried to make “rainbow gum.” It looked more like someone dropped Play-Doh in a blender. Stick to two colors max per batch unless you’re going for that “toddler did this” aesthetic.
Bottom line? Making your own homemade bubble gum gives you creative freedom like nothing else. Just maybe skip the savory flavors unless you’re into chewing regret.
Science Behind the Chew – A Tasty STEM Project
Kitchen Chemistry That Blew My Mind (and My Bubbles)
I never thought I’d say this, but making homemade bubble gum actually made me feel like a chemist—minus the lab coat and goggles. There’s a lot more science in that chewy pink blob than you’d expect. And the best part? Your kids don’t even realize they’re learning because they’re too busy trying to blow the biggest bubble.
Polymers Are the Real MVP
Let’s talk about polymers—those stretchy, elastic molecules that make gum chewy. Gelatin is packed with ’em. When you heat it and mix it with sugar and syrup, you’re basically building an edible elastic band. Seriously. That’s why gum stretches and doesn’t just crumble in your mouth like dry candy.
When my son asked, “Why doesn’t gum just melt in your mouth like chocolate?” I had to look it up. Turns out, it’s all thanks to those long polymer chains that don’t dissolve in saliva. Which, if you think about it, is kind of gross—but also kind of genius.
Heat + Sugar = Controlled Chaos
This part I learned the hard way: temperature matters. When you heat sugar and corn syrup, you’re doing a mini version of candy thermodynamics. Too hot, and your gum turns into rock candy. Too cold, and it won’t mix right. I used a candy thermometer once, but now I just eyeball it—bubbles forming? Lower the heat. Syrup turning golden? You’re probably close.
There’s this weird sweet spot where it thickens just enough to blend the gelatin and citric acid, and that’s when you know it’s go time. Miss it, and you’ll be chiseling sugar off your pan with a butter knife. Ask me how I know.
The Science of Flavor (Yes, That’s a Thing)
Adding flavoring isn’t just about dumping in a few drops. There’s this thing called volatility—basically, how fast a scent or flavor evaporates when heated. If you add the flavor when your mix is too hot, you lose the aroma. That’s why your gum smells amazing in the pot but tastes like cardboard later.
Wait 5 minutes. Let it cool a bit. Trust the science.
Make It a STEM Activity for the Kids
This is where things get fun for homeschoolers or science-loving parents. You can literally turn this into a STEM project. Talk about:
- Polymers and elasticity
- The role of temperature in cooking
- Solubility (why gum doesn’t dissolve in water or your mouth)
- Acid-base balance (if using citric acid)
One time, my daughter did a science fair project comparing gum stretchiness based on kneading time. Legit hypothesis, testing, and even a graph. All with pink sticky blobs. The judges ate it up—literally and figuratively.
So yeah, making gum isn’t just sugar and silliness—it’s legit science disguised as a snack.
Storage Tips and How Long Homemade Gum Lasts
That One Time I Found a Gum Blob in My Hoodie…
Okay, true story: I found a piece of my homemade bubble gum in my hoodie pocket three weeks after making it. Wrapped in wax paper, totally forgotten. I braced for a sticky disaster… but guess what? It was still chewy. That’s when I realized: storage is everything when it comes to DIY gum.
Wrap It Up Like Candy
After you’ve shaped your gum (balls, twists, hearts, whatever), the best thing you can do is wrap each piece in wax paper. Don’t use parchment—it doesn’t seal well. Wax paper folds nicely and keeps the gum from drying out. I just cut little squares, wrap them like old-school candies, and toss ’em in a container.
Pro tip: let the gum cool and dry for about 30 minutes before wrapping. I didn’t do this once, and my wrappers stuck like duct tape. Lesson learned.
Airtight Is Your Friend
Once wrapped, toss your little gum pieces in a glass jar with a tight lid, or even a ziplock bag if you’re not fancy. Just make sure it’s sealed. Air is the enemy—it’ll dry out your gum faster than you can say “chew.”
I store mine in a cool, dry pantry. Avoid the fridge—it messes with the texture. I made that mistake once and ended up with rock-solid gum nuggets that were more like jawbreakers.
Shelf Life: How Long Does It Last?
Here’s the good news: homemade bubble gum lasts about 2–3 weeks if stored properly. After that, it starts to get tough and loses flavor. Some batches hold up better than others—mint seems to last longer than fruity flavors, in my experience.
If you add too much citric acid, it can make the gum go stale faster. Keep it balanced, and you’ll get that nice chew for a couple of weeks, easy.
Bonus: How to Revive Stale Gum
Yup, I’ve tried this. If your gum gets a little too firm, wrap it in a damp (not wet!) paper towel and microwave it for about 5 seconds. Knead it a little, and boom—it’s almost like new. Almost. It’s not perfect, but hey, beats tossing it.
I’ll be honest—when I first tried making homemade bubble gum, I thought it’d be one of those one-and-done Pinterest fails. But it turned into something way cooler. Now it’s kind of a tradition in our house. Rainy weekends? We’re elbow-deep in powdered sugar and neon-colored dough, laughing when a batch turns blue instead of pink or when someone tries to chew before it’s cool and burns their tongue (yep, that happened too).
The thing is, it’s not just about the gum. It’s about doing something hands-on with your kids. Mixing science and snacks. Making a mess and not stressing about it. And yeah, occasionally finding gum in places it shouldn’t be.
You Don’t Have to Be a Pro
You don’t need fancy equipment, a candy thermometer, or even much patience. Just a few ingredients, a sense of humor, and maybe some wet wipes nearby. I’ve messed up at least half the batches I’ve made—and I still love it every time.
So give it a shot. Make a batch of homemade bubble gum. Pick a weird flavor. Let your kids choose the color. Knead the dough while you chat about your week. Then wrap them up like candy and share them with friends.
And if you’re proud of your creations? Snap a photo and share it on Pinterest. Someone out there might be inspired to try it too—mistakes, messy counters, and all.
PrintHow to Make Homemade Bubble Gum in 2025 (Fun DIY Kids Activity!)
Ever wondered how those chewy, poppable pieces of joy are made? This homemade bubble gum recipe is a fun, messy, and sweet kitchen adventure for the whole family.
Ingredients
- 1 cup granulated sugar
- 1/2 cup light corn syrup
- 1 tbsp unflavored gelatin
- 1/2 tsp citric acid (optional, but recommended)
- 2 cups powdered sugar (plus more for dusting)
- Flavoring extract (e.g., strawberry, peppermint, bubblegum)
- Gel-based food coloring
Instructions
- In a nonstick saucepan, combine granulated sugar and corn syrup over medium-low heat. Stir constantly until fully dissolved and smooth.
- Add gelatin and citric acid to the warm syrup mixture. Stir quickly until dissolved. Remove from heat.
- Let the mixture cool for about 5 minutes before adding your desired flavoring and food coloring. Stir to combine.
- Dust a clean surface with powdered sugar. Pour the mixture onto the surface.
- Knead the warm mixture with powdered sugar for 5–10 minutes until it becomes smooth and pliable like taffy.
- Shape the gum into balls, twists, or any fun design you like.
- Wrap each piece in wax paper and store in an airtight container for up to 2–3 weeks.
Notes
Use gel-based food coloring to avoid making the gum too runny. Don’t add flavor while the syrup is too hot or it’ll evaporate. Avoid metal utensils as they get hot quickly.

