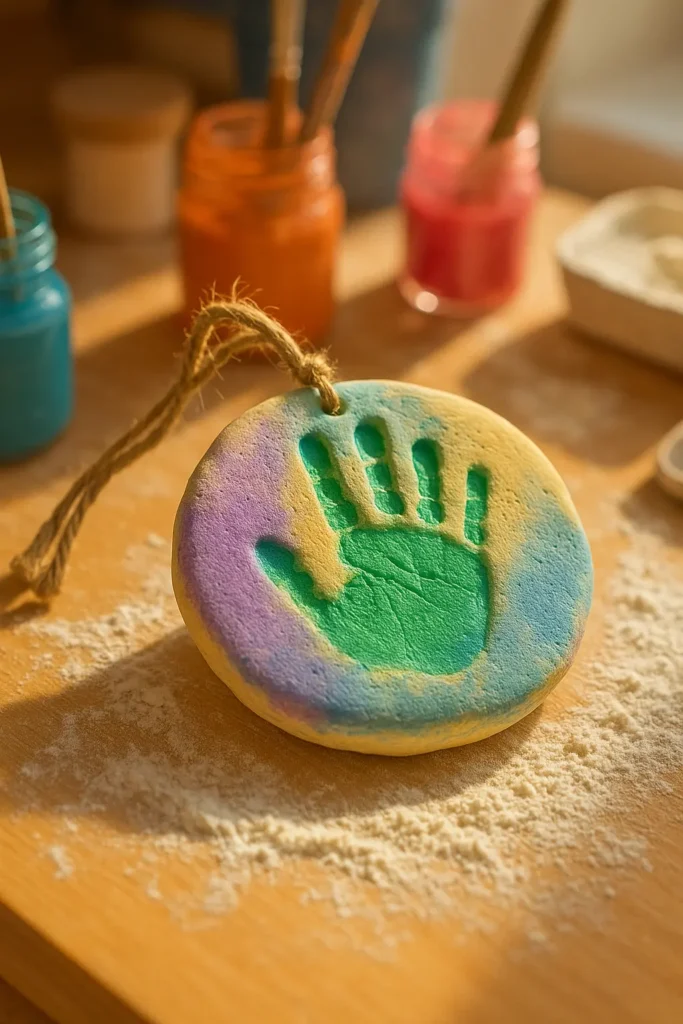
Ever wish you could freeze a moment in time—like the size of your child’s tiny hand? Salt-dough handprints are one of those rare crafts that blend simplicity with deep emotional value. With just flour, salt, and water, you can create a keepsake that lasts for years (and costs next to nothing!). These adorable little hand molds aren’t just Pinterest-worthy—they’re heartfelt, homemade treasures. Whether you’re celebrating a baby’s first birthday, a holiday, or just a quiet afternoon indoors, this guide will show you how to make salt-dough handprints step-by-step. Let’s turn flour into forever memories!

What You’ll Need for Salt-Dough Handprints
Keeping It Simple (And Cheap!)
I remember the first time I made salt-dough handprints—I was knee-deep in laundry, trying to distract my toddler, and I thought, “Eh, why not?” The recipe looked easy enough: flour, salt, water. That’s it. No fancy clay or pricey kits. Just pantry staples.
Here’s what I use every single time (and yes, I’ve messed it up more than once):
- 2 cups all-purpose flour – trust me, don’t use self-rising. I did once. Dough ballooned like a pita in the oven!
- 1 cup table salt – the fine kind works best. Rock salt? Nah, avoid it unless you want your dough to look like gravel.
- 1 cup warm water – not boiling, just warm enough to help everything blend nicely.
Tools You’ll Want on Hand
Nothing fancy here, either. If you’ve got a spoon and a baking sheet, you’re halfway there.
- Mixing bowl – bigger is better. You’ll be kneading and things get messy.
- Wooden spoon or your hands – let’s be honest, I always ditch the spoon after 30 seconds.
- Rolling pin – or even a wine bottle in a pinch. (Been there.)
- Parchment paper – saves cleanup and helps the dough not stick.
- Drinking straw – this is the secret weapon if you want to hang the handprints like ornaments.
- Baking sheet – lined with parchment, always. Ever tried scraping dried dough off metal? Don’t.
Optional But Awesome
This part’s where the magic happens:
- Acrylic paints – my kid once painted hers neon pink and called it “unicorn paw.” Use whatever you have—bold, pastel, even metallics.
- Paintbrushes – small ones for the fingers, wider for the background.
- Clear acrylic spray or Mod Podge – this step is crucial if you want your handprint to last. I skipped this once… moisture got in, and the handprint crumbled like a cookie a year later.
- Ribbon or string – if you made that hanging hole with the straw, now you’ve got yourself a keepsake ornament.
Real Talk: What Not to Use
I once tried adding glitter directly into the dough. Thought it would be “fun.” Don’t. It clumps, melts weird in the oven, and makes your handprint look like it got into a fight with a disco ball.
Also—don’t skip the sealant. A few friends said theirs cracked within a few months. No one wants a crumbling memory.
Bottom line? You don’t need to spend a fortune or have a craft room full of tools. Everything you need to make salt-dough handprints is probably already in your kitchen. Just grab your ingredients, clear a bit of table space, and get ready to make something that’ll melt your heart every time you look at it.
Step-by-Step Instructions to Make Salt-Dough Handprints
Start With the Dough
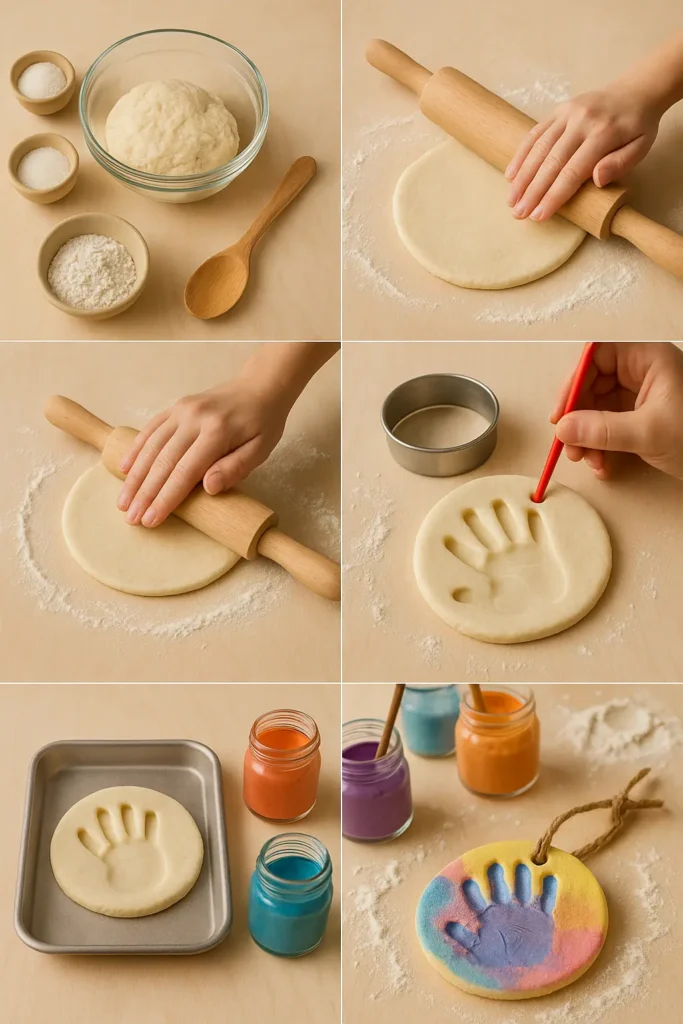
Alright, here’s where the real fun begins. Mixing the dough is oddly satisfying—like adult Play-Doh therapy with a side of nostalgia. I usually dump the flour and salt into a bowl and stir a bit before adding water. It’s important to gradually add the warm water—don’t pour it all in at once or you’ll end up with soup.
I’ve learned that kneading the dough for a good 5 to 7 minutes makes a world of difference. It gets smoother and way easier to work with. If it’s too sticky, add a sprinkle of flour. Too dry? Drizzle in a bit more warm water. You’ll get a feel for it. Honestly, my kid calls it “squish time” and it’s become part of our ritual.
Roll It Out (Not Too Thin!)
Once your dough is nice and soft, roll it out on parchment paper. You want it about 1/2 inch thick. Any thinner and it might crack in the oven, especially if little hands push too hard. I’ve had one too many floppy hand disasters before learning that magic number.
You can roll it into a big slab and cut out shapes around the handprints later, or shape it into circles beforehand. Both work. I like a more rustic look, so we usually roll and press directly.
The Handprint Moment
Now comes the “awww” part. Have your kid press their hand firmly into the dough. You want clear fingers, defined palm lines—the whole bit. I once rushed this and ended up with a sad blob that looked more like a potato than a hand.
Pro tip: guide their fingers down one at a time, especially with wiggly toddlers. Press around the edges gently if you need to define it more.
If you plan to hang it, grab a drinking straw and poke a hole near the top. Just twist it a little to get a clean punch through the dough.
Bake It Low and Slow
Transfer the parchment onto a baking sheet, then into the oven at 200°F (93°C). Bake for 2 to 3 hours depending on thickness. I usually flip them halfway through to dry the underside evenly. They’ll feel dry and solid when ready—not squishy or doughy.
Oh, and yes, your house will smell like warm flour. Not amazing, not terrible. Just… doughy.
Let them cool completely before decorating. I once painted one too soon and the paint bubbled. Lesson learned.
Wrapping Up
The whole process is kind of magical—watching that squishy dough transform into a lasting memory. It’s not just a craft; it’s a little freeze-frame of your kid’s growth. Plus, it’s the kind of thing you’ll pull out in ten years and get all misty-eyed about.

Decorating Your Handprint Keepsake
Let the Creativity Loose
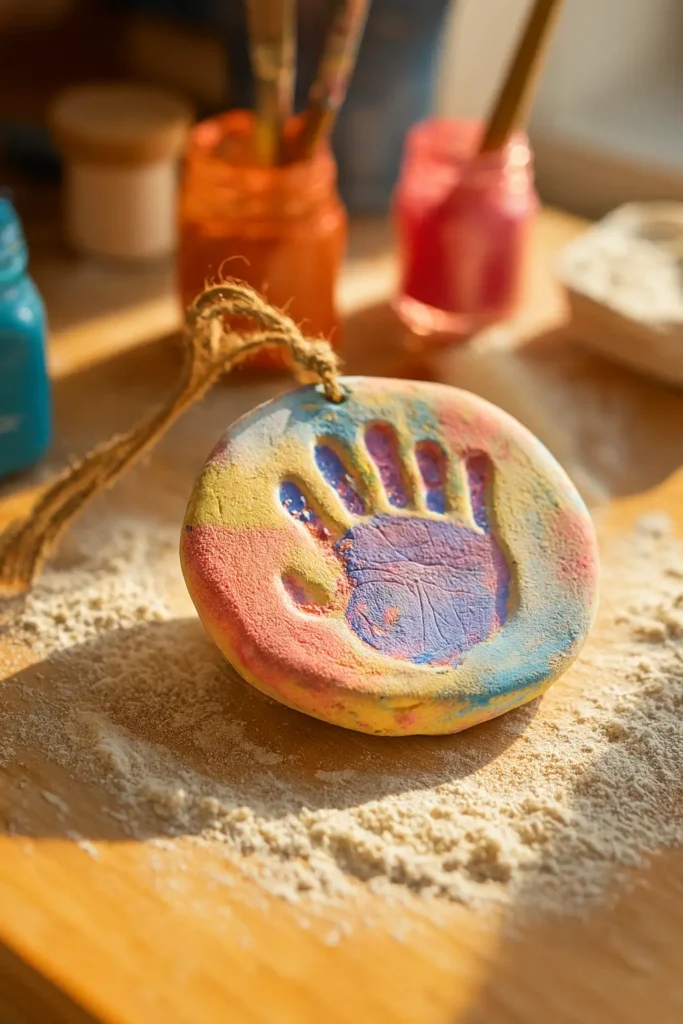
Once your handprints are baked and totally cooled (seriously—don’t rush this part), it’s time for the fun bit: decorating! This is where your kid’s personality really shines. My daughter went through a rainbow phase and painted each finger a different color. My son? He made his look like a monster with googly eyes. Whatever works, right?
We use acrylic paints because they’re bright, fast-drying, and don’t flake off later. You can grab a cheap set from any craft store, and they’ll last through tons of projects. Just lay down some newspaper or a drop cloth—this gets messy quick.
Choose Your Vibe: Bright, Pastel, or Glitter Glam?
There are so many ways to go here, and none of them are wrong. Some ideas we’ve tried (and loved):
- Pastel colors for a baby nursery vibe—great as a baby shower gift
- Metallics like gold and silver—super pretty for holiday ornaments
- Bold colors for fun, kid-made flair—this is our go-to
Don’t forget the little details. Add the child’s name and date with a fine-tipped brush or even a paint marker. You’ll thank yourself years from now when you’re trying to remember what year that tiny hand belonged to.
We once used a paint pen to write “Mommy’s Little Star – 2022” on one, and it’s still my favorite fridge decoration.
Sealing the Deal (Literally)
After the paint dries—give it at least an hour or two—it’s sealing time. This is crucial if you want your keepsake to last more than one season. I use Mod Podge because it’s easy and gives a nice glossy finish, but a clear acrylic spray works great too.
Make sure to coat the front, back, and especially the edges. That’s where moisture sneaks in and causes cracks. Let it dry fully (usually overnight) before you handle or hang it.
Trust me, the sealant is what takes it from “kid’s craft” to “lasting keepsake.” I skipped it once. The dough absorbed humidity and turned soft within months. Tragic.
Optional Add-Ons
Want to make it next-level adorable? Try these:
- Stick-on gems or glitter glue for sparkle
- Stencils for clean letters or shapes
- Handprint turned into animals—like a turkey, or even a reindeer for Christmas!
Let your kid run wild. They’ll love that their handprint becomes more than just a blob of paint. It’s their art. Their memory.
Final Thoughts
Decorating is the moment this little slab of dough becomes something personal. Something cherished. And watching your kid beam with pride at their finished handprint? That’s the best part of all. It’s messy, sure. But it’s also kind of magical.
Displaying or Gifting Your Salt-Dough Handprints
From Fridge Art to Forever Keepsake
Once the paint’s dry and your handprint is sealed like Fort Knox, it’s time to figure out what the heck to do with it. I’ve tried sticking it on the fridge (too heavy), putting it on a bookshelf (cute but forgotten), and even hanging it in the bathroom (bad idea—moisture warped it).
Eventually, I figured out a few go-to display ideas that actually work and look great. These aren’t just “kid crafts”—they’re memory pieces. And when you treat them like that, they look the part.
Hang It Like a Pro
If you remembered to use a straw and poke that hole at the top—gold star for you. Now all you need is some ribbon, twine, or even yarn. Thread it through and tie a loop. Done!
Some of our favorite hanging spots:
- On the Christmas tree (yes, even in September)
- Near their bed or nursery wall
- On a pinboard with other keepsakes
One year, we used red velvet ribbon for a holiday handprint, and it totally looked store-bought. Except, y’know, made by a 3-year-old with a paintbrush in each hand.
Frame It Up
Another cool idea is to put the handprint in a shadow box frame. I found one at a thrift store, added some scrapbook paper as a background, and bam—instant sentimental wall art.
Bonus tip: glue a little label or tag inside the frame with your child’s name and the date. Otherwise, you’ll look at it five years later and wonder whose chubby little hand that was.
Give It As a Gift (That Will Make Grown Adults Cry)
These things make amazing gifts. I mean, who wouldn’t want a baby’s tiny handprint painted with love?
Perfect gift occasions:
- Mother’s Day and Father’s Day – total heart-melters
- Grandparents’ birthdays – my mom legit cried the first time she got one
- Christmas – great ornament idea or stocking stuffer
- First day of school – kind of like a mini time capsule
Wrap it in tissue paper, tie it with twine, and maybe pop it into a little gift box. It doesn’t have to be fancy—just thoughtful.
Pro Tips I Learned the Hard Way
Don’t hang it above a heater. I did this once, and it slowly got soft, then cracked. Also, don’t store it in a damp basement—same result. Always keep these somewhere dry, cool, and out of direct sunlight if you want the colors to last.
And one last thing: take a photo of the finished handprint. Especially if you’re gifting it. It’s a great backup if anything ever happens to the original, and it’s sweet to see how your kid’s prints change year after year.

These salt-dough handprints may start out as a rainy day craft, but they’ll end up as part of your family’s story. Whether hanging in a hallway or tucked into Grandma’s keepsake box, they’re little reminders of how small they once were—and how loved they always are.
I’ve made a lot of crafts with my kids—some ended up in the trash before the glue even dried. But these salt-dough handprints? They’ve stuck around. Literally. There’s one hanging on our tree every Christmas, another framed in the hallway, and a few tucked away in boxes labeled “keep forever.”
What makes them so special isn’t just the paint or the hand shape—it’s the moment. The little fingers, the giggles during painting, the messy flour on the counter. It’s capturing childhood in a way that’s real and lasting.
And honestly, they’re one of the few crafts we’ve done that everyone—parents, grandparents, even the kids themselves—actually care about years later.
So, next rainy day or lazy Saturday, give this a try. Roll out some dough, press those tiny hands, and make something that’ll melt your heart every time you look at it.
Oh—and if you loved this idea, share it on Pinterest so more families can turn a simple lump of dough into something priceless. ❤️
PrintDIY Salt-Dough Handprints (2025): A Keepsake Craft to Treasure Forever
Create heartfelt keepsakes with salt-dough handprints using simple pantry staples like flour, salt, and water. Perfect for family crafts, gifts, or ornaments that capture precious memories.
Ingredients
- 2 cups all-purpose flour (not self-rising)
- 1 cup table salt
- 1 cup warm water
- Mixing bowl
- Wooden spoon or hands
- Rolling pin or wine bottle
- Parchment paper
- Drinking straw (for hanging holes)
- Baking sheet
- Acrylic paints
- Paintbrushes
- Clear acrylic spray or Mod Podge
- Ribbon or string
Instructions
- Mix flour and salt in a large bowl.
- Gradually add warm water, stirring until dough forms.
- Knead dough for 5–7 minutes until smooth. Adjust with flour or water as needed.
- Roll dough on parchment paper to 1/2 inch thickness.
- Press child’s hand firmly into the dough to create a clear imprint.
- Use a straw to make a hole if planning to hang as an ornament.
- Transfer parchment to baking sheet and bake at 200°F (93°C) for 2–3 hours, flipping halfway.
- Let handprints cool completely before decorating.
- Paint with acrylics, adding child’s name and date if desired.
- Seal with Mod Podge or clear acrylic spray, coating all sides.
- Thread ribbon or string through the hole if hanging.
- Display, gift, or frame as a keepsake.
Notes
Seal thoroughly to prevent cracking or moisture damage. Store in a dry, cool place. Great for holiday ornaments, gifts, or family keepsakes.


