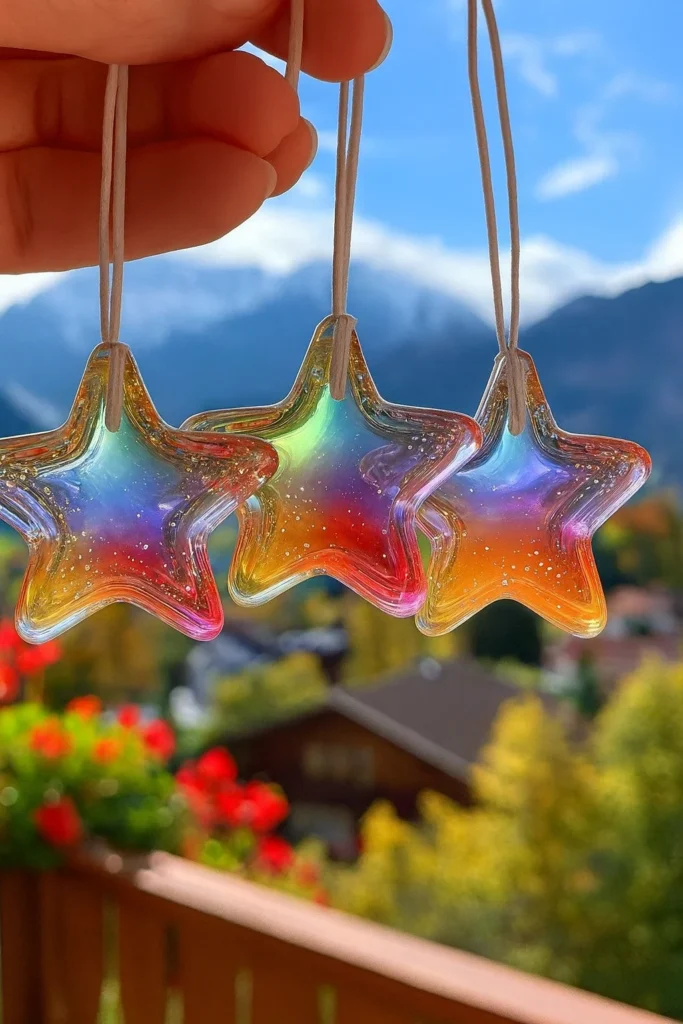
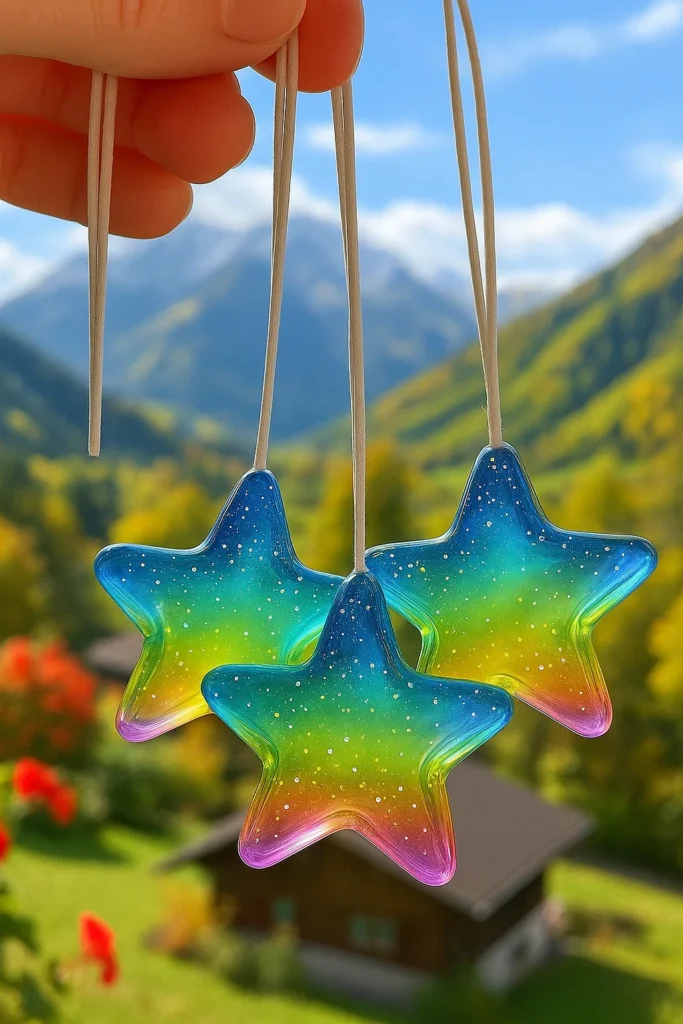
Ever wonder what to do with those broken crayon bits cluttering your drawers? 🌈 Here’s a brilliant and fun solution: Crayon Star Sun Catchers! Inspired by stained glass but made with melted crayons, these DIY crafts are a glowing example of upcycling at its finest. Plus, they’re super easy and mesmerizing for both kids and adults.
Crayon art isn’t just about colors—it’s about creativity, science, and sustainability. Did you know over 12 million crayons are produced daily in the U.S. alone? That’s a lot of potential waste. This project turns trash into treasure while adding a pop of color to your window. Let’s dive in and bring some sunshine indoors!

Gather Your Crayon Star Sun Catcher Supplies
Alright, before we start melting anything, let’s talk supplies. I’ve learned—sometimes the hard way—that having everything ready before diving in makes all the difference. One time, I forgot the parchment paper and, well… let’s just say my baking sheet still has a psychedelic wax tattoo to this day. 😅
🎨 What You’ll Need
1. Broken Crayons (Wrappers Off!)
Don’t toss those snapped crayons! I keep a little jar of them just for projects like this. Peeling the wrappers can be oddly satisfying, though if you’re in a hurry, soak them in warm water first. The paper slides right off.
2. Star-Shaped Silicone Molds or Cookie Cutters
Silicone is the way to go—makes popping the stars out so much easier. I got a set off Amazon for under $10. If you’re using metal cookie cutters, line the bottom with foil or parchment so the wax doesn’t escape.
3. Parchment Paper & Baking Sheet
Don’t skip this! Even with silicone molds, wax drips will happen. Parchment is your best friend. Just trust me.
4. Mini Muffin Tin
This is a pro tip: Put the silicone molds inside a mini muffin tin to stabilize them in the oven. They stay flat, and no surprise spills!
5. Jewelry Wire or Fishing Line
This is for hanging them up once they’re done. I like fishing line because it’s basically invisible and gives that floating effect in the window.
6. Craft Knife & Oven Mitts
Let the adults handle this part. Cutting crayons and dealing with hot wax isn’t something I let my kids near without supervision.
7. Optional Sparkle (Glitter or Mica Powder)
I say optional, but let’s be real: glitter makes everything better. Just don’t go overboard or you’ll end up with disco stars that blind you when the sun hits ’em.
💡 My Favorite Hack?
Use an old cutting board for chopping the crayons. One I don’t care about. I once used my nice bamboo one and let’s just say it now has a permanent “tie-dye” vibe. Not cute.
If you’ve got kids joining in, let them pick their favorite colors and sort the crayon bits into little muffin cups. Makes them feel involved and keeps the mess somewhat contained.
Honestly, once you’ve gathered your gear, you’re halfway there. I always say prep is the unsung hero of any good DIY. Got everything? Great—next up, let’s chop, swirl, and melt some crayon magic.
Prep and Sort Your Crayons for the Best Results
Alright, time to get messy—in the best way possible. Prepping crayons is kinda like prepping ingredients for a great meal: it sets the whole tone. Skip this part, and you’ll be elbow-deep in wax chaos before you even hit the oven.
🧼 Step 1: Peel Those Crayons (Without Losing Your Mind)
You ever try peeling a crayon that’s been sitting in a crayon box since 2011? Yeah, it’s like trying to unwrap a mummy. My trick? Soak ’em in warm water for 5–10 minutes. Game changer. The wrappers practically peel themselves. Just don’t toss in too many at once or the paper gets mushy and gross.
If you’re doing this with kids, let them handle the peeling while you chop. They love feeling helpful—and it keeps them out of the knife zone.
🔪 Step 2: Chop or Shave Like a Pro
This is where your craft knife earns its keep. Chop crayons into little bits—think pencil eraser size. Too big and they take forever to melt. Too small and they melt too fast and get muddy.
I like using a cheap cutting board and making little piles of colors. Sometimes I mix colors for a swirl effect, but if you’re aiming for a galaxy vibe or ombré, keep those colors separate. That’s how you control the magic.
Pro tip: Don’t mix red and green unless you want your stars to look like they belong in a fruitcake.
✨ Optional Add-Ins: Glitter & Mica Powder
Okay, here’s where it gets extra. Adding glitter gives that sparkle when the light hits, and mica powder gives a shimmery, almost stained-glass sheen. But—and I speak from experience here—don’t dump it in like you’re frosting cupcakes. A pinch goes a loooong way.
One time my daughter dumped half a jar of silver glitter into a mold and the result looked like a star exploded. Beautiful, but not quite what we were going for.
🧠 Organization = Sanity
I like setting up a mini “work station” with bowls for each color group. Red/pink in one, blues in another, and so on. Not just for aesthetics—it helps you and the kiddos visualize what color blends you’ll get. And when a 5-year-old decides purple and orange are besties? At least it’s a creative mess.
There’s something super calming about sorting crayons by color. It’s one of those tasks that feels like a mix between art therapy and old-school organizing. And once you’re all prepped? Oh man, you’re so close to the fun part—melting. Just wait till you see the swirl magic coming up next.

Melt, Mold, and Make Your Stars Shine
Alright, it’s showtime! This is where those humble crayon bits turn into glossy, glowing sun catchers. I’ve messed this part up a few times—like, lava flow of wax all over the oven kind of mess. So here’s the rundown to keep it clean, colorful, and totally magical.
🍳 Preheat First—No Surprises!
Start by preheating your oven to 275°F (135°C). Don’t skip this. If you put the wax in too early, it heats unevenly and you’ll end up with bubbly, overcooked blobs instead of stars.
🧁 Use Muffin Tins for Mold Stability
This trick saved my sanity: place your silicone star molds inside a mini muffin tin. Keeps everything level so wax doesn’t tilt or overflow. I learned that the hard way when my first batch came out looking like abstract art… in a bad way.
Line the muffin tin with parchment paper too. Wax has a way of escaping no matter how careful you are.
🎨 Time to Fill Those Molds!
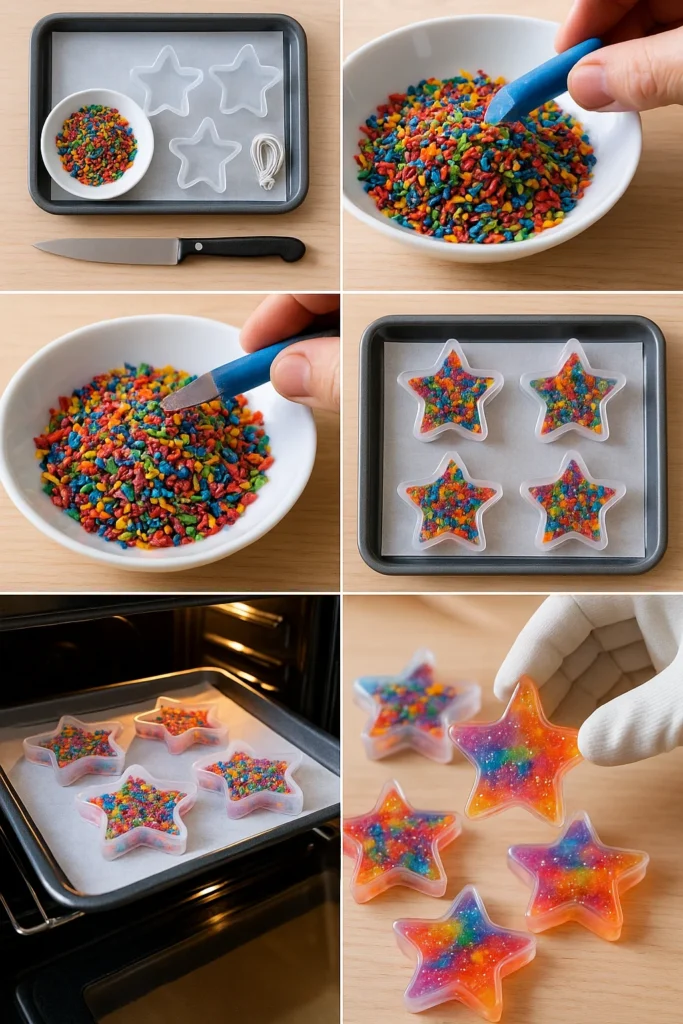
Here’s the fun part. Layer your crayon pieces however you like:
- Ombré: Start with lighter shades and move to darker tones.
- Galaxy Stars: Mix deep purples, blues, and a bit of glitter.
- Rainbow Swirl: Total chaos, but always gorgeous.
Just don’t pack them too full—leave a bit of space at the top so they melt evenly without spilling over.
🔥 Into the Oven (But Don’t Stir!)
Pop your tray in the oven and bake for about 8–10 minutes. Keep an eye on it. When the wax turns glossy and liquid, it’s done.
And listen—don’t stir the melted wax. I made that mistake once thinking I could “help the swirl.” Nope. It just turns into a weird muddy mess. Let it settle naturally. The colors blend in amazing ways all on their own.
⚠️ Hot Stuff! Use Oven Mitts
These molds get hot. Like, hotter than expected. Use thick oven mitts and place the tray on a heat-safe surface when removing it.
Now—this next part’s super important if you want to hang them up…
🧵 Insert Hanging Loops While It’s Still Soft
Right after you take them out (and before they harden), press a little loop of jewelry wire or fishing line into each star. Do it gently so it doesn’t sink too deep, but make sure it’s secure. Otherwise, you’ll have gorgeous sun catchers with no way to hang them.
I’ve definitely forgotten this step once or twice and had to hot-glue a loop on afterward. Not ideal. Looks kinda janky.
Once the loops are in, let ’em cool for a bit—or toss them in the freezer to speed things up. You’re almost done!
Add Loops & Freeze to Finish
So, you’ve melted the wax, swirled those colors like a pro, and the kitchen smells vaguely like a crayon box. Love it. Now we just need to cool things down—literally—and make these beauties ready to hang.
⏳ Act Fast While They’re Soft
Timing’s everything here. Once you pull the tray out of the oven, you’ve got maybe 2–3 minutes before the wax firms up. That’s your golden window to gently press in a loop of wire or fishing line.
I use a pencil or skewer to help push the loop in without burning my fingers. Learned that one after attempting the ol’ “careful fingertip push” and yelping like I’d grabbed a hot pan. 😅
Fishing line gives that floating look, but honestly, even twine or thin ribbon works if you’re into the rustic vibe.
❄️ Speed Things Up with the Freezer
Once the loops are in and the wax has cooled a bit at room temp (like 5–10 minutes), toss the whole muffin tin into the freezer for 15 minutes. Not longer—you don’t want the wax getting too brittle.
This is my favorite part because it’s where everything sets perfectly. Plus, it’s oddly satisfying to pop them out once they’re cold. Just press gently from the bottom of the mold, and out they slide!
If you’re using cookie cutters instead of silicone molds, peel the foil slowly so the edges don’t chip.
⚠️ Don’t Rush the Pop-Out
I used to get impatient and yank them out before they were fully cold. Don’t. That’s how I cracked two perfect stars right down the middle.
Now I just wait the full 15, then gently flex the mold and push the stars out. They should be cool, solid, and beautifully translucent. You’ll see little color swirls that look like stained glass. It’s magic.
💡 Storage Tip
If you’re not hanging them right away, store the stars in a cool, flat box, separated by parchment paper. Heat or stacking can warp them. Trust me, a bent sun catcher is… not cute.
You’re so close now. Just one more step—hanging these up to catch that glorious sunlight. Let’s finish strong in the next section!

Display and Enjoy Your DIY Sun Catchers
Alright—this is the moment you’ve been waiting for. Your stars are cool, solid, and bursting with color. Now it’s time to let them shine (literally).
🌞 Find the Sunniest Spot in the House
These Crayon Star Sun Catchers come alive when sunlight hits them. I usually hang ours on east-facing windows so they catch the morning light. The colors cast little rainbows all over the walls—it’s like instant good vibes.
South-facing windows also work great, especially if you want that all-day sun-glow.
🧵 How to Hang Them Up
I use fishing line and clear suction cup hooks for a floating look. If you went the twine or ribbon route, those work well with mini curtain clips or even thumbtacks for corkboard displays.
Some folks get fancy and hang multiple stars at different heights in a window. I tried that once and it looked so good I left it up way past the holidays.
🎨 Mix Up the Designs
Don’t stop at rainbow swirls. Once you get the hang of it, experiment!
- Galaxy Vibes: Mix navy, purple, black, and silver glitter.
- Seasonal Themes: Reds and golds for fall; pastels for spring.
- Mini Ornaments: Use smaller molds and make them for gifts or tree decorations.
I even made a few with glow-in-the-dark mica powder once. They don’t exactly light up like a firefly, but they do glow just enough at night to make you smile.
🧽 Bonus: Easy to Clean!
If a star melts in the sun (it happens if your window gets really hot), just scrape the wax off with a butter knife and wipe with warm soapy water. That’s one nice thing about wax—it doesn’t stain glass like paint does.
☀️ From Trash to Treasure
I still get a little joy every time I see one of our sun catchers glowing in the afternoon light. It’s wild to think they started as busted old crayons at the bottom of a drawer. Now they’re part of our decor—and conversation starters when guests notice them.
Plus, kids get so proud seeing their stars up on display. It’s an easy, low-cost way to boost their confidence and creativity.
Okay, stars hung? Window sparkling? Let’s wrap this up!
And there you have it—Crayon Star Sun Catchers, from messy little crayon nubs to dazzling window art that literally shines! Whether you’re doing this as a rainy-day craft with the kids, jazzing up your classroom windows, or just looking for a relaxing creative outlet, this project hits all the right notes: fun, easy, eco-friendly, and seriously gorgeous.
There’s something magical about watching those colors swirl and melt, then seeing them light up like stained glass in the afternoon sun. Even better? You made it yourself. No fancy supplies, no stress—just a little bit of heat and a whole lot of color.
So go on, dig through that crayon bin and give those scraps a second life. And hey—if this brought some sunshine to your day, share it on Pinterest! 🧷✨ Your friends, fellow parents, and craft lovers will thank you.
Happy crafting, and may your windows always be this colorful. 🌈
PrintHow to Make Crayon Star Sun Catchers (2025 DIY Guide for Kids & Parents)
Turn broken crayons into dazzling DIY Crayon Star Sun Catchers! This fun and eco-friendly craft transforms old crayon bits into stained-glass inspired stars that brighten up any window.
Ingredients
- Broken crayons (wrappers removed)
- Star-shaped silicone molds or cookie cutters
- Parchment paper
- Baking sheet
- Mini muffin tin (for stability)
- Jewelry wire or fishing line
- Craft knife
- Oven mitts
- Optional: glitter or mica powder
Instructions
- Preheat oven to 275°F (135°C).
- Peel crayon wrappers by soaking in warm water if needed.
- Chop crayons into small bits (eraser-sized).
- Sort by color and optionally add glitter or mica powder.
- Place silicone molds inside a mini muffin tin lined with parchment.
- Fill molds with crayon pieces, leaving space at the top.
- Bake 8–10 minutes until crayons are fully melted and glossy.
- Carefully remove from oven with mitts—do not stir melted wax.
- Quickly insert small loops of jewelry wire or fishing line before wax hardens.
- Cool at room temp for 5–10 minutes, then transfer to freezer for 15 minutes.
- Gently pop stars out of molds once solid and cool.
- Hang in a sunny window with suction hooks, fishing line, or ribbon.
Notes
Use a mini muffin tin to stabilize molds and avoid spills. Always add hanging loops before the wax hardens. For storage, keep stars flat and separated with parchment paper to prevent warping.


I can’t wait until this weekend. I’m going to start gathering everything i need to make a crayon star sunshine windchime and a flower sunshine windchimep.