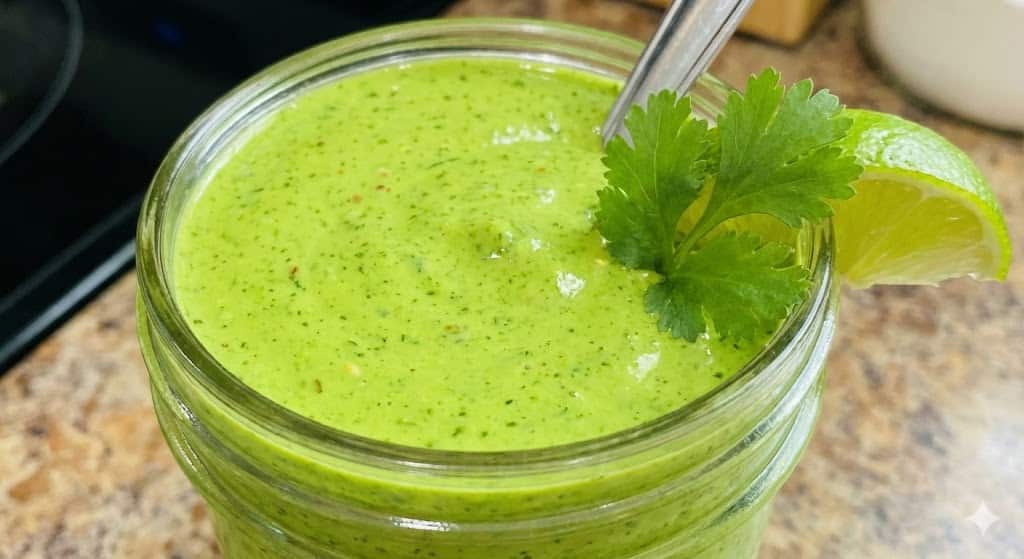
The Ultimate Guide to Homemade Red Enchilada Sauce: From Pantry Staple to Authentic Masterpiece

Gemini Generated Image ymue8eymue8eymue

The Heart of Mexican Cuisine: Mastering Homemade Red Enchilada Sauce

Enchiladas are one of the most beloved and iconic dishes of Mexican and Tex-Mex cuisine, and the secret to a truly outstanding enchilada lies entirely in its sauce. Forget the bland, overly salty canned variety. A homemade Red Enchilada Sauce—known in Spanish as salsa roja or salsa de chile rojo—is a vibrant, complex, and earthy masterpiece that transforms a simple corn tortilla and filling into an unforgettable meal.

Making your own enchilada sauce from scratch might seem daunting, but it’s a deeply rewarding culinary process. Whether you opt for a quick, pantry-friendly version using chili powder or commit to the traditional, rich depth of flavor that comes from using whole dried chiles, this comprehensive guide will walk you through every step to perfect your own Authentic Enchilada Sauce. We’ll cover the essential ingredients, step-by-step instructions for both quick and traditional methods, key tips for flavor, and how to use and store your incredible creation.


🔑 Key Ingredients: The Foundation of Flavor

The ingredients for red enchilada sauce are simple, but their quality and preparation are paramount. The choice between a quick version and an authentic one largely dictates the primary base.

1. The Traditional Chile Base (For Authentic Flavor)

The classic, most flavorful enchilada sauce relies on dried Mexican chiles. Using a mix ensures a balanced, complex flavor profile:

  • Ancho Chiles: Dried poblano peppers. These are the workhorse of the sauce, providing a deep, fruity, slightly smoky, and rich dark red color with very little heat. They are key for the Authentic Enchilada Sauce flavor.
  • Guajillo Chiles: These are long, thin, deep reddish-brown chiles with a mild to medium heat. They contribute a bright, tangy, and slightly earthy flavor, adding a lovely complexity.
  • Chiles de Árbol (Optional): Small, thin, and very hot. A few of these can be added for a noticeable kick of heat. Adjust this quantity based on your personal spice preference.

2. The Quick Chili Powder Base (For Easy Weeknights)

A faster method uses a high-quality, pre-mixed American-style chili powder, which is typically a blend of ground chiles, cumin, oregano, and sometimes garlic.

  • Chili Powder: Look for a blend specifically labeled as “chili powder” (not cayenne pepper or pure ground chile). Its flavor profile will vary by brand, so taste it first.
  • Flour and Oil (The Roux): A simple roux of fat (vegetable oil, avocado oil, or lard) and all-purpose flour is used to thicken the sauce quickly and add a nutty depth.

3. Aromatic and Spice Essentials

These ingredients are common to both methods and build the final complexity of the sauce:

  • Aromatics: Fresh garlic and onion (or their powdered counterparts in the quick version) provide a savory base. In authentic recipes, they are often cooked or even toasted/roasted alongside the chiles.
  • Broth or Water: Chicken or vegetable broth adds a richer depth than plain water. In the authentic method, the chile-soaking water can sometimes be used, though some traditional cooks prefer fresh broth to avoid potential bitterness.
  • Spices: Ground Cumin adds warmth and earthiness. Mexican Oregano (or standard oregano) provides aromatic, herbal notes. Salt is crucial to make all the flavors pop.
  • Optional Enhancements: Some recipes include a small amount of Tomato Sauce or Paste for tang and color balance, or a piece of Mexican Chocolate or a pinch of sugar at the end to deepen the color and balance any bitterness or acidity.

🌶️ Recipe Method 1: Authentic Red Enchilada Sauce (with Dried Chiles)

This traditional method delivers the deepest, most complex flavor. with recipe comment

📝 Ingredients

Gemini Generated Image nb73p1nb73p1nb73 5
  • 4 oz (approx. 6-8 total) dried Guajillo Chiles and Ancho Chiles (about a 2:1 ratio, e.g., 5 Guajillo, 3 Ancho)
  • 2-3 Chiles de Árbol (optional, for heat)
  • 4 cups Chicken or Vegetable Broth (or water, plus bouillon)
  • 1/2 small white or yellow Onion, coarsely chopped
  • 4 cloves Garlic, peeled
  • 1 tsp Ground Cumin
  • 1 tsp Dried Mexican Oregano
  • 1 Tbsp Vegetable or Olive Oil (for simmering)
  • 1 tsp Salt (or to taste)
  • 1/4 tsp Sugar or small piece of Mexican chocolate (optional, for balance)

🔪 Step-by-Step Instructions

1. Prepare and Toast the Chiles

  • Carefully wipe the chiles clean. Remove the stems from all chiles. Slit them open and shake out the seeds and membranes. (Pro Tip: Wear gloves for this step, especially with Árbol chiles!)
  • In a dry skillet or cast-iron pan over medium heat, toast the chiles for 30 seconds to 1 minute per side, just until they become fragrant and slightly pliable. Do not let them burn, as this will make the sauce bitter.

2. Rehydrate the Chiles

  • Place the toasted chiles, onion, and garlic in a saucepan. Cover completely with the 4 cups of broth (or water).
  • Bring the liquid to a boil, then immediately turn off the heat, cover the pot, and let the chiles soak for 30–45 minutes until they are very soft and fully rehydrated.
Gemini Generated Image nb73p1nb73p1nb73 4

3. Blend the Sauce

  • Transfer the soaked chiles, onion, and garlic to a blender (a high-powered blender is best). Add about 2 cups of the soaking liquid, the cumin, oregano, and salt.
  • Blend until the mixture is completely smooth. This may take a few minutes, depending on your blender. If the mixture is too thick to blend, add more of the soaking liquid, a tablespoon at a time, until it is moving freely.
Gemini Generated Image nb73p1nb73p1nb73 3

4. Strain and Simmer

  • Set a fine-mesh sieve or conical strainer over a large bowl or directly over a clean saucepan.
  • Pour the puréed mixture into the strainer and use the back of a ladle or spoon to push the sauce through, forcing out as much liquid as possible while leaving behind any bits of skin or remaining seeds. Discard the pulp.
Gemini Generated Image nb73p1nb73p1nb73 2

5. Cook and Thicken

  • Heat the 1 tablespoon of oil in the saucepan over medium heat.
  • Slowly pour the strained chile puree into the hot oil. This step, called sazón or “seasoning the sauce,” is crucial for deepening the flavor.
  • Bring the sauce to a gentle simmer. Cook, stirring occasionally, for 10–15 minutes. It should thicken slightly as it simmers. If it becomes too thick, stir in a little more broth or water until it reaches the consistency of heavy cream.
  • Taste and adjust seasoning. This is where you add more salt, a tiny pinch of sugar, or the Mexican chocolate (if using) to balance the acidity and bitterness.
Gemini Generated Image nb73p1nb73p1nb73 1 1

⏲️ Recipe Method 2: Quick Red Enchilada Sauce (with Chili Powder)

Perfect for when time is of the essence, this recipe uses pantry staples and is ready in about 20 minutes. with recipe comment

📝 Ingredients

  • 2 Tbsp Vegetable or Canola Oil
  • 2 Tbsp All-Purpose Flour
  • 3-4 Tbsp Chili Powder (use 4 for a stronger flavor, 3 for milder)
  • 1 tsp Ground Cumin
  • 1 tsp Garlic Powder
  • 1/2 tsp Onion Powder
  • 1/2 tsp Dried Oregano
  • 1 (8 oz) can Tomato Sauce
  • 2 cups Chicken or Vegetable Broth
  • 1 tsp Salt (or to taste)
  • 1/4 tsp Cayenne Pepper (optional, for heat)

🔪 Step-by-Step Instructions

1. Make the Roux

  • Heat the oil in a medium saucepan over medium heat.
  • Whisk in the flour and cook for about 1 minute until the mixture (the roux) is smooth and bubbly. This cooks out the raw flour taste.
Gemini Generated Image nb73p1nb73p1nb73 1

2. Toast the Spices

  • Whisk in the chili powder, cumin, garlic powder, onion powder, and oregano (and cayenne, if using).
  • Cook and stir for another 30 seconds to 1 minute. This brief toasting step unlocks the full aroma and flavor of the spices.

3. Simmer and Thicken

  • Slowly pour in the tomato sauce and then the broth, whisking continuously to ensure no lumps form.
  • Bring the sauce to a gentle simmer. Reduce the heat to low and let it simmer for 10-15 minutes, stirring occasionally.
  • The sauce will thicken as it simmers and will continue to thicken as it cools.
Gemini Generated Image qoe2kpqoe2kpqoe2

4. Season and Finish

  • Stir in the salt.
  • Taste and adjust seasoning. Add more salt, chili powder, or a tiny pinch of sugar if it tastes too acidic.
Gemini Generated Image ud9lzsud9lzsud9l

Versatile Applications

  • Classic Enchiladas: Dip warm corn tortillas in the sauce, fill with your choice of protein (chicken, beef, or beans) and cheese, roll them up, place in a baking dish, and smother with more sauce before topping with cheese and baking.
  • Wet Burritos: Use it as a deep, savory topping for a large, filled burrito.
  • Chilaquiles: Pour it over fried tortilla chips to soften them for a rich, hearty breakfast or lunch.
  • Tamales: Use it to moisten the masa dough for tamales colorados.
  • Soup Base: A fantastic flavor booster for Mexican-style chicken soup or chili.

Storage and Freezing

Red enchilada sauce is an excellent make-ahead component.

  • Refrigerator: Store in an airtight container for up to 5-7 days.
  • Freezer: For longer storage, pour the cooled sauce into freezer-safe containers or heavy-duty freezer bags. It can be frozen for up to 6 months. Thaw overnight in the refrigerator before using. Note: The quick, roux-thickened version may separate slightly after freezing, but a good whisking during reheating should smooth it out.

🌟 Expert Tips for a Next-Level Red Enchilada Sauce

Achieving that deep, authentic flavor takes a few simple, but crucial, techniques:

  • The Power of Toasting Chiles: In the authentic recipe, the brief toasting of the dried chiles releases their volatile oils and intensifies their flavor. Remember: fragrant, not burnt. Scorched chiles equal a bitter sauce.
  • To Strain or Not to Strain: For the smoothest, restaurant-quality sauce, straining the chile purée is a non-negotiable step. It removes tough bits of skin and stray seeds that can affect the texture. If you have a powerful blender (like a Vitamix), you might skip this step, but traditionalists always strain.
  • The Simmer is Key: For both methods, simmering is essential. It allows the flavors of the spices and chiles to fully meld and deepen, transforming the raw taste into a complex, savory profile. Don’t rush this step.
  • Balancing the Bitter/Acidic Notes: If your final sauce tastes bitter (likely from over-toasted chiles or a high chile-to-broth ratio) or too acidic (if using tomato product), add a small counter-balance. A teaspoon of sugar, a pinch of cinnamon, or a piece of dark/Mexican chocolate are traditional flavor balancers.
  • Use Mexican Oregano: If possible, seek out Mexican oregano. It has a citrusy, slightly grassy flavor profile that is distinct from the more common Mediterranean variety, lending a more authentic taste to your sauce.

🧐 Troubleshooting and FAQs

Why is my enchilada sauce bitter?

The most common culprit is scorched chiles. If the chiles burn during toasting, the flavor is permanently bitter. To fix a slightly bitter sauce, you can try adding a small amount of sugar, honey, or a piece of Mexican chocolate to balance the flavor. Simmering with a slice of onion for a few minutes and then discarding it can also sometimes help.

Can I make the authentic sauce without flour for thickening?

Absolutely. The authentic method uses the chile solids themselves as the natural thickener. The step where you simmer the strained purée in a bit of hot oil (the sazón) also contributes to the thickening process by reducing the liquid content. If it’s too thin, you can simply simmer it longer, or for a very slight thickening, whisk in a cornstarch slurry (1 tsp cornstarch mixed with 1 tsp cold water) at the end.

What’s the difference between chili powder and pure chile powder?

  • Chili Powder (American-Style): A blend of ground chiles, cumin, garlic powder, and oregano. It is generally mild and designed to season dishes like chili con carne.
  • Pure Chile Powder: Ground, dried whole chiles, like ground Ancho, ground Guajillo, or pure Cayenne. These are much more potent and not interchangeable with the blended “chili powder.” The quick recipe relies on the blended American-style variety.

How can I make my sauce spicier?

For the authentic recipe, increase the number of Chiles de Árbol. For the quick recipe, add a pinch of cayenne pepper or a dash of chipotle powder for smoky heat. You can also use a spicy blend of chili powder.


The Takeaway

Homemade red enchilada sauce elevates a simple Mexican dish into a culinary event. Whether you choose the speed of the chili powder method or the unparalleled depth of the traditional dried chile approach, you will never go back to the canned version. The earthy, complex flavors of chili, garlic, and cumin are the perfect backdrop for your next batch of homemade enchiladas.

Burger Sauce: The Secret to the Ultimate Burger Experience

Burger Sauce

When it comes to burgers, the patty, bun, and toppings get all the attention—but the burger sauce is often the real game-changer. A good sauce can transform a simple burger into a mouthwatering masterpiece. In this article, we’ll explore what makes a great burger sauce, the different types you can try, and how to make your own at home.

What is Burger Sauce?

Burger sauce is a creamy, tangy, and sometimes slightly sweet condiment designed to complement the flavors of a burger. Think of it as the glue that binds all the ingredients together while adding a punch of flavor. Most burger sauces are mayonnaise-based, but they can also include ketchup, mustard, pickles, and spices.

Popular burger sauce ingredients:

  • Mayonnaise
  • Ketchup
  • Mustard
  • Pickles or relish
  • Garlic and onion powder
  • Vinegar or lemon juice
  • Paprika or cayenne pepper

Types of Burger Sauce

There’s more than one way to elevate your burger with sauce. Here are some popular variations:

  1. Classic Burger Sauce
    • A mix of mayo, ketchup, mustard, and pickles. Perfect for a traditional cheeseburger.
  2. Spicy Burger Sauce
    • Adds hot sauce, sriracha, or cayenne pepper to give your burger a fiery kick.
  3. Specialty Burger Sauces
    • Think tangy aioli, chipotle mayo, or garlic herb blends for gourmet flavors.
  4. Vegan or Healthier Alternatives
    • Made with plant-based mayo, Greek yogurt, or avocado for a lighter twist.

How to Make Burger Sauce at Home

burger sauce

Making burger sauce at home is simple, and it tastes far better than store-bought options. Here’s a quick recipe:

Ingredients:

  • ½ cup mayonnaise
  • 2 tbsp ketchup
  • 1 tbsp mustard
  • 1 tbsp finely chopped pickles or relish
  • ½ tsp garlic powder
  • ½ tsp onion powder
  • 1 tsp vinegar or lemon juice

Instructions:

  1. In a small bowl, mix all ingredients until smooth.
  2. Taste and adjust seasoning as needed.
  3. Chill for at least 30 minutes to let flavors blend.
  4. Spread generously on your burger and enjoy!

Tips for the Best Burger Sauce

  • Fresh ingredients: Use fresh pickles, lemon juice, and quality mayo for maximum flavor.
  • Balance flavors: Make sure your sauce isn’t too sweet or too tangy—aim for harmony.
  • Experiment: Add herbs, hot sauce, or smoked paprika to create your signature burger sauce.

Why Burger Sauce Matters

A delicious burger sauce doesn’t just add moisture—it enhances the overall taste experience. It brings together the flavors of the meat, cheese, and toppings, creating that perfect bite every time.

Whether you’re a home cook or a burger enthusiast, making your own sauce is an easy way to elevate any burger.


The Best homemade Teriyaki Sauce: Mastering the Glaze, the History, and the Umami Science

teriyaki sauce

I. Introduction: The Sauce That Means “Shine”

Few Japanese culinary terms are as globally recognizable as Teriyaki. Yet, for most people outside of Japan, “teriyaki” refers not to a cooking method, but to a sweet, sticky, and savory bottled sauce. This distinction is the key to mastering this pillar.

The word Teriyaki is a compound of two Japanese terms: “Teri” (照り), which means shine or luster, and “Yaki” (焼き), meaning grilling or broiling. The technique, developed in the 17th century, focuses on achieving a beautiful, caramelized sheen on food by continuously basting it with a reduced sauce.

This pillar article is your comprehensive guide to both the authentic, traditional tare (glaze) and the popular, savory Americanized version. We will break down the history, the essential ingredients (Soy, Mirin, Sake), and the crucial technique of reduction that turns a simple liquid into a glossy, umami-rich glaze, allowing you to elevate chicken, salmon, beef, and tofu alike.


II. Pillar 1: The Teriyaki Origin — Traditional Japanese Tare

True Teriyaki tare is a minimalist masterwork, emphasizing the natural qualities of a few high-quality, indigenous ingredients.

The History of Teriyaki: Preservation to Popularity

Teriyaki originated in Japan during the Edo period (1603-1868), primarily as a method of preserving and flavoring fish, especially in coastal regions. Japanese immigrants later brought the technique to the U.S., notably evolving the sauce in Hawaii during the 20th century by integrating local ingredients like pineapple juice (for sweetness and tenderizing enzymes), leading to the distinct flavor we know today.

The Traditional Tare (Glaze)

The traditional formula is a simple, 1:1:1:1 ratio. The goal is a delicate, savory balance, not an overwhelming sweetness.

IngredientQuantity (Ratio)Purpose
Soy Sauce (Shoyu)1 PartSalty, savory umami base.
Mirin (Sweet Rice Wine)1 PartEssential sweet glaze and shine (teri).
Sake (Rice Wine)1 PartDepth of flavor and tenderizing element.
Sugar (Granulated)1 PartCaramelization and further sweetness.

Core Technique: Reduction

The traditional tare relies solely on reduction to thicken. The sauce is boiled slowly, evaporating the water and alcohol, concentrating the sugars and soy sauce until it achieves a syrupy, natural viscosity. This process creates a deep, complex flavor with no cornstarch required.

Traditional Teriyaki Master Recipe

  1. Combine 1/2 cup soy sauce, 1/2 cup mirin, 1/2 cup sake, and 1/4 cup sugar in a saucepan.
  2. Bring to a boil, then immediately reduce heat and simmer gently for 10-15 minutes, or until the sauce has reduced by about one-third and coats the back of a spoon.
  3. Use immediately as a glaze or reserve as a marinade.

III. Pillar 2: The Modern Americanized Teriyaki Sauce (The Cornstarch Method)

The teriyaki sauce popularized in the West is thicker, sweeter, and significantly bolder, incorporating aromatics like garlic and ginger. This style relies on the cornstarch slurry method for quick, reliable thickening.

The American Teriyaki Evolution

The key difference is the addition of fresh aromatics and the use of cornstarch, allowing the sauce to thicken in minutes, making it ideal for fast-paced stir-fries and weeknight dinners.

Recipe Spotlight: Thick & Sticky Weeknight Teriyaki Sauce

This version is perfect for stir-fries and glazes.

IngredientsQuantityNotes
Water (or Stock)1 cupLiquid base for dilution and thickening.
Soy Sauce (Low Sodium)1/2 cupSavory base. Use Tamari for gluten-free.
Brown Sugar (Packed)1/2 cupDeeper sweetness than granulated sugar.
Fresh Ginger (Minced)1 1/2 teaspoonsAdds essential fresh, sharp aroma.
Fresh Garlic (Minced)1 teaspoonAdds savory depth.
Honey (or Agave)1 tablespoonFor added complexity and gloss.
Cornstarch3 tablespoonsThe instant thickener.
Cold Water (for Slurry)1/4 cupEssential for dissolving the cornstarch.

Step-by-Step Instructions: The Slurry Technique

  1. Combine Ingredients: In a saucepan, whisk together the water, soy sauce, brown sugar, ginger, garlic, and honey. Heat over medium until the sugar is dissolved and the sauce is steaming.
  2. Prepare the Slurry: In a separate small bowl, whisk the 3 tablespoons of cornstarch with the 1/4 cup of cold water until no lumps remain. This is the slurry.
  3. Thicken: Pour the slurry into the simmering sauce while stirring continuously. The sauce will thicken almost immediately.
  4. Cook Off Starch: Bring the sauce to a full boil for 60 seconds to cook off any residual starchy flavor. Remove from heat. The sauce will continue to thicken slightly as it cools.

Ingredient Deep Dive & Troubleshooting

  • Cornstarch Slurry Rule: Always dissolve cornstarch in cold liquid first! Adding cornstarch directly to hot liquid will cause it to clump instantly, resulting in a grainy sauce.
  • Gluten-Free Swap: Substitute regular soy sauce with Tamari for an equally deep umami flavor with a gluten-free composition.
  • The Pineapple Factor: For a Hawaiian twist, substitute 1/4 cup of the plain water with pineapple juice. The juice adds sweetness and a small amount of bromelain, which helps tenderize meat when used as a marinade.

IV. Pillar 3: Culinary Application & Glazing Techniques

Gemini Generated Image 4u6ib64u6ib64u6i

Teriyaki sauce is incredibly versatile, transitioning seamlessly between use as a marinade, a stir-fry sauce, and a finishing glaze.

Teriyaki as a Marinade (The Non-Thickened Base)

To use the teriyaki mixture as a marinade for chicken, beef, or tofu, DO NOT add the cornstarch slurry. The thin liquid penetrates the protein more effectively.

  • Protein: Marinate chicken, beef, or tofu for 30 minutes to 4 hours. Marinate fish for a maximum of 15 minutes due to its delicate texture.
  • Safety Tip: Never brush uncooked marinade directly onto cooked food. If you want to use the marinade as a finishing glaze, you must first boil it thoroughly for 5 minutes to destroy any bacteria from the raw meat. Better yet: make a dedicated batch for glazing.

The Final Glaze Technique

The signature teri (shine) is achieved by applying the thickened sauce at the end of the cooking process.

  1. Grilling/Broiling: Cook your protein until it is about 80% done. Then, brush the thickened sauce liberally over the surface and return it to the heat source for 1-2 minutes until the sauce caramelizes and becomes tacky.
  2. Stir-Fries: Cook your meat and vegetables entirely. Lower the heat, then pour the thickened sauce over the mixture and toss vigorously for 30 seconds until everything is evenly coated in a glossy layer.

The Best Pairings

  • Poultry: Teriyaki Chicken is the classic. Perfect for skewers (yakitori-style) or whole thighs.
  • Seafood: Salmon and Tuna Steaks take to the glaze beautifully, often enhanced by the sweetness.
  • Vegetarian: Tofu, shiitake mushrooms, and eggplant are excellent, savory sponges for the sauce.

Storage: Store the thickened teriyaki sauce in an airtight container in the refrigerator for up to 2 weeks.


V. Conclusion: Your Teriyaki Masterpiece

The journey of Teriyaki, from a simple 17th-century Japanese preservation technique to a complex, globally popular sauce, is a testament to the power of culinary adaptation. By understanding the difference between the traditional reduction method (for delicate flavor) and the Americanized cornstarch slurry (for quick, sticky glazes), you now possess the key to achieving that perfect shine (teri) on any dish. Whether you choose a balanced four-ingredient tare or a savory, garlic-and-ginger-laden glaze, the mastery of this sauce ensures countless delicious, weeknight-friendly meals.

The Ultimate Homemade Big Mac Sauce Recipe & Secrets

big mac sauce ingredients
big mac sauce bowl

I. Introduction: The Condiment that Defined a Generation

The world is full of sauces, but few have achieved the legendary status of the “Special Sauce” served on McDonald’s Big Mac. It’s more than just a topping; it is a meticulously crafted balance of flavor that defines the entire dining experience. Without it, the Big Mac is merely two beef patties, lettuce, and cheese. With it, it becomes an icon.

This pillar article is the definitive guide to mastering this creamy, tangy, sweet, and savory condiment, and understanding its place in the wider world of fast-food sauces. We will move beyond the basic copycat recipe to explore the history, the flavor science (the “umami” factor), the techniques for achieving the perfect texture, and how this sauce is adapted for other iconic burgers. By the end, you will not only be able to recreate the genuine flavor but also use the foundational principles to invent your own signature creamy burger sauce.

The journey begins with the perfect copycat, structured around key pillars: History & Flavor Science, The Emulsion Mastery, and Global Culinary Application.


II. Pillar 1: Decoding the Flavor Science and History

The Big Mac sauce is a brilliant study in balancing the five primary tastes, creating a flavor profile known as “super-tasty” or “hyper-palatable.”

The History: From Tartar to Trademark

The origin story of the special sauce is rooted in the classic American condiments. It is an evolution of French remoulade and Russian or Thousand Island dressings, traditionally combining mayonnaise and relish.

  • The Big Mac’s Debut (1967): The original sauce was somewhat simpler, rooted in classic tartar sauce.
  • The R&D Evolution (Post-1970s): Through extensive testing, the formula was refined to specifically hit the sweet, sour, and savory notes simultaneously, which research showed was highly addictive to the average consumer.
  • The Secret is Out (Sort Of): While the official recipe is tightly controlled, the core ingredients were identified as mayonnaise, pickle relish, mustard, vinegar, garlic, onion, and paprika. The challenge for the home cook lies in achieving the exact ratios and texture.

The Flavor Science: The Five Senses

The genius of the sauce is its complexity in a simple application:

  • Sweet: Provided by the sugar and sweet pickle relish.
  • Sour (Acid): Provided by the vinegar and the tartness of the pickle relish. This cuts the fat.
  • Salty: Provided by the salt and the brine from the relish.
  • Bitter: A subtle undercurrent from the paprika and mustard.
  • Umami (Savory): This critical fifth taste is delivered by the onion powder, garlic powder, and a touch from the mustard, making the sauce craveable and complementing the savory beef patty perfectly.

III. Pillar 2: The Emulsion Mastery — Homemade Big Mac Sauce Recipe

big mac sauce ingredients

Achieving the authentic flavor requires specific ingredients and, crucially, a chilling period to allow the savory powder flavors to “bloom.”

The Master Copycat Recipe

This recipe balances the creamy richness with the necessary acid and aromatic punch.

IngredientQuantityPurpose in the Sauce
Mayonnaise1/2 cupCreamy base and binding agent (fat).
Sweet Pickle Relish2 tablespoonsSweetness, crunch, and essential tangy acid.
Yellow Mustard1 teaspoonColor, sharp flavor, and extra emulsifier.
White Wine Vinegar1 teaspoonSharp, clean acid for brightness.
Granulated Sugar1 teaspoonBalances the vinegar.
Paprika (Sweet or Smoked)1/2 teaspoonColor and earthiness.
Onion Powder1/4 teaspoonUmami depth and savory punch.
Garlic Powder1/4 teaspoonSavory aromatic foundation.
SaltPinch, to tasteEssential seasoning.

Step-by-Step Instructions: Mastering the Blend

  1. The Base Emulsion: In a small mixing bowl, whisk together the mayonnaise, yellow mustard, and white wine vinegar until completely smooth. The initial whisking helps create a uniform creamy base, ensuring no pockets of oil or vinegar remain separated.
  2. Bloom the Aromatics: Add the granulated sugar, paprika, onion powder, garlic powder, and salt. This is the key moment for flavor. Whisk vigorously for 30–60 seconds. Vigorously whisking helps the dry powders bloom their flavor immediately and prevents graininess in the final sauce. The sauce should turn that recognizable pale peachy-pink.
  3. Introduce Texture: Gently stir in the sweet pickle relish. The relish is added last to maintain its structure and crunch. Note: Some recipes call for a combination of sweet pickle relish and finely minced fresh onion and dill pickle. If doing this, use 1 tbsp relish and 1 tbsp finely minced fresh dill pickle, plus 1 tsp of finely grated fresh white onion.
  4. The Essential Chill: Transfer the sauce to an airtight container or glass jar. Refrigerate for a minimum of 2 hours, but ideally overnight (8+ hours). This step is absolutely critical. The dry powdered ingredients (onion and garlic) take time to properly hydrate and infuse into the creamy base. The difference in flavor between a fresh batch and an overnight batch is enormous.
  5. Final Adjustment: Stir the sauce again before serving. If the sauce is too thick (due to cold), you may stir in a few drops of pickle juice or water to loosen the consistency.

IV. Pillar 3: Advanced Techniques and Customization

This sauce is a template. Understanding how to swap ingredients allows you to tailor the flavor to any burger, fry, or wrap.

The Texture Challenge: Getting the Right Mouthfeel

The authentic sauce has a very specific mouthfeel: thick enough to cling to a hot patty without running, but creamy enough to spread easily.

  • The Fresh Onion Trick: For that signature, almost invisible crunch, grate a small piece of fresh white onion (about 1 tsp) and add the resulting onion pulp and juice. This provides a punchier onion flavor than the powder alone and adds a subtle thickening agent.
  • Achieving Cling: If your sauce is too thin, the culprit is often too much added liquid (vinegar or relish liquid). Reduce the vinegar next time. If fixing a batch, stir in 1/2 tsp of cornstarch mixed with 1 tsp of water.
  • The Tomato Factor: While purists avoid it, adding 1/2 tsp of tomato paste can deepen the color and add a slight cooked sweetness, making the sauce closer to a classic fry sauce.

Troubleshooting: Common Flavor Adjustments

IssueFlavor ProfileSolution
Too SweetThe sugar and relish overpower the tang.Add an extra 1/2 tsp of white wine vinegar or a small pinch of cayenne pepper for balance.
Too Mayonnaise-HeavyLacking the signature savory “punch.”Increase the onion powder and garlic powder by 1/4 tsp each, and ensure a generous pinch of salt is used.
Lacks ColorToo pale or yellow (missing the pink hue).Increase the paprika by 1/4 tsp. Using sweet paprika (vs. Spanish smoked) will yield a brighter color.
Relish is Too ChunkyDoesn’t spread evenly on a bun.Pulse the sweet pickle relish once or twice in a small food processor before adding it to the mayo base to achieve a finer, more uniform mince.

Iconic Sauce Comparisons

  • Big Mac Sauce vs. Thousand Island: Thousand Island typically includes ketchup or chili sauce, giving it a stronger tomato base. Big Mac sauce is dominated by the savory onion/garlic notes and pickle brine, making it sharper and more savory than sweet.
  • Big Mac Sauce vs. Fry Sauce (Utah Fry Sauce): Fry sauce is often simpler, relying on just ketchup and mayonnaise. Big Mac sauce is significantly more complex due to the addition of vinegar, mustard, and the dry savory spices.

V. Pillar 4: Culinary Applications — Beyond the Big Mac

The creamy, tangy, and savory profile of this sauce makes it incredibly versatile. It deserves a spot in your fridge as a “master condiment” for endless pairings.

The Ultimate Burger Stack (The Sauce Environment)

To use the sauce effectively, you must understand the classic Big Mac structure: The Three Layers of Contrast.

  1. Bottom Bun Sauce Layer: Provides the base flavor.
  2. Middle Bun Sauce Layer: A second, generous application ensures the savory sauce hits the palate with every bite.
  3. The Shredded Lettuce: The sauce needs the shredded lettuce (moisture, crunch) to grab onto and coat, ensuring it doesn’t run out.

Creative Culinary Uses

  • As a Dip:
    • Fries & Rings: The quintessential pairing for any creamy, tangy sauce.
    • Chicken Tenders & Nuggets: Provides a much-needed savory contrast to fried chicken breading.
    • Roasted Potatoes: Toss roasted potato wedges with a dollop of sauce immediately after coming out of the oven.
  • As a Spread:
    • Deli Sandwiches: Use it as a vibrant alternative to plain mayonnaise on turkey, ham, or roast beef sandwiches.
    • Wraps: Mix it into tuna salad or shredded chicken salad for an extra punch of flavor and moisture.
    • Sliders & Sloppy Joes: It works beautifully to cut the richness of mini-sliders or to top a classic beef or chicken sloppy joe.
  • As a Dressing:
    • Taco Salad: Thin the sauce with a splash of milk, buttermilk, or pickle juice to create a creamy dressing for a simple chopped salad or taco bowl.

Storage and Longevity

Due to the vinegar and pickle brine content, this sauce is relatively stable. Store in a clean, airtight glass container in the refrigerator. The ideal storage life is 7 to 10 days. Always discard if you notice any separation, mold, or an off-smell. Remember, the sauce’s best flavor is typically reached on Day 2 after the aromatics have fully incorporated.


VI. Conclusion: Your Secret Sauce is Safe

You have now mastered the art of the Big Mac sauce. By understanding the critical role of the savory powders, the balancing act of vinegar and sugar, and the necessity of the overnight chill, you can replicate this fast-food legend at home, anytime. More importantly, you now possess the knowledge to build any savory, creamy condiment to elevate your burgers, fries, and sandwiches from ordinary to irresistible.

What iconic condiment will you decode next?

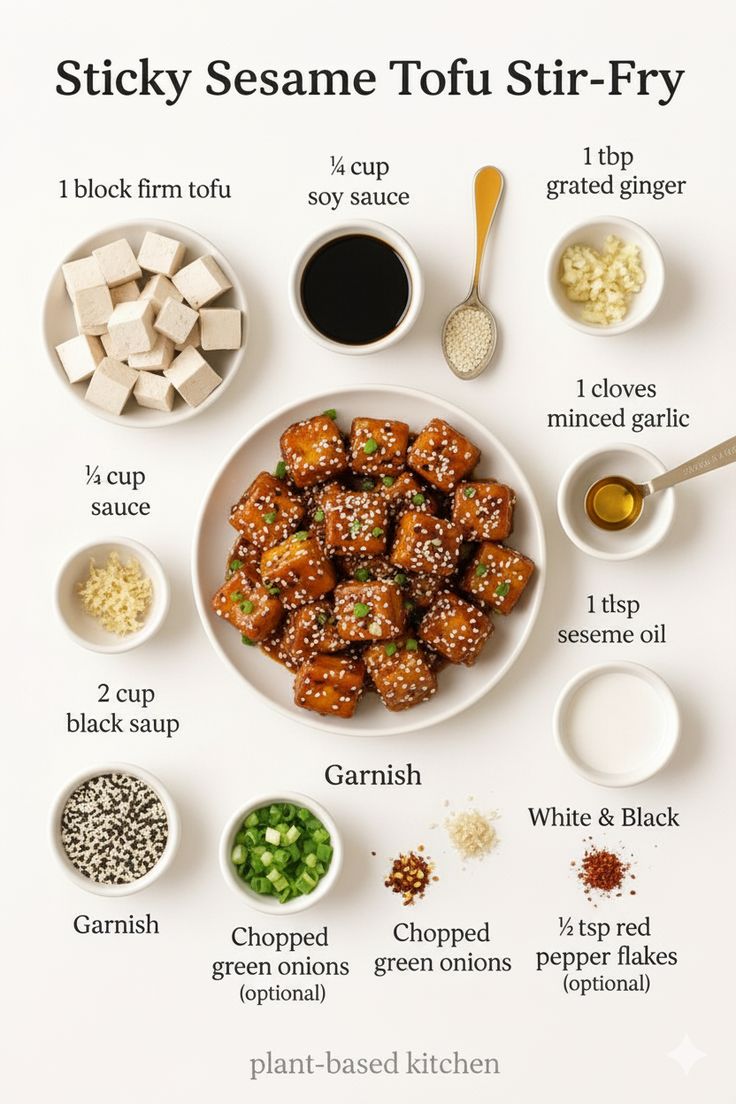
Sticky Sesame Tofu Stir-Fry: Your New Weeknight Obsession

Sticky Sesame Tofu Stir-Fry

Looking for a delicious, satisfying, and relatively quick meal that’s packed with flavor and plant-based goodness? Look no further than the Sticky Sesame Tofu Stir-Fry. This dish is a true crowd-pleaser, perfect for a busy weeknight or a cozy weekend dinner. It features crispy pan-fried tofu coated in a luscious, sweet, and savory sesame sauce, all ready to be served over rice or noodles with your favorite stir-fried vegetables.

Why You’ll Love This Recipe:

  • Flavor Bomb: The combination of soy sauce, ginger, garlic, and sesame oil creates an irresistible glaze that will have your taste buds singing.
  • Crispy Tofu Perfection: Learn the secret to achieving perfectly golden and slightly crispy tofu that holds up beautifully in the sauce.
  • Healthy & Hearty: Tofu is an excellent source of plant-based protein, making this a fulfilling and nutritious meal.
  • Customizable: Easily adapt this recipe with your favorite vegetables, making it a versatile addition to your culinary repertoire.
  • Weeknight Friendly: With a little prep, this dish comes together surprisingly quickly, making it ideal for those busy evenings.

The Magic Ingredients You’ll Need:

The beauty of this dish lies in its simple yet powerful ingredient list. Here’s a breakdown of what you’ll typically find in a Sticky Sesame Tofu Stir-Fry:

  • Firm or Extra-Firm Tofu: The star of the show! Pressing your tofu is crucial for a great texture.
  • Soy Sauce: The backbone of the savory sauce. Use tamari for a gluten-free option.
  • Fresh Ginger: Adds a fragrant, spicy kick that’s essential for stir-fries.
  • Garlic: Another aromatic powerhouse that complements the ginger perfectly.
  • Sesame Oil: Provides that distinctive nutty, toasted sesame flavor.
  • Sweetener: Often honey, maple syrup, or brown sugar to balance the savory notes and create that desirable sticky glaze.
  • Cornstarch Slurry: This is key for thickening the sauce to that perfect glossy, clingy consistency.
  • Sesame Seeds (Black and White): For garnish and an extra layer of nutty crunch.
  • Chopped Green Onions: Adds freshness, a mild oniony bite, and a pop of color.
  • Red Pepper Flakes (Optional): For those who like a little heat!

Getting Started: The Tofu Transformation

Gemini Generated Image 6o3paw6o3paw6o3p 1

The secret to great tofu in a stir-fry is all in the prep.

  1. Pressing the Tofu: This is the most important step! Tofu comes packed in water, and removing excess moisture is vital for achieving a crispy texture and allowing it to absorb the flavors of the sauce. Wrap the block of tofu in paper towels or a clean kitchen towel, place it on a plate, and top with something heavy (like a cast-iron skillet or a few cans). Let it press for at least 20-30 minutes, or even longer for best results.
  2. Cubing: Once pressed, cut the tofu into uniform cubes. This ensures even cooking.
  3. Seasoning & Coating (Optional but Recommended): For extra crispness, you can lightly toss the tofu cubes in a tablespoon of cornstarch before pan-frying. This creates a thin, crispy crust.

Crafting the Irresistible Sauce:

Crafting the Irresistible Sauce:

While the tofu is pressing, you can whisk together your sauce ingredients. In a small bowl, combine soy sauce, minced ginger, minced garlic, sesame oil, your chosen sweetener, and a touch of rice vinegar if you like a little tang. Set aside.

The Stir-Fry Method: Bringing It All Together

  1. Crisping the Tofu: Heat a tablespoon of oil (like olive oil or a neutral cooking oil) in a large skillet or wok over medium-high heat. Add the tofu in a single layer, ensuring not to overcrowd the pan. Cook for 5-7 minutes, flipping occasionally, until golden brown and crispy on all sides. Remove the tofu from the pan and set aside.
  2. Sautéing Aromatics & Vegetables (Optional): If you’re adding vegetables (broccoli, bell peppers, carrots, snow peas work wonderfully), add them to the same pan with a little more oil if needed. Stir-fry for a few minutes until tender-crisp. Then, briefly sauté any remaining fresh garlic or ginger for about 30 seconds until fragrant.
  3. Adding the Sauce: Give your prepared sauce a quick whisk to ensure everything is combined, then pour it into the pan. Bring it to a gentle simmer.
  4. Thickening the Sauce: In a small separate bowl, whisk together a cornstarch slurry (1 tsp cornstarch with 1 tsp cold water). Slowly drizzle the slurry into the simmering sauce, whisking constantly until the sauce thickens to a beautiful, glossy consistency that clings to a spoon.
  5. Tossing with Tofu: Return the crispy tofu to the pan and toss gently to coat thoroughly with the sticky sesame sauce. Make sure every piece is glistening!

Serving Suggestions & Garnishes:

Serving Suggestions & Garnishes:

Serve your Sticky Sesame Tofu Stir-Fry immediately over:

  • Steamed white or brown rice
  • Noodles (udon, ramen, or lo mein)
  • Quinoa or other grains

Garnish generously with:

  • Toasted sesame seeds (both black and white for visual appeal!)
  • Freshly chopped green onions
  • A sprinkle of red pepper flakes for a touch of heat

Tips for Success:

  • Don’t Rush the Tofu: Proper pressing and patient pan-frying are key to crispy tofu.
  • Taste and Adjust: Always taste your sauce before adding it to the pan. Adjust the sweetness, saltiness, or spice to your liking.
  • High Heat Stir-Frying: Use high heat for cooking your tofu and vegetables to get that perfect sear and avoid steaming.
  • Batch Cook: This recipe is great for meal prep! Cook a larger batch and enjoy it throughout the week.

The Sticky Sesame Tofu Stir-Fry is more than just a meal; it’s an experience of vibrant flavors and satisfying textures. It’s proof that plant-based eating can be incredibly exciting and utterly delicious. Give this recipe a try, and prepare to add it to your regular rotation!

Cajun Cream Sauce: The Ultimate Recipe for Bold Southern Flavor

Cajun Cream Sauce

Outline for “Cajun Cream Sauce”
Heading LevelSection Title
H1Cajun Cream Sauce: The Ultimate Recipe for Bold Southern Flavor
H2Introduction to Cajun Cream Sauce
H3What Is Cajun Cream Sauce?
H3The History and Origins of Cajun Cuisine
H3Why Cajun Cream Sauce Has Become a Kitchen Staple
H2Ingredients You’ll Need for the Perfect Cajun Cream Sauce
H3Key Ingredients and Their Roles
H3Choosing the Right Cajun Seasoning
H3Substitutions for Dietary Preferences (Gluten-Free, Dairy-Free, etc.)
H2Step-by-Step Instructions: How to Make Cajun Cream Sauce
H3Preparation Tips Before Cooking
H3Cooking Process: From Base to Perfection
H3Pro Tips for the Perfect Creamy Texture
H2Delicious Dishes That Pair Perfectly with Cajun Cream Sauce
H3Cajun Cream Sauce with Chicken or Shrimp
H3Vegetarian and Pasta Pairings
H3Creative Uses: Pizza, Burgers, and More
H2Variations of Cajun Cream Sauce
H3Spicy Cajun Cream Sauce
H3Lemon Cajun Cream Sauce
H3Garlic Parmesan Cajun Cream Sauce
H2Common Mistakes to Avoid When Making Cajun Cream Sauce
H3Overheating the Sauce
H3Using the Wrong Cream or Butter
H3Skipping the Seasoning Layering Technique
H2Storage and Reheating Tips
H3How to Store Cajun Cream Sauce Safely
H3Best Reheating Methods to Retain Creaminess
H2Health Benefits and Nutritional Insights
H3Macronutrient Breakdown
H3Tips for Making It Healthier
H2FAQs About Cajun Cream Sauce
H2Conclusion

Introduction to Cajun Cream Sauce

What Is Cajun Cream Sauce?

Cajun Cream Sauce is a luscious, spicy, and flavorful blend that brings the essence of Louisiana’s Cajun cuisine right into your kitchen. Made with butter, cream, garlic, and Cajun spices, this sauce delivers the perfect balance of heat and richness. It’s often used to coat pasta, drizzle over grilled meats, or enhance seafood dishes like shrimp or crawfish.

The History and Origins of Cajun Cuisine

Cajun cuisine has deep roots in the French-speaking Acadian settlers who migrated to Louisiana in the 18th century. They brought with them a tradition of rustic, hearty cooking that combined French techniques with local ingredients. The Cajun Cream Sauce reflects this culinary fusion — a combination of French-inspired creaminess and the bold, earthy spices of Southern cooking.

Why Cajun Cream Sauce Has Become a Kitchen Staple

This sauce’s popularity lies in its versatility. Whether you’re preparing a weeknight dinner or a restaurant-style dish, Cajun Cream Sauce adds instant depth and flavor. It’s a one-pan wonder that pairs perfectly with shrimp, chicken, or pasta — turning even simple meals into gourmet experiences.


Ingredients You’ll Need for the Perfect Cajun Cream Sauce

Key Ingredients and Their Roles

  • Butter: Forms the rich, velvety base of the sauce.
  • Garlic: Adds an aromatic punch.
  • Cajun Seasoning: The heart of the recipe — a mix of paprika, cayenne, garlic powder, and herbs.
  • Heavy Cream: Provides thickness and luxury.
  • Parmesan Cheese: Balances spice with nutty creaminess.
  • Lemon Juice (optional): Adds brightness to cut through the richness.

Choosing the Right Cajun Seasoning

Cajun seasoning varies by brand, but a good blend should balance smoky paprika, pepper, and herbs. You can make your own by combining paprika, garlic powder, onion powder, thyme, oregano, and cayenne pepper.

Substitutions for Dietary Preferences

  • Dairy-Free: Use coconut cream or cashew cream instead of heavy cream.
  • Gluten-Free: Ensure your Cajun seasoning is free of flour or fillers.
  • Low-Sodium: Make homemade seasoning to control salt content.

Step-by-Step Instructions: How to Make Cajun Cream Sauce

Preparation Tips Before Cooking

Start by measuring all ingredients. Cajun Cream Sauce comes together quickly, so having everything ready ensures smooth cooking.

Cooking Process: From Base to Perfection

  1. Melt butter in a skillet over medium heat.
  2. Add minced garlic and sauté for 30 seconds.
  3. Stir in Cajun seasoning and cook for 1 minute to release the spices.
  4. Pour in heavy cream, stirring constantly until thickened.
  5. Add grated Parmesan and mix until smooth and creamy.
  6. Season with salt, pepper, and a squeeze of lemon juice if desired.

Pro Tips for the Perfect Creamy Texture

  • Don’t let the cream boil — simmer gently.
  • Use freshly grated Parmesan for the best consistency.
  • If the sauce thickens too much, thin it with a splash of chicken broth.

Delicious Dishes That Pair Perfectly with Cajun Cream Sauce

Cajun Cream Sauce with Chicken or Shrimp

A classic pairing — toss grilled shrimp or pan-seared chicken in the sauce for a crowd-pleasing dish that’s rich, spicy, and irresistible.

Vegetarian and Pasta Pairings

Cajun Cream Sauce is divine with fettuccine, penne, or even roasted vegetables like bell peppers, mushrooms, and zucchini.

Creative Uses: Pizza, Burgers, and More

Use it as a base for Cajun-style pizza, drizzle it over burgers, or mix it into mashed potatoes for a Southern twist.


Variations of Cajun Cream Sauce

Spicy Cajun Cream Sauce

Add extra cayenne or red pepper flakes for a fiery version that’s perfect for spice lovers.

Lemon Cajun Cream Sauce

A touch of lemon zest gives a refreshing tang that pairs beautifully with seafood.

Garlic Parmesan Cajun Cream Sauce

Boost the garlic and cheese content for a richer, more savory flavor.


Common Mistakes to Avoid When Making Cajun Cream Sauce

Overheating the Sauce

Boiling can cause the cream to separate — always keep it at a low simmer.

Using the Wrong Cream or Butter

Low-fat cream or margarine can make the sauce watery. Always use full-fat cream and real butter.

Skipping the Seasoning Layering Technique

Add Cajun seasoning at different stages — once with the butter, and again at the end — for layered flavor.


Storage and Reheating Tips

How to Store Cajun Cream Sauce Safely

Cool completely and store in an airtight container in the refrigerator for up to 3 days.

Best Reheating Methods

Reheat gently on the stove over low heat, stirring in a tablespoon of milk or cream to restore the texture.


Health Benefits and Nutritional Insights

Macronutrient Breakdown

While Cajun Cream Sauce is indulgent, it offers protein from cheese and calcium from cream. Use moderation for a balanced meal.

Tips for Making It Healthier

Use half-and-half instead of heavy cream, or replace butter with olive oil for a lighter version.


FAQs About Cajun Cream Sauce

  1. Can I freeze Cajun Cream Sauce?
    It’s best enjoyed fresh, but you can freeze it in small portions for up to one month.
  2. What can I use instead of heavy cream?
    Try evaporated milk, coconut cream, or half-and-half.
  3. Is Cajun Cream Sauce spicy?
    It has a mild kick, but you can adjust spice levels to taste.
  4. Can I make it vegan?
    Yes! Use plant-based cream, butter, and nutritional yeast instead of Parmesan.
  5. What pasta goes best with Cajun Cream Sauce?
    Fettuccine, penne, or linguine hold the sauce beautifully.
  6. How can I thicken Cajun Cream Sauce naturally?
    Let it simmer longer or add a bit more Parmesan cheese.

Conclusion

Cajun Cream Sauce is more than just a condiment — it’s a celebration of flavor, culture, and comfort. Whether you pour it over shrimp, swirl it into pasta, or drizzle it on steak, this sauce transforms ordinary dishes into Southern masterpieces.


McDonald’s BBQ Sauce (Copycat Recipe): Sweet, Smoky & Addictively Tangy

McDonald’s BBQ Sauce

table of contents
Heading LevelSection Title / Subheading
H1McDonald’s BBQ Sauce (Copycat Recipe): Sweet, Smoky & Addictively Tangy
H2Introduction: The Secret Behind McDonald’s Famous BBQ Sauce
H2Why This Homemade BBQ Sauce Beats the Drive-Thru
H3Affordable, Easy, and Fast
H3Pantry Ingredients, Big Flavor
H2Ingredients You’ll Need
H3Core Ingredients Explained
H3Optional Flavor Enhancers
H2Step-by-Step Instructions: How to Make McDonald’s BBQ Sauce at Home
H3Step 1: Combine and Simmer
H3Step 2: Adjust Thickness and Taste
H3Step 3: Cool and Store Properly
H2Tips to Perfect the McDonald’s-Style BBQ Sauce
H3Matching That Signature Sweet-Smoky Balance
H3Adjusting for Spice, Tang, and Texture
H2Delicious Ways to Use This Copycat BBQ Sauce
H3Classic Pairings
H3Creative Twists
H2Storing and Shelf Life
H3Refrigerator Storage
H3Freezer Option
H2Nutrition Information
H2Common Mistakes to Avoid
H2FAQs About McDonald’s BBQ Sauce Copycat
H2Conclusion: Make Every Nugget Dunk Worth It

Introduction: The Secret Behind McDonald’s Famous BBQ Sauce

There’s something magical about that little tub of McDonald’s BBQ Sauce. It’s tangy, a little smoky, perfectly sweet — and somehow, it goes with everything. From crispy nuggets to fries and burgers, this sauce is the true unsung hero of the Golden Arches menu.

Now, you can make that same irresistible flavor right at home. This copycat recipe is quick, simple, and shockingly close to the real thing. You’ll only need common pantry staples and about 10 minutes on the stove.


Why This Homemade BBQ Sauce Beats the Drive-Thru

Affordable, Easy, and Fast

Why pay extra for tiny sauce cups when you can make a jar full for pennies? This recipe comes together in under 15 minutes — no fancy tools, no long simmering time.

Pantry Ingredients, Big Flavor

Everything in this recipe — from ketchup to vinegar and brown sugar — might already be in your kitchen. Yet, together they form the perfect sweet-smoky balance you’d swear came straight from a McDonald’s bag.


Ingredients You’ll Need

Core Ingredients Explained

IngredientPurpose
1 cup ketchupThe base of the sauce; adds tang and body.
¼ cup apple cider vinegarGives that signature mild tang.
¼ cup brown sugarAdds sweetness and a hint of molasses flavor.
2 tbsp molassesDeepens the color and gives that smoky sweetness.
1 tbsp Worcestershire sauceBoosts umami and richness.
1 tsp liquid smokeOptional, but it adds that “grilled” taste.
½ tsp onion powderEnhances savory flavor.
½ tsp garlic powderBalances sweetness.
½ tsp paprikaAdds subtle warmth and color.
¼ tsp mustard powderBrightens the flavor.
Pinch of salt and black pepperBrings everything together.

Optional Flavor Enhancers

  • Dash of hot sauce for a spicy twist.
  • 1 tbsp honey for a silkier texture.
  • A few drops of lemon juice to add brightness.

Step-by-Step Instructions: How to Make McDonald’s BBQ Sauce at Home

Step 1: Combine and Simmer

In a small saucepan, whisk together all ingredients over medium heat. Bring the mixture to a gentle simmer, stirring often so the sugar doesn’t stick or burn.

Step 2: Adjust Thickness and Taste

Let the sauce cook for about 10 minutes, until it slightly thickens. Taste and tweak — add more vinegar for tang, sugar for sweetness, or a touch more molasses for richness.

Step 3: Cool and Store Properly

Remove from heat and let the sauce cool. It will thicken more as it sits. Pour into a jar or airtight container and refrigerate.


Tips to Perfect the McDonald’s-Style BBQ Sauce

Matching That Signature Sweet-Smoky Balance

The secret lies in the molasses + vinegar combo. Don’t skip the molasses—it’s what gives this copycat its restaurant-style depth.

Adjusting for Spice, Tang, and Texture

  • Want it tangier? Add extra vinegar.
  • Prefer sweeter? Increase brown sugar by a tablespoon.
  • Love smoky BBQ flavor? Add a few extra drops of liquid smoke.

Delicious Ways to Use This Copycat BBQ Sauce

Classic Pairings

  • Chicken nuggets (of course!)
  • Crispy fries
  • Burgers, sliders, or grilled chicken sandwiches

Creative Twists

  • Use as a pizza base for BBQ chicken pizza.
  • Drizzle over grilled veggies or pulled pork.
  • Mix with mayo or ranch for a creamy dipping sauce hybrid.

Storing and Shelf Life

Refrigerator Storage

Store in a sealed jar in the fridge for up to 2 weeks. Shake before each use to redistribute the flavors.

Freezer Option

Freeze in small containers for up to 3 months. Thaw overnight in the fridge and reheat gently before serving.


Nutrition Information

Serving Size2 tablespoons
Calories~45 kcal
Sugar8g
Fat0g
Sodium180mg
Carbohydrates11g

Health Note: This sauce is lower in sodium and sugar than store-bought BBQ sauces, making it a smart homemade alternative.


Common Mistakes to Avoid

  • Over-boiling: The sugar can caramelize too much, altering flavor.
  • Skipping molasses: It’s key to achieving that dark, smoky taste.
  • Not cooling completely: The sauce thickens as it rests; judge texture after cooling.

FAQs About McDonald’s BBQ Sauce Copycat

Q1: Can I make this sugar-free?
Yes! Use brown sugar substitute or honey-flavored monk fruit for similar sweetness.

Q2: What kind of ketchup works best?
Regular tomato ketchup — not fancy or spicy — gives the most authentic flavor.

Q3: How do I make it thicker?
Simmer longer or add 1 tsp cornstarch dissolved in a bit of water.

Q4: Can I make a smoky version without liquid smoke?
Use smoked paprika or a drop of chipotle sauce instead.

Q5: How long does it last?
Up to 2 weeks refrigerated, or 3 months frozen.

Q6: Does it really taste like McDonald’s BBQ sauce?
Yes — nearly identical! Some even say it’s better because it’s fresher and more balanced.


Conclusion: Make Every Nugget Dunk Worth It

The McDonald’s BBQ Sauce (Copycat Recipe) is pure dipping perfection — sweet, smoky, and tangy all at once. You don’t need a drive-thru to enjoy it anymore.

Whether you’re dunking nuggets, slathering burgers, or marinating ribs, this sauce will instantly transport your taste buds to that familiar McDonald’s flavor — only better because you made it yourself.

So grab your saucepan, whip up a batch, and enjoy the satisfaction of homemade fast-food flavor at its finest. 🍔🔥


Candied Jalapeños Recipe: Sweet Heat You’ll Want on Everything

Candied Jalapeños
Cowboy Candy Candied Jalapenos 16

Outline for “Candied Jalapeños”
Heading LevelSection Title / Subheading
H1Candied Jalapeños Recipe: Sweet Heat You’ll Want on Everything
H2Introduction: What Are Candied Jalapeños (Cowboy Candy)?
H2The Sweet and Spicy Magic of Candied Jalapeños
H3How the Flavor Profile Works
H3Why They’re Called “Cowboy Candy”
H2Ingredients You’ll Need to Make Candied Jalapeños
H3Fresh Ingredients List
H3Optional Add-Ins for Extra Flavor
H2Step-by-Step Instructions for Homemade Candied Jalapeños
H3Step 1: Prepping the Jalapeños
H3Step 2: Making the Syrup
H3Step 3: Cooking and Simmering the Jalapeños
H3Step 4: Canning or Storing for Later Use
H2Pro Tips for the Best Cowboy Candy
H3Adjusting Sweetness and Heat Levels
H3Getting the Perfect Texture
H2Delicious Ways to Use Candied Jalapeños
H3Topping Ideas for Everyday Meals
H3Pairing with Cheese Boards and Appetizers
H2Variations and Creative Twists
H3Honey Candied Jalapeños
H3Maple Bourbon Cowboy Candy
H3Pineapple Jalapeño Mix
H2Storing and Preserving Candied Jalapeños
H3Fridge Storage
H3Long-Term Canning Tips
H2Nutritional Information and Health Benefits
H2Common Mistakes to Avoid
H2FAQs About Candied Jalapeños
H2Conclusion: Why You’ll Always Want a Jar on Hand


Introduction: What Are Candied Jalapeños (Cowboy Candy)?

Candied Jalapeños, also known as Cowboy Candy, are slices of fresh jalapeño peppers simmered in a thick, sugary syrup until they become glossy, sticky, and packed with sweet heat. They’re the perfect condiment to elevate everyday meals—adding a little kick and a lot of flavor.

This Southern favorite originated in Texas, where it quickly became a staple on everything from grilled meats to sandwiches. The combination of spice, sweetness, and tang is pure perfection.


The Sweet and Spicy Magic of Candied Jalapeños

How the Flavor Profile Works

Candied jalapeños balance three core flavor sensations—sweet, spicy, and tangy. The sugar syrup tames the pepper’s heat, while the vinegar adds brightness, creating a taste that’s addictively bold.

Why They’re Called “Cowboy Candy”

The name comes from old ranch traditions. Cowboys would carry spicy preserved peppers to add flavor to camp meals—over time, locals sweetened them with sugar to make a candy-like treat.


Ingredients You’ll Need to Make Candied Jalapeños

Fresh Ingredients List

IngredientQuantity
Fresh jalapeños2 pounds
Granulated sugar3 cups
Apple cider vinegar1 cup
Garlic powder½ tsp
Turmeric¼ tsp
Celery seed½ tsp
Cayenne pepper¼ tsp (optional for extra heat)

Optional Add-Ins for Extra Flavor

  • A splash of honey for smooth sweetness
  • Cinnamon stick for depth
  • Lime zest for citrusy brightness

Step-by-Step Instructions for Homemade Candied Jalapeños

Step 1: Prepping the Jalapeños

Wash the jalapeños and slice them into ¼-inch rounds. Wear gloves—these peppers can burn your skin! Remove seeds for a milder flavor or keep them for more heat.

Step 2: Making the Syrup

In a saucepan, combine sugar, vinegar, turmeric, garlic powder, and celery seed. Bring to a gentle boil over medium heat until the sugar dissolves completely.

Step 3: Cooking and Simmering the Jalapeños

Add the jalapeño slices to the syrup. Simmer for 15–20 minutes, stirring occasionally, until they turn glossy and slightly translucent.

Step 4: Canning or Storing for Later Use

Transfer the jalapeños to sterilized jars using tongs. Pour the hot syrup over them until fully covered. Seal tightly and let them cool before storing.


Pro Tips for the Best Cowboy Candy

Adjusting Sweetness and Heat Levels

  • For more heat, reduce the sugar slightly or include pepper seeds.
  • For less heat, blanch the jalapeños briefly before adding them to syrup.

Getting the Perfect Texture

Simmer until the syrup thickens enough to coat a spoon. Overcooking will make them chewy; undercooking keeps them too crisp.


Delicious Ways to Use Candied Jalapeños

Topping Ideas for Everyday Meals

  • Spread over cream cheese and crackers
  • Add to burgers, pulled pork, or hot dogs
  • Mix into coleslaw or potato salad for extra zing
  • Spoon over grilled chicken or steak

Pairing with Cheese Boards and Appetizers

Candied jalapeños are a showstopper on charcuterie boards. Their sweet-spicy flavor pairs beautifully with sharp cheddar, brie, or smoked gouda.


Variations and Creative Twists

Honey Candied Jalapeños

Swap half the sugar for honey—adds a floral, silky sweetness.

Maple Bourbon Cowboy Candy

Use maple syrup and a splash of bourbon in the syrup for a smoky, rich twist.

Pineapple Jalapeño Mix

Add small pineapple chunks to the pot for a tropical flavor explosion.


Storing and Preserving Candied Jalapeños

Fridge Storage

Keep in airtight jars in the refrigerator for up to 3 months. The flavors intensify over time.

Long-Term Canning Tips

Use proper water-bath canning methods for jars if you want to store them at room temperature for up to 1 year. Always sterilize jars and lids beforehand.


Nutritional Information and Health Benefits

NutrientAmount per Tablespoon
Calories35 kcal
Sugar8g
Vitamin C10% Daily Value
CapsaicinNatural metabolism booster

Health Tip: The capsaicin in jalapeños supports metabolism, while the vinegar helps with digestion.


Common Mistakes to Avoid

  • Using old or soft jalapeños—fresh is key!
  • Boiling too long—results in burnt sugar and bitterness.
  • Not using enough vinegar—leads to poor preservation.
  • Skipping gloves—your hands will thank you later.

FAQs About Candied Jalapeños

Q1: How long before I can eat them?
They’re best after sitting for 1–2 weeks, allowing flavors to meld.

Q2: Can I use other peppers?
Yes! Try serrano or Fresno chiles for variety.

Q3: Are candied jalapeños very spicy?
They’re moderately spicy—the sugar balances the heat.

Q4: Can I make them sugar-free?
You can use monk fruit or erythritol, though texture may differ.

Q5: What’s the best vinegar to use?
Apple cider vinegar adds depth, but white vinegar works fine.

Q6: Can I reuse leftover syrup?
Absolutely! Use it as a glaze for meats or drizzle over cornbread.


Conclusion: Why You’ll Always Want a Jar on Hand

Candied jalapeños are more than a condiment—they’re a flavor powerhouse. Whether you call them Cowboy Candy or sweet fire rings, their addictive balance of sugar and spice makes them a must-have in every kitchen.

Once you try them on a burger or cream cheese dip, you’ll understand why people make batches at a time—and guard their jars like treasure.

So grab your jalapeños, make some syrup, and let that sweet heat shine!

Texas Roadhouse Butter Chicken Skillet Recipe: A Creamy, Buttery Delight for Every Food Lover

Texas Roadhouse Butter Chicken Skillet Recipe
texas roadhouse butter chicken skillet

Outline for “Texas Roadhouse Butter Chicken Skillet”
Heading LevelSection Title / Subheading
H1Texas Roadhouse Butter Chicken Skillet Recipe: A Creamy, Buttery Delight for Every Food Lover
H2Introduction: The Irresistible Charm of Texas Roadhouse Butter Chicken Skillet
H2What Makes the Texas Roadhouse Butter Chicken Skillet So Special?
H3The Signature Texas Roadhouse Touch
H3Why “Butter Chicken” Has Become a Comfort Food Staple
H2Ingredients Needed for Texas Roadhouse Butter Chicken Skillet
H3Main Ingredients
H3Optional Add-Ons and Variations
H2Step-by-Step Cooking Instructions
H3Step 1: Preparing the Chicken
H3Step 2: Making the Buttery Garlic Sauce
H3Step 3: Searing, Simmering, and Finishing the Skillet
H2Expert Tips to Perfect the Recipe
H3Getting That Signature Golden Sear
H3Adjusting the Creaminess and Spice Level
H2Delicious Serving Suggestions
H3Side Dishes That Pair Perfectly
H3Beverage Pairings for a Complete Meal
H2Nutrition Breakdown and Health Insights
H3Calorie Count and Macronutrient Overview
H3Making a Lighter Version of the Dish
H2Storage and Reheating Instructions
H3How to Store Butter Chicken Skillet
H3The Best Way to Reheat Without Losing Flavor
H2Variations of Texas Roadhouse Butter Chicken Skillet
H3Creamy Mushroom Version
H3Spicy Cajun Twist
H3Dairy-Free and Keto-Friendly Alternatives
H2Common Mistakes to Avoid When Cooking Butter Chicken
H2FAQs About Texas Roadhouse Butter Chicken Skillet
H2Conclusion: Why This Dish Deserves a Spot in Your Weekly Menu

Introduction: The Irresistible Charm of Texas Roadhouse Butter Chicken Skille

The Texas Roadhouse Butter Chicken Skillet has become a viral sensation among comfort-food lovers. Though it’s not an official menu item, this home-style recreation captures everything fans adore about Texas Roadhouse—juicy chicken, savory butter, and a touch of southern charm.

Imagine tender chicken cooked to perfection in a sizzling skillet, bathed in a luscious garlic-butter sauce, and served piping hot. This dish is both rustic and indulgent, making it the perfect centerpiece for any weeknight dinner or special family gathering.


What Makes the Texas Roadhouse Butter Chicken Skillet So Special?

The Signature Texas Roadhouse Touch

Texas Roadhouse is known for hearty, down-home meals—steaks, ribs, and buttery rolls. The Butter Chicken Skillet embodies that same warmth with its simple yet powerful flavors. It’s made with pantry staples but tastes like a restaurant-quality dish.

Why “Butter Chicken” Has Become a Comfort Food Staple

Butter-based sauces have a way of transforming ordinary chicken into something extraordinary. The silky texture and rich aroma provide a comforting experience that resonates with everyone—from picky eaters to seasoned foodies.


Ingredients Needed for Texas Roadhouse Butter Chicken Skillet

Main Ingredients

IngredientQuantity
Chicken breasts or thighs4 pieces
Olive oil2 tbsp
Unsalted butter¼ cup
Garlic (minced or powdered)2 tsp
Honey2 tsp
Salt½ tsp
Black pepper½ tsp
Smoked paprika½ tsp (optional)
Chicken broth¼ cup
Fresh parsleyFor garnish

Optional Add-Ons and Variations

  • Creamy Twist: Add 2 tbsp heavy cream for a rich, velvety sauce.
  • Herbal Boost: Toss in fresh thyme or rosemary.
  • Spicy Kick: Include a pinch of cayenne or chili flakes.

Step-by-Step Cooking Instructions

Step 1: Preparing the Chicken

Pat the chicken dry, season it with salt, pepper, garlic, and paprika, and set aside. A dry surface ensures a crisp, golden sear later.

Step 2: Making the Buttery Garlic Sauce

In a large skillet, melt butter over medium heat. Add honey and garlic, stirring until fragrant. The honey balances the savory richness with a subtle sweetness.

Step 3: Searing, Simmering, and Finishing the Skillet

Heat olive oil in the same pan, sear chicken on both sides for 5–6 minutes until golden brown. Add chicken broth and let it simmer. Spoon the buttery sauce over the chicken to coat evenly.


Expert Tips to Perfect the Recipe

Getting That Signature Golden Sear

Avoid overcrowding the pan; give each piece space. Searing locks in moisture and creates a delicious crust.

Adjusting the Creaminess and Spice Level

  • For a richer sauce, stir in heavy cream.
  • For heat, add a dash of paprika or cayenne.
  • Want it lighter? Use less butter and more broth.

Delicious Serving Suggestions

Side Dishes That Pair Perfectly

  • Mashed potatoes or roasted garlic rice
  • Steamed green beans or sautéed spinach
  • Fresh rolls or garlic bread (for mopping up that sauce!)

Beverage Pairings for a Complete Meal

  • Sweet iced tea or lemonade for a Southern twist
  • A crisp white wine (like Chardonnay) complements the buttery flavor

Nutrition Breakdown and Health Insights

NutrientAmount per Serving
Calories~420 kcal
Protein34g
Fat28g
Carbohydrates8g

Making a Lighter Version of the Dish

Swap butter for olive oil, reduce honey, and use chicken breast instead of thighs. You’ll still enjoy a flavorful, satisfying meal—just with fewer calories.


Storage and Reheating Instructions

How to Store Butter Chicken Skillet

Store leftovers in an airtight container in the refrigerator for up to 3 days.

The Best Way to Reheat Without Losing Flavor

Reheat gently in a skillet over low heat, adding a splash of broth to revive the sauce’s creaminess.


Variations of Texas Roadhouse Butter Chicken Skillet

Creamy Mushroom Version

Add sautéed mushrooms for an earthy, rich flavor.

Spicy Cajun Twist

Sprinkle Cajun seasoning for a smoky Southern touch.

Dairy-Free and Keto-Friendly Alternatives

Use ghee or vegan butter and skip the honey for a low-carb version.


Common Mistakes to Avoid When Cooking Butter Chicken

  • Overcrowding the skillet
  • Using cold chicken straight from the fridge
  • Burning the butter (keep heat medium-low once added)
  • Skipping the resting time—juices need to settle for tenderness

FAQs About Texas Roadhouse Butter Chicken Skillet

Q1: Can I use chicken thighs instead of breasts?
Absolutely. Thighs add extra juiciness and deeper flavor.

Q2: Is this the same as Indian Butter Chicken?
No—this is an American-style version inspired by Texas Roadhouse flavors.

Q3: How long does this take to cook?
About 25–30 minutes from start to finish.

Q4: Can I meal-prep this recipe?
Yes! It reheats beautifully for lunches throughout the week.

Q5: What can I do with leftover sauce?
Pour it over pasta, rice, or even roasted vegetables.

Q6: Can I grill instead of pan-sear?
Yes—grill the chicken, then toss it in the butter sauce for a smoky version.


Conclusion: Why This Dish Deserves a Spot in Your Weekly Menu

The Texas Roadhouse Butter Chicken Skillet is comfort food perfection—simple ingredients, buttery flavor, and a restaurant-style finish all in one pan. Whether you’re hosting dinner or just treating yourself, this recipe proves that you don’t need to dine out to enjoy five-star taste at home.

Try it once, and it’ll become a family favorite you’ll crave week after week.

BBQ Chicken with Sauce: The Ultimate Recipe for Juicy, Flavorful Perfection (2025 Guide)

BBQ Chicken with Sauce: The Ultimate Recipe for Juicy, Flavorful Perfection (2025 Guide)

👋 Welcome!

BBQ chicken being brushed with thick homemade sauce on a hot grill, with glowing charcoal and grill marks visible, chef’s hand holding a brush, warm outdoor setting, shallow depth of field.

Outline
Heading LevelSection Title
H1BBQ Chicken with Sauce: The Ultimate Recipe for Juicy, Flavorful Perfection (2025 Guide)
H2Introduction to BBQ Chicken with Sauce
H3What Makes BBQ Chicken So Popular
H3The Role of Sauce in Perfecting BBQ Chicken
H2Essential Ingredients for BBQ Chicken with Sauce
H3Choosing the Right Chicken Cuts
H3Key Ingredients for the Marinade
H3Best BBQ Sauce Base: Sweet, Spicy, or Smoky
H2How to Make BBQ Chicken with Sauce (Step-by-Step Guide)
H3Step 1: Preparing the Chicken
H3Step 2: Making the Perfect BBQ Sauce
H3Step 3: Marinating for Maximum Flavor
H3Step 4: Grilling or Baking to Juicy Perfection
H3Step 5: Adding and Caramelizing the Sauce
H2Top BBQ Sauce Variations to Try
H3Classic American BBQ Sauce
H3Honey Garlic BBQ Sauce
H3Spicy Chipotle BBQ Sauce
H3Asian-Style BBQ Sauce with Soy and Ginger
H2Tips for Cooking the Best BBQ Chicken with Sauce
H3How to Prevent Dry Chicken
H3Timing and Temperature Secrets
H3Basting vs. Brushing: What Works Best
H2Serving Suggestions for BBQ Chicken
H3Best Side Dishes to Pair With BBQ Chicken
H3Presentation and Garnishing Ideas
H2Health Benefits and Nutritional Insights
H3Is BBQ Chicken a Healthy Option?
H3How to Make It Healthier Without Losing Flavor
H2Common Mistakes When Making BBQ Chicken with Sauce
H3Overcooking or Undercooking the Chicken
H3Applying Sauce Too Early
H3Using Low-Quality Ingredients
H2Frequently Asked Questions (FAQs)
H2Conclusion: Mastering the Art of BBQ Chicken with Sauce

Introduction to BBQ Chicken with Sauce

Few dishes can rival the mouthwatering aroma of BBQ chicken with sauce sizzling on the grill. This timeless favorite is a summer essential, uniting families and friends over its smoky, caramelized, and irresistibly tangy flavor. But what truly sets the best BBQ chicken apart is the sauce — the sweet, spicy, or smoky glaze that gives every bite a burst of perfection.

What Makes BBQ Chicken So Popular

BBQ chicken has earned its spot as a global comfort food. Its versatility allows you to enjoy it at cookouts, family dinners, or even in sandwiches and wraps. The blend of tender meat and flavorful sauce makes it both satisfying and crowd-pleasing.

The Role of Sauce in Perfecting BBQ Chicken

A great BBQ sauce isn’t just a condiment — it’s the soul of the dish. It enhances the flavor, seals in moisture, and creates a glossy finish when caramelized on heat. The right sauce can transform ordinary chicken into a culinary masterpiece.


Essential Ingredients for BBQ Chicken with Sauce

Choosing the Right Chicken Cuts

BBQ chicken being brushed with thick homemade sauce on a hot grill, with glowing charcoal and grill marks visible, chef’s hand holding a brush, warm outdoor setting, shallow depth of field.

When it comes to BBQ chicken, not all cuts are created equal. While drumsticks and thighs offer juicy richness, chicken breasts are leaner and quicker to cook. Bone-in cuts are preferred for grilling because they retain moisture better under high heat.

Key Ingredients for the Marinade

A well-balanced marinade typically includes:

  • Olive oil or buttermilk (for tenderness)
  • Garlic and onion powder (for depth of flavor)
  • Paprika or chili flakes (for heat)
  • Brown sugar or honey (for sweetness)
  • Lemon juice or vinegar (for tang)

Let the chicken soak for at least 2–4 hours to absorb all the flavors.

Best BBQ Sauce Base: Sweet, Spicy, or Smoky

The best part about BBQ sauce is its adaptability:

  • Sweet sauces often feature brown sugar, honey, or molasses.
  • Spicy versions include chili, cayenne, or chipotle.
  • Smoky sauces use smoked paprika or liquid smoke for that classic BBQ taste.

How to Make BBQ Chicken with Sauce (Step-by-Step Guide)

Step 1: Preparing the Chicken

Rinse and pat dry your chicken pieces. Trim excess fat, but leave the skin on for extra flavor.

Step 2: Making the Perfect BBQ Sauce

A saucepan on a stove with simmering BBQ sauce made from ketchup, brown sugar, and spices, steam rising, spoon stirring the sauce, kitchen background, cozy lighting.

In a saucepan, combine:

  • 1 cup ketchup
  • ¼ cup apple cider vinegar
  • ¼ cup brown sugar
  • 2 tbsp Worcestershire sauce
  • 1 tbsp mustard
  • 1 tsp garlic powder
  • Salt, pepper, and chili flakes to taste

Simmer until thick and glossy.

Step 3: Marinating for Maximum Flavor

Coat the chicken with the marinade and refrigerate for several hours. This allows the flavors to penetrate deep into the meat.

Step 4: Grilling or Baking to Juicy Perfection

Grill over medium heat (350°F–375°F) for about 30–40 minutes, turning occasionally. For baked BBQ chicken, cook at 400°F for 25–30 minutes, then broil for 5 minutes to caramelize.

Step 5: Adding and Caramelizing the Sauce

Brush sauce generously during the last 10 minutes of cooking to avoid burning. This gives you that glossy, sticky finish that defines true BBQ chicken.


Top BBQ Sauce Variations to Try

Classic American BBQ Sauce

Rich, tangy, and slightly sweet — a perfect match for any grilled meat.

HoneySpicy Honey Garlic Dipping Sauce Easy Recipe Garlic BBQ Sauce

Combines the sweetness of honey with the savory punch of garlic. Great for families and kids.

Spicy Chipotle BBQ Sauce

Ideal for those who crave a fiery kick and smoky depth.

Asian-Style BBQ Sauce with Soy and Ginger

A fusion twist with soy sauce, rice vinegar, and a hint of ginger for complexity.


Tips for Cooking the Best BBQ Chicken with Sauce

  • Use indirect heat for even cooking.
  • Avoid applying sauce too early — it can burn before the chicken is done.
  • Let the chicken rest for 5 minutes before serving to lock in juices.
  • Baste often for extra flavor layers.

Serving Suggestions for BBQ Chicken

Best Side Dishes to Pair With BBQ Chicken

A flavorful plate of BBQ chicken with sauce deserves equally satisfying sides. Here are some perfect pairings:

  • Classic coleslaw – The creamy crunch contrasts beautifully with the smoky meat.
  • Corn on the cob – Grilled or boiled, buttered corn is a BBQ must-have.
  • Baked beans – Their sweet and smoky flavor complements BBQ sauce perfectly.
  • Macaroni and cheese – The rich, cheesy texture balances the tangy sauce.
  • Potato salad – A cool, hearty side that adds freshness to your plate.

Presentation and Garnishing Ideas

Serve your BBQ chicken on a wooden platter for a rustic feel. Garnish with fresh parsley or cilantro, add lemon wedges, and drizzle a bit of extra BBQ sauce for shine. For a restaurant-style touch, sprinkle some smoked paprika on top.


Health Benefits and Nutritional Insights

Is BBQ Chicken a Healthy Option?

Surprisingly, BBQ chicken with sauce can be part of a balanced diet. Chicken is an excellent source of lean protein, providing essential amino acids for muscle growth and repair. When grilled instead of fried, it’s lower in fat and calories.

However, moderation is key — BBQ sauces can contain sugar and sodium. To make your BBQ meal healthier, go for homemade sauces where you control the ingredients.

How to Make It Healthier Without Losing Flavor

  • Use skinless chicken breasts for less fat.
  • Replace sugar with honey or maple syrup.
  • Add apple cider vinegar to cut down on sweetness.
  • Brush sauce lightly instead of drenching the chicken.

For a complete healthy meal, serve your BBQ chicken with grilled vegetables or fresh salad instead of starchy sides.


Common Mistakes When Making BBQ Chicken with Sauce

Overcooking or Undercooking the Chicken

One of the biggest mistakes is not checking internal temperature. Always use a meat thermometer — the perfect temp is 165°F (74°C) for juicy, fully cooked chicken.

Applying Sauce Too Early

If you add the sauce too soon, the sugars in it will burn before the meat finishes cooking. Apply it in the last 10 minutes for the best caramelization.

Using Low-Quality Ingredients

Cheap sauces or frozen chicken can ruin the texture and taste. Always use fresh chicken and high-quality spices to bring out authentic BBQ flavor.


Frequently Asked Questions (FAQs)

1. Can I make BBQ chicken with sauce in the oven?
Yes! Preheat the oven to 400°F (200°C), bake the chicken for 25–30 minutes, then brush with BBQ sauce and broil for an additional 5 minutes for a crispy glaze.

2. What’s the best BBQ sauce for chicken?
It depends on your preference. Sweet and tangy sauces are classic, while spicy chipotle or honey garlic versions offer exciting variations.

3. How long should I marinate BBQ chicken?
Marinate for at least 2–4 hours. For best results, leave it overnight so the flavors penetrate deep into the meat.

4. Can I use store-bought BBQ sauce?
Absolutely! But for a more authentic, fresher taste, tweak it by adding a bit of honey, lemon juice, or chili flakes.

5. Should I grill chicken with the lid open or closed?
For thicker cuts, keep the lid closed to trap heat and cook evenly. For smaller cuts like wings or thighs, you can leave it open to monitor closely.

6. What can I do with leftover BBQ chicken?
Leftovers make delicious BBQ chicken sandwiches, wraps, or salads. Store them in an airtight container and refrigerate for up to 3 days.


Conclusion: Mastering the Art of BBQ Chicken with Sauce

BBQ chicken with sauce is more than just a dish — it’s a celebration of flavor, family, and summertime joy. Whether grilled outdoors or baked indoors, it brings together sweet, smoky, and tangy elements that never fail to impress.

By choosing the right ingredients, marinating with care, and mastering the timing, you can create a dish that rivals restaurant-quality BBQ. Remember, the secret lies in the sauce — so experiment with flavors, enjoy the process, and let every bite remind you why BBQ chicken remains a timeless favorite.

For more BBQ inspiration and sauce variations, check out Food Network’s BBQ recipes.


Peach Carolina Reaper Sauce: The Ultimate Blend of Sweet and Heat

Peach Carolina Reaper Sauce
ChatGPT Image Nov 3 2025 07 06 06 PM

Comprehensive Outline for “Peach Carolina Reaper Sauce”
Heading LevelHeading / Subheading
H1Peach Carolina Reaper Sauce: The Ultimate Blend of Sweet and Heat
H21. What is Peach Carolina Reaper Sauce?
H3Origins of the Carolina Reaper Pepper
H3The Role of Peach in Balancing the Heat
H3Flavor Profile: Sweet, Smoky, and Fiery
H22. Ingredients That Make the Perfect Peach Carolina Reaper Sauce
H3Key Ingredients: Peaches, Reapers, and Vinegar
H3Optional Add-Ins for Flavor Enhancement
H3Choosing Fresh vs. Frozen Peaches
H23. How to Make Homemade Peach Carolina Reaper Sauce
H3Step-by-Step Recipe
H4Preparation Tips for Handling Reaper Peppers Safely
H4Cooking and Blending for Perfect Consistency
H3Bottling and Storing Your Hot Sauce
H24. Pairing Ideas: How to Use Peach Carolina Reaper Sauce in Everyday Meals
H3Perfect with Grilled Meats and Barbecue
H3Elevating Burgers, Wings, and Tacos
H3Surprising Pairings: Desserts and Cocktails
H25. The Science Behind the Heat: Scoville Scale and Spice Level
H3Understanding the Carolina Reaper’s 2.2 Million SHU
H3How Peaches Mellow the Fire
H3Tolerance Tips for Spicy Food Lovers
H26. Health Benefits of Peach Carolina Reaper Sauce
H3Boosts Metabolism and Heart Health
H3Rich in Vitamins and Antioxidants
H3Natural Mood and Immunity Enhancer
H27. Popular Brands and Where to Buy Peach Carolina Reaper Sauce
H3Top Commercial Sauces in the Market
H3Small-Batch Artisanal Brands
H3Where to Buy Online
H28. Common Mistakes When Making Peach Carolina Reaper Sauce
H3Overpowering the Sauce with Too Much Heat
H3Not Balancing Sweetness and Acidity
H3Improper Storage and Preservation
H29. Expert Tips for Customizing Your Sauce
H3Adjusting Heat Levels Safely
H3Infusing with Herbs and Spices
H3Creating a Smoky or Tangy Variation
H210. FAQs About Peach Carolina Reaper Sauce
H31. How hot is Peach Carolina Reaper Sauce compared to other hot sauces?
H32. Can I use canned peaches instead of fresh ones?
H33. How long does homemade sauce last in the fridge?
H34. Is Peach Carolina Reaper Sauce gluten-free and vegan?
H35. How can I tone down the heat if it’s too spicy?
H36. Can I use this sauce for marinades or dips?
H211. Conclusion: A Fiery Fusion Worth the Flavor

If you’re a fan of bold flavors, Peach Carolina Reaper Sauce might just become your new obsession. Combining the world’s hottest pepper with the juicy sweetness of ripe peaches, this sauce offers a unique flavor experience — one that balances fire and fruit in perfect harmony. Whether drizzled over grilled chicken, mixed into marinades, or used as a spicy dipping sauce, this fiery blend brings your meals to life.


1. What is Peach Carolina Reaper Sauce?

Origins of the Carolina Reaper Pepper

The Carolina Reaper, developed by Ed Currie of the PuckerButt Pepper Company, holds the Guinness World Record as the hottest chili pepper on Earth, with a mind-blowing 2.2 million Scoville Heat Units (SHU). Despite its intensity, the Reaper isn’t just about pain — it has a fruity, slightly smoky flavor that complements sweet ingredients like peaches beautifully.

The Role of Peach in Balancing the Heat

Peaches add natural sugars and a delicate floral note that mellow out the Reaper’s fiery punch. The fruit’s juicy texture also gives the sauce a smooth consistency, making it perfect for glazing meats or topping tacos.

Flavor Profile: Sweet, Smoky, and Fiery

Peach Carolina Reaper Sauce offers a unique trifecta: sweetness from peaches, smokiness from roasted peppers, and heat from the Reaper. This balance makes it incredibly versatile — not just a “hot-for-hot’s-sake” condiment.


2. Ingredients That Make the Perfect Peach Carolina Reaper Sauce

Key Ingredients: Peaches, Reapers, and Vinegar

To make an authentic Peach Carolina Reaper Sauce, you’ll need:

  • Fresh or frozen peaches
  • Carolina Reaper peppers (use gloves!)
  • Apple cider vinegar
  • Garlic and onions
  • Lime juice and salt

These ingredients combine to create a sauce that’s both flavorful and shelf-stable.

Optional Add-Ins for Flavor Enhancement

You can get creative by adding honey for sweetness, smoked paprika for depth, or ginger for a citrusy kick. Some cooks even add bourbon or mango for a gourmet twist.

Choosing Fresh vs. Frozen Peaches

Fresh peaches offer the best flavor, especially in summer. However, frozen peaches are a great year-round option and retain most of their nutrients and sweetness.


3. How to Make Homemade Peach Carolina Reaper Sauce

Step-by-Step Recipe

  1. Prepare ingredients: Chop peaches, onions, and garlic. Handle Carolina Reapers with care — wear gloves and avoid touching your face.
  2. Sauté base ingredients: In a saucepan, cook onions and garlic until translucent.
  3. Add fruits and peppers: Stir in peaches, Reaper peppers, vinegar, and lime juice.
  4. Simmer and blend: Let it simmer for 15 minutes, then blend until smooth.
  5. Bottle: Pour into sterilized bottles and refrigerate.

Preparation Tips for Handling Reaper Peppers Safely

Always wear gloves and work in a ventilated area. The oils from Carolina Reapers can irritate your skin and eyes even after washing.

Cooking and Blending for Perfect Consistency

To achieve restaurant-quality texture, blend the sauce thoroughly, then strain it through a fine mesh sieve for a silky finish.

Bottling and Storing Your Hot Sauce

Homemade hot sauce lasts about 3–4 months in the fridge. Adding vinegar helps extend its shelf life naturally.


4. Pairing Ideas: How to Use Peach Carolina Reaper Sauce in Everyday Meals

Perfect with Grilled Meats and Barbecue

The sweet-heat balance pairs beautifully with grilled chicken, ribs, or pork chops. Brush it on during the final minutes of cooking for a caramelized glaze.

Elevating Burgers, Wings, and Tacos

Add a spoonful to your burger for a fiery twist, toss wings for a mouthwatering kick, or drizzle over fish tacos for a burst of tropical heat.

Surprising Pairings: Desserts and Cocktails

Believe it or not, Peach Carolina Reaper Sauce can work in desserts! Try it over vanilla ice cream or mix it into a spicy margarita for adventurous flavor fans.


5. The Science Behind the Heat: Scoville Scale and Spice Level

Understanding the Carolina Reaper’s 2.2 Million SHU

The Scoville Heat Scale measures a pepper’s spiciness based on the concentration of capsaicin — the chemical that triggers your tongue’s heat receptors. The Carolina Reaper ranks at 2.2 million SHU (Scoville Heat Units), making it nearly 400 times hotter than a jalapeño!
In the Peach Carolina Reaper Sauce, this heat is tamed by the natural sugars in peaches and the acidity of vinegar, resulting in a fiery yet balanced burn that enhances flavor rather than overwhelms it.

How Peaches Mellow the Fire

Peaches contain natural fructose and malic acid, both of which soften the sharp bite of capsaicin. The sweetness coats your palate, creating a delayed and more enjoyable spice experience. This makes the sauce appealing to both chili veterans and spice beginners alike.

Tolerance Tips for Spicy Food Lovers

If you’re new to ultra-hot sauces, start small — just a drop or two. Pairing it with dairy-based foods like yogurt or sour cream can help neutralize excess heat. Over time, your spice tolerance builds, allowing you to fully appreciate the sauce’s complex flavors.


6. Health Benefits of Peach Carolina Reaper Sauce

Boosts Metabolism and Heart Health

Capsaicin, the compound responsible for the Reaper’s heat, is known to boost metabolism, improve circulation, and support cardiovascular health. It increases calorie burn and promotes fat oxidation, making it a surprisingly healthy addition to your diet when used in moderation.

Rich in Vitamins and Antioxidants

Peaches provide vitamins A, C, and E, while the Reaper peppers are rich in antioxidants and carotenoids. These nutrients help combat oxidative stress, strengthen your immune system, and maintain glowing skin.

Natural Mood and Immunity Enhancer

Spicy foods release endorphins and serotonin, your body’s “feel-good” chemicals. This makes Peach Carolina Reaper Sauce not just delicious but also a natural mood booster. The vitamin C content also supports your immune defense, helping your body ward off common colds.


7. Popular Brands and Where to Buy Peach Carolina Reaper Sauce

Top Commercial Sauces in the Market

Several brands have mastered the balance of fruit and fire. Some popular options include:

  • PuckerButt Pepper Company’s Reaper Peach Sauce – from the pepper’s original creator.
  • Hellfire Hot Sauce “Peach Ghost Reaper” – a gourmet blend of peaches, Reapers, and ghost peppers.
  • Torchbearer Sauces “Sweet Reaper” – a sweeter, milder version perfect for everyday meals.

Small-Batch Artisanal Brands

Independent producers and local farmers’ markets often feature small-batch versions that highlight regional ingredients — think smoked Reaper and peach bourbon variations.

Where to Buy Online

You can find Peach Carolina Reaper Sauce on Amazon, Etsy, or directly from hot sauce specialists like Heatonist. Many sellers also offer sampler packs for spice enthusiasts who love to experiment.


8. Common Mistakes When Making Peach Carolina Reaper Sauce

Overpowering the Sauce with Too Much Heat

One of the biggest errors is overloading the recipe with Reaper peppers. Start small — a single pepper goes a long way. Too much can mask the peach flavor and make the sauce unbearably hot.

Not Balancing Sweetness and Acidity

A great sauce strikes harmony between sweet (peaches and honey) and tangy (vinegar and lime). If it’s too sweet, add a touch more vinegar; if too acidic, balance it with honey or brown sugar.

Improper Storage and Preservation

Always bottle hot sauce in sterilized glass bottles. Refrigerate it immediately after cooling, and label the date. Improper storage can lead to spoilage or loss of flavor.


9. Expert Tips for Customizing Your Sauce

Adjusting Heat Levels Safely

If you want a milder sauce, remove the Reaper’s inner ribs and seeds — that’s where most of the heat resides. Alternatively, mix in milder peppers like habaneros or jalapeños for complexity without extreme spice.

Infusing with Herbs and Spices

Add depth by including herbs like cilantro or basil. Ground spices such as cumin, smoked paprika, or turmeric can elevate your sauce’s aroma and flavor profile.

Creating a Smoky or Tangy Variation

For a smoky version, use roasted or smoked Reaper peppers. For tanginess, increase lime juice or add a splash of pineapple juice for a tropical vibe.


10. FAQs About Peach Carolina Reaper Sauce

1. How hot is Peach Carolina Reaper Sauce compared to other hot sauces?

It’s significantly hotter than traditional sauces like Tabasco or Sriracha. Expect extreme heat balanced by the sweetness of peaches.

2. Can I use canned peaches instead of fresh ones?

Yes, canned peaches work well in a pinch — just make sure they’re packed in juice, not syrup, to avoid overly sweet results.

3. How long does homemade sauce last in the fridge?

Typically, 3–4 months if stored in sterilized bottles. The vinegar acts as a natural preservative.

4. Is Peach Carolina Reaper Sauce gluten-free and vegan?

Absolutely! Most recipes use plant-based ingredients and no gluten-containing additives. Always double-check store-bought labels to be sure.

5. How can I tone down the heat if it’s too spicy?

Blend in extra peaches, mango, or even roasted red bell peppers. The additional sweetness dilutes the intensity while keeping the flavor rich.

6. Can I use this sauce for marinades or dips?

Definitely. It works wonderfully as a marinade for grilled meats, dipping sauce for fried foods, or spicy glaze for roasted vegetables.


11. Conclusion: A Fiery Fusion Worth the Flavor

Peach Carolina Reaper Sauce is more than just a condiment — it’s a culinary adventure. By blending the blistering heat of the Carolina Reaper with the juicy sweetness of ripe peaches, this sauce achieves an unforgettable balance of flavor and fire. Whether you’re a heat seeker or a flavor lover, it’s a must-have for your kitchen arsenal.

So next time you crave something daring, drizzle a little Peach Carolina Reaper Sauce over your meal and savor the sweet burn. Just remember — a little goes a long way!


🔗 External Resource:

For more information about pepper heat levels and recipes, visit the PuckerButt Pepper Company’s official site — home of the Carolina Reaper.


Smoked Habanero Sauce: The Bold and Fiery Condiment You Need in 2025

Smoked Habanero Sauce.

table of content
Heading LevelSection Title / Subtopic
H1Smoked Habanero Sauce: The Bold and Fiery Condiment You Need in 2025
H2What Is Smoked Habanero Sauce?
H3The Origin and History of Habanero Peppers
H3How Smoking Transforms the Habanero Flavor
H2The Unique Flavor Profile of Smoked Habanero Sauce
H3Balancing Heat with Smoky Depth
H3How It Differs from Traditional Hot Sauces
H2Health Benefits of Smoked Habanero Sauce
H3Packed with Vitamins and Nutrients
H3Natural Anti-Inflammatory and Pain Relief
H3Boosts Metabolism and Immunity
H2How to Make Smoked Habanero Sauce at Home
H3Essential Ingredients and Equipment
H3Step-by-Step Preparation Process
H3Storage and Preservation Tips
H2Delicious Ways to Use Smoked Habanero Sauce
H3As a Marinade or Barbecue Glaze
H3Adding Heat to Soups, Tacos, and Grilled Dishes
H3Enhancing Dips, Burgers, and Vegan Meals
H2Best Store-Bought Smoked Habanero Sauce Brands in 2025
H3Artisanal and Small-Batch Brands
H3Popular Commercial Options
H2Tips for Handling and Cooking with Habaneros Safely
H3Preventing Skin and Eye Irritation
H3How to Reduce Overpowering Heat in Recipes
H2Buying Guide: What to Look for in a Quality Smoked Habanero Sauce
H3Ingredients, Heat Level, and Authentic Smoke Flavor
H3Packaging, Expiry, and Preservative Information
H2Frequently Asked Questions (FAQs)
H2Conclusion: Why Smoked Habanero Sauce Is the Ultimate Spicy Upgrade
ChatGPT Image Nov 3 2025 06 41 41 PM

What Is Smoked Habanero Sauce?

Smoked Habanero Sauce is a fiery yet flavor-rich condiment made from habanero peppers that have been carefully smoked before blending with vinegar, garlic, and spices. The smoking process imparts a deep, earthy aroma that perfectly complements the habanero’s tropical heat. It’s a favorite among heat lovers and food enthusiasts seeking a sophisticated, smoky kick in their dishes.

The Origin and History of Habanero Peppers

Habanero peppers trace their roots to the Amazon region, later spreading to Mexico and the Caribbean. They’re one of the oldest known chili varieties, boasting a Scoville rating of 100,000 to 350,000 SHU. Over time, they’ve become a cornerstone of Caribbean and Latin American cuisine.

How Smoking Transforms the Habanero Flavor

Smoking habaneros over hardwood—like mesquite, hickory, or applewood—mellows their raw, sharp heat and adds a sweet, complex smokiness. This process creates a flavor that’s both fiery and nuanced, perfect for marinades, tacos, and barbecues.


The Unique Flavor Profile of Smoked Habanero Sauce

Balancing Heat with Smoky Depth

Smoked Habanero Sauce offers more than just heat—it’s a sensory experience. The smoke adds richness and warmth, balancing the habanero’s natural fruitiness and citrus-like brightness.

How It Differs from Traditional Hot Sauces

While traditional hot sauces rely heavily on vinegar for tang, smoked habanero sauce emphasizes earthy undertones and aroma. It’s the ideal choice for those seeking a deeper, richer flavor that pairs beautifully with grilled meats or roasted vegetables.


Health Benefits of Smoked Habanero Sauce

Packed with Vitamins and Nutrients

Habaneros are rich in vitamin C, vitamin A, and capsaicin, which contribute to immune health and skin vitality.

Natural Anti-Inflammatory and Pain Relief

Capsaicin, the active compound in habaneros, is known for its anti-inflammatory and analgesic effects. It helps reduce pain by triggering endorphin release in the body.

Boosts Metabolism and Immunity

Regular consumption of capsaicin-rich foods like Smoked Habanero Sauce can speed up metabolism, aid in weight management, and strengthen immune defense.


How to Make Smoked Habanero Sauce at Home

Essential Ingredients and Equipment

  • 10–12 habanero peppers
  • 1 small onion
  • 4 cloves garlic
  • 1 cup apple cider vinegar
  • 2 tablespoons brown sugar
  • 1 teaspoon smoked paprika
  • Salt to taste
  • Optional: lime juice, roasted tomatoes

Equipment: Smoker, blender, saucepan, and sterilized bottles.

Step-by-Step Preparation Process

  1. Smoke the peppers: Place habaneros in a smoker with hickory or applewood for 1–2 hours.
  2. Blend the ingredients: Combine smoked peppers, garlic, onion, vinegar, and spices until smooth.
  3. Simmer the sauce: Pour into a saucepan and simmer for 10–15 minutes to enhance flavor.
  4. Cool and store: Let it cool completely, then transfer into airtight bottles.

Storage and Preservation Tips

Store in the refrigerator for up to 3 months. For long-term storage, add a bit more vinegar and ensure containers are well-sealed.


Delicious Ways to Use Smoked Habanero Sauce

As a Marinade or Barbecue Glaze

Brush it over chicken wings, ribs, or vegetables before grilling for a smoky, spicy finish.

Adding Heat to Soups, Tacos, and Grilled Dishes

A few drops can elevate soups, stews, tacos, and even scrambled eggs.

Enhancing Dips, Burgers, and Vegan Meals

Mix it with mayonnaise or hummus for a smoky dip, or drizzle it on veggie burgers for a satisfying punch.


Best Store-Bought Smoked Habanero Sauce Brands in 2025

Artisanal and Small-Batch Brands

  • Inferno Craft Sauces: Known for hand-smoked habaneros and natural ingredients.
  • FireFarm Kitchen: Offers a mild-smoke variety ideal for beginners.

Popular Commercial Options

  • Pain Is Good Smoked Habanero Sauce – bold flavor with balanced heat.
  • Melinda’s Smoked Habanero Hot Sauce – combines sweetness with smokiness.

Tips for Handling and Cooking with Habaneros Safely

Preventing Skin and Eye Irritation

Always wear gloves when handling habaneros. Wash your hands and tools immediately after cutting.

How to Reduce Overpowering Heat in Recipes

Add sweetness (honey or brown sugar) or acidity (lime or vinegar) to soften the intensity. Dairy products like yogurt or sour cream also help neutralize the heat.


Buying Guide: What to Look for in a Quality Smoked Habanero Sauce

Ingredients, Heat Level, and Authentic Smoke Flavor

Opt for sauces made with real smoked peppers—not artificial smoke flavoring. Check labels for natural ingredients and your preferred heat range.

Packaging, Expiry, and Preservative Information

Choose glass bottles over plastic to preserve flavor longer. Always verify manufacturing and expiry dates for freshness.


Frequently Asked Questions (FAQs)

1. How spicy is Smoked Habanero Sauce compared to other hot sauces?
It’s moderately to extremely hot, typically hotter than jalapeño or chipotle sauces.

2. What’s the best way to tone down the heat?
Mix with a creamy base like yogurt, sour cream, or avocado.

3. Can I use dried habaneros to make this sauce?
Yes—rehydrate them in warm water first, then blend with the other ingredients.

4. Is smoking necessary for flavor?
While optional, smoking adds complexity and depth that raw habaneros can’t replicate.

5. Can I ferment Smoked Habanero Sauce?
Absolutely! Fermenting enhances tanginess and shelf life.

6. What foods pair best with this sauce?
Grilled meats, tacos, roasted vegetables, and even scrambled eggs shine with this fiery condiment.


Conclusion: Why Smoked Habanero Sauce Is the Ultimate Spicy Upgrade

Smoked Habanero Sauce is not just a condiment—it’s a culinary adventure. Its combination of fiery heat, smoky depth, and tropical undertones makes it a must-have for food lovers seeking bold flavor. Whether homemade or store-bought, this sauce transforms any dish into a gourmet experience.

🔥 Get ready to add smoke, spice, and soul to every bite!


For more insights on pepper varieties and their Scoville ratings, visit Green Ghost Pepper Sauce


Cranberry Sauce: The Sweet-Tart Star of Every Holiday Table

Cranberry Sauce: Th Sweet-Tart Star of Every Holiday Table

Part 1: From Wild Berries to Holiday Tradition

A Berry with a Story

Cranberries are more than just a tart holiday side dish — they’re one of North America’s original superfoods. Indigenous peoples across New England and Canada harvested these ruby-red berries long before the first Thanksgiving feast. They mixed cranberries with dried venison and fat to make pemmican — a nutrient-rich preserved food. The fruit’s sharp, tangy flavor and natural pectin made it perfect for sauces, jams, and even medicinal remedies.

By the 1600s, European settlers adopted cranberries into their cuisine, pairing them with roasted meats to balance rich, savory flavors. The earliest recorded cranberry sauce recipes appeared in American cookbooks in the late 18th century, and by the 19th century, it was a staple on Thanksgiving tables.

Why We Love It

Cranberry sauce perfectly bridges the gap between sweet and savory. It cuts through the heaviness of turkey, stuffing, and gravy with its zingy acidity and jewel-like color. Whether you make it smooth and glossy or chunky and rustic, its vibrant flavor and visual appeal make it an instant classic.

Modern cooks love it for another reason — simplicity. You can make homemade cranberry sauce in under 15 minutes using just a handful of ingredients.


Classic Homemade Cranberry Sauce Recipe

Ingredients

  • 12 oz (340 g) fresh or frozen cranberries
  • ¾ cup (150 g) granulated sugar
  • ½ cup (120 ml) orange juice (freshly squeezed preferred)
  • 1 tsp orange zest
  • ¼ tsp cinnamon (optional for warmth)
  • Pinch of salt

Instructions

1️⃣ In a medium saucepan, combine the orange juice, sugar, and salt. Heat over medium until the sugar dissolves.
2️⃣ Stir in the cranberries and bring to a gentle boil. You’ll hear them pop as they cook — that’s the pectin releasing!
3️⃣ Reduce the heat and simmer for about 10 minutes, stirring occasionally, until the sauce thickens.
4️⃣ Add orange zest and cinnamon for extra brightness and aroma.
5️⃣ Let it cool — the sauce will continue to thicken as it stands.

🫙 Storage Tip: Transfer to a jar, cover, and refrigerate for up to 10 days. It also freezes beautifully for future meals.


Flavor Breakdown: Sweet, Tart & Tangy Harmony

The beauty of cranberry sauce lies in balance:

  • Sweetness from sugar or honey tempers the berry’s tart edge.
  • Acidity from orange juice brightens the flavor.
  • Spices like cinnamon, nutmeg, or cloves add depth.
  • Citrus zest gives a refreshing lift that pairs with almost anything.

That flavor dance transforms every bite of turkey, ham, or roast vegetables into something extraordinary.


Perfect Serving Occasions

While it shines on Thanksgiving and Christmas, cranberry sauce deserves year-round love. Try it with:

  • Roast pork or chicken
  • Brie or goat cheese crostini
  • Grilled salmon or white fish
  • Pancakes or yogurt bowls
  • Sandwiches (especially leftover turkey!)

You can even swirl it into cocktails or drizzle it over cheesecake.


Tips for the Perfect Sauce Every Time

  • Don’t overcook. Once cranberries burst and the sauce thickens, remove it from heat. Overcooking dulls the color and flavor.
  • Adjust sweetness to taste. Some prefer tart and bold, others like dessert-sweet. Start with less sugar, taste, and tweak.
  • Enhance naturally. Add a splash of port wine, maple syrup, or vanilla for a gourmet twist.
  • Texture matters. For smooth sauce, puree in a blender. For rustic charm, leave the berries whole.

Part 2: Creative Twists & Serving Inspiration

Beyond the Basics: Creative Cranberry Sauce Variations

1. Cranberry-Orange-Ginger Sauce

Add 1 tablespoon of grated fresh ginger and a drizzle of honey to your classic recipe. The ginger gives warmth and a subtle kick — perfect with glazed ham or roast duck.

2. Spiced Red Wine Cranberry Sauce

Replace orange juice with dry red wine and add a cinnamon stick, a few whole cloves, and a star anise pod. Simmer until glossy — a luxurious pairing with beef tenderloin or lamb.

3. Cranberry Jalapeño Relish 🌶️

For spice lovers, pulse 2 fresh jalapeños and a handful of cilantro in a food processor, then mix into cooled cranberry sauce. This zesty, spicy relish is amazing on tacos or roasted chicken.

4. Maple Bourbon Cranberry Sauce

A splash of bourbon and a touch of maple syrup create a smoky-sweet, grown-up version of the classic. It’s holiday magic on roasted turkey or served alongside aged cheddar.

5. Cranberry Apple Chutney

Simmer chopped apples with your cranberries, add apple cider vinegar, brown sugar, and raisins for a chutney-style twist that’s delicious with pork or cheese boards.


Presentation & Plating Ideas

  • Serve in a crystal bowl or small glass jar for a pop of ruby red on the table.
  • Garnish with orange peel curls or rosemary sprigs for a festive look.
  • Layer over whipped cream cheese on a platter for a quick appetizer dip.
  • Use as a swirl on a white dessert plate with cheesecake or panna cotta — it’s stunning and flavorful.

Pairing Perfection: What Cranberry Sauce Loves Most

Main Dishes:

  • Roasted turkey, duck, pork loin, or glazed ham
  • Grilled salmon or baked cod
  • Spicy barbecue meats (adds contrast to smoky flavors)

Cheese & Charcuterie:

  • Brie, goat cheese, or aged cheddar
  • Smoked meats and pâté
  • Crackers, crostini, or rustic bread

Beverages:

  • Mulled wine or cider
  • Sparkling rosé
  • Citrus-based cocktails (like a cranberry mimosa or vodka spritz)

Hosting Tips: Make It Ahead & Keep It Fresh

Homemade cranberry sauce is a host’s dream. You can make it up to a week before your feast and refrigerate it. The flavors actually improve over time!
If freezing, portion it into airtight containers — thaw overnight in the fridge before serving.

To serve warm, gently reheat on the stove over low heat, adding a splash of orange juice to loosen the texture.


Fun Facts About Cranberry Sauce

🥄 Americans consume over 80 million pounds of cranberries each Thanksgiving.
🍊 Fresh cranberries bounce — it’s a sign of ripeness!
🥶 They’re one of the few fruits native to North America still commercially grown today.
💡 The first canned cranberry sauce appeared in 1941, forever changing holiday dinners.


Final Thoughts: The Flavor That Connects Generations

Cranberry sauce isn’t just a condiment — it’s a nostalgic bridge between family memories and culinary creativity. From its Native American roots to its modern gourmet adaptations, this tangy sauce remains a symbol of gathering, gratitude, and balance.

Whether you spoon it next to golden roast turkey, swirl it through creamy yogurt, or turn it into a fiery jalapeño relish, cranberry sauce brings color, flavor, and warmth to every table.

So next time you’re planning your holiday feast, skip the can — grab fresh cranberries, a bit of citrus, and create your own sweet-tart masterpiece from scratch.


Green Ghost Pepper Sauce: The Fiery Secret Behind Gourmet Flavor

Green Ghost Pepper Sauce.

📘 Outline

Heading LevelSection Title / Subtopic
H1Green Ghost Pepper Sauce: The Fiery Secret Behind Gourmet Flavor (2025 Guide)
H2What Is Green Ghost Pepper Sauce?
H3The Origin of Ghost Peppers
H3How Green Ghost Pepper Sauce Differs from Traditional Hot Sauces
H2The Unique Flavor Profile of Green Ghost Pepper Sauce
H3Balance of Heat, Tang, and Freshness
H3Pairing Green Ghost Pepper Sauce with Foods
H2Health Benefits of Green Ghost Pepper Sauce
H3Rich in Vitamins and Antioxidants
H3Boosts Metabolism and Aids Digestion
H3Natural Anti-Inflammatory Properties
H2How to Make Green Ghost Pepper Sauce at Home
H3Key Ingredients You’ll Need
H3Step-by-Step Preparation Process
H3Storage Tips for Long Shelf Life
H2Creative Ways to Use Green Ghost Pepper Sauce
H3Marinades and Dressings
H3Spice Up Your Snacks and Street Food
H3Incorporate into Gourmet Recipes
H2Safety Tips: Handling Ghost Peppers the Right Way
H3Essential Kitchen Safety Practices
H3How to Reduce the Burn if It’s Too Hot
H2Best Brands of Green Ghost Pepper Sauce in 2025
H3Artisanal and Small-Batch Producers
H3Popular Commercial Options
H2Buying Guide: What to Look for in a Quality Green Ghost Pepper Sauce
H3Ingredients to Prioritize
H3Packaging, Heat Level, and Freshness Indicators
H2Frequently Asked Questions (FAQs)
H2Conclusion: Why Green Ghost Pepper Sauce Deserves a Spot in Your Kitchen

What Is Green Ghost Pepper Sauce?

Green Ghost Pepper Sauce is an exciting, vibrant condiment crafted from unripe ghost peppers—also known as Bhut Jolokia—blended with fresh herbs, vinegar, and other natural ingredients. Unlike the traditional red ghost pepper sauces, the green version delivers a zesty, herbaceous punch with a slightly milder heat profile.

The Origin of Ghost Peppers

Originating in Northeast India, ghost peppers (Bhut Jolokia) were once recognized by the Guinness World Records as the world’s hottest chili. Their name, meaning “ghost,” stems from the mysterious way their heat sneaks up on your palate—subtle at first, then explosively fiery.

How Green Ghost Pepper Sauce Differs from Traditional Hot Sauces

Traditional hot sauces often rely on fermented red chilies, giving them a smoky, deep heat. Green Ghost Pepper Sauce, however, is fresher and tangier, showcasing the grassy notes of unripe peppers. It’s perfect for food lovers who crave intensity without overpowering their meal’s natural flavors.


The Unique Flavor Profile of Green Ghost Pepper Sauce

Balance of Heat, Tang, and Freshness

The Green Ghost Pepper Sauce offers a delightful trifecta—intense heat from the ghost peppers, tangy notes from vinegar or citrus, and refreshing herbal undertones from cilantro or green onions.

Pairing Green Ghost Pepper Sauce with Foods

This sauce pairs beautifully with grilled meats, seafood, tacos, and even pizza. Its citrusy zing complements avocado-based dishes and brings life to simple snacks like nachos or french fries.


Health Benefits of Green Ghost Pepper Sauce

Rich in Vitamins and Antioxidants

Ghost peppers are packed with vitamin C, capsaicin, and carotenoids—compounds that support immunity and combat oxidative stress.

Boosts Metabolism and Aids Digestion

Capsaicin is known to stimulate metabolism and promote fat oxidation, making Green Ghost Pepper Sauce a spicy but healthy addition to your meals.

Natural Anti-Inflammatory Properties

Regular, moderate use of this sauce may help reduce inflammation and support heart health thanks to its active compounds.


How to Make Green Ghost Pepper Sauce at Home

Gemini Generated Image ad76cqad76cqad76

Key Ingredients You’ll Need

  • 6–8 green ghost peppers (fresh or frozen)
  • 1 cup white vinegar
  • ½ cup lime juice
  • 3 cloves garlic
  • ½ cup cilantro
  • 1 small onion
  • 1 teaspoon salt
  • 1 tablespoon sugar (optional for balance)

Step-by-Step Preparation Process

  1. Prep the ingredients: Wash peppers and herbs thoroughly.
  2. Blend: Combine all ingredients in a blender until smooth.
  3. Simmer: Cook the mixture for 10–15 minutes to meld flavors.
  4. Cool and bottle: Let it cool before storing in sterilized glass bottles.

Storage Tips for Long Shelf Life

Keep refrigerated for up to 3 months. For extended shelf life, add a touch of vinegar and store in sterilized, airtight jars.


Creative Ways to Use Green Ghost Pepper Sauce

Marinades and Dressings

Use it as a spicy base for chicken or seafood marinades—it tenderizes while adding fiery zest.

Spice Up Your Snacks and Street Food

A few drops on samosas, fries, or sandwiches can turn ordinary street food into a gourmet delight.

Incorporate into Gourmet Recipes

Chefs love blending it into aioli, pasta sauces, or even cocktails like Bloody Marys for a smoky, peppery twist.


Safety Tips: Handling Ghost Peppers the Right Way

Essential Kitchen Safety Practices

Always wear gloves when chopping or blending ghost peppers. Avoid touching your face and wash utensils immediately after use.

How to Reduce the Burn if It’s Too Hot

If the sauce feels overwhelming, add sugar, honey, or yogurt to balance the heat without losing flavor.


Best Brands of Green Ghost Pepper Sauce in 2025

Artisanal and Small-Batch Producers

  • Fire Mountain Naturals: Known for organic, farm-sourced ghost peppers.
  • Green Inferno Gourmet: Offers a balanced blend with herbal freshness.

Popular Commercial Options

  • Blair’s Green Heat Sauce – famous for consistent heat and tang.
  • Da Bomb Verde Edition – perfect for extreme spice lovers.

Buying Guide: What to Look for in a Quality Green Ghost Pepper Sauce

Ingredients to Prioritize

Choose sauces with all-natural ingredients, free from preservatives or artificial coloring.

Packaging, Heat Level, and Freshness Indicators

Opt for glass bottles, which preserve freshness better. Check Scoville ratings and batch dates for the best flavor experience.


Frequently Asked Questions (FAQs)

1. Is Green Ghost Pepper Sauce hotter than red ghost pepper sauce?
Generally, it’s slightly milder but still extremely hot compared to regular sauces.

2. Can I use Green Ghost Pepper Sauce on desserts?
Yes! It pairs surprisingly well with dark chocolate and citrus-based desserts.

3. How can I tone down the heat if my sauce is too spicy?
Add more vinegar, lime juice, or a touch of honey.

4. Is it safe to eat ghost peppers regularly?
Yes, in moderation—capsaicin has health benefits, but overconsumption can irritate your stomach.

5. Can I ferment my Green Ghost Pepper Sauce?
Absolutely! Fermentation deepens the flavor and improves shelf stability.

6. Where can I buy authentic Green Ghost Pepper Sauce online?
You can find it on Amazon, specialty spice stores, or from local artisan brands like Fire Mountain Naturals.


Conclusion: Why Green Ghost Pepper Sauce Deserves a Spot in Your Kitchen

Green Ghost Pepper Sauce isn’t just another hot sauce—it’s a gourmet experience. From its vibrant flavor to its health benefits and versatility, it brings new life to every meal. Whether you’re crafting your own batch or exploring artisanal brands, this fiery condiment will ignite your culinary creativity.

🔥 Taste the green heat—embrace the ghost!


Learn more about ghost pepper varieties and their Scoville scale ratings at The Chile Pepper Institute.


Blueberry Habanero Hot Sauce: Sweet Heat in Every Drop

Blueberry Habanero Hot Sauce
506818546 122173114814370581 5419022108572200280 n 3

Part 1: The Origins and Classic Recipe

A Burst of Sweet Fire: Why Blueberry Meets Habanero

When fruit meets fire, something magical happens. The Blueberry Habanero Hot Sauce is proof of that—a blend of deep, jammy sweetness and tropical heat that excites both chili lovers and curious foodies. It’s a sauce that bridges two worlds: the comfort of ripe summer fruit and the electrifying kick of habanero peppers.

This sauce first gained popularity in small-batch hot sauce markets across North America, especially among makers seeking a creative twist beyond traditional vinegar-heavy hot sauces. With blueberries native to North America and habaneros tracing their roots to the Caribbean, it’s a cultural fusion that celebrates both sweetness and spice in one elegant bottle.

The Perfect Balance: Flavor Notes

What makes the blueberry–habanero pairing so satisfying is contrast:

  • Sweet: Ripe blueberries offer a fruity base that rounds out the heat.
  • Spicy: Habaneros add fiery notes that hit quickly but fade beautifully.
  • Tangy: Apple cider vinegar brightens the sauce and enhances its shelf life.
  • Savory depth: Garlic, onion, and a touch of lime tie everything together.

The result is a multi-layered sauce that’s vibrant in both color and flavor—perfect for glazing meats, spicing up cheese boards, or adding a bold twist to brunch dishes.


Classic Blueberry Habanero Hot Sauce Recipe

Prep Time: 10 minutes
Cook Time: 20 minutes
Total Time: 30 minutes
Yield: About 2 cups

Ingredients

  • 2 cups fresh or frozen blueberries
  • 3–4 orange habanero peppers (adjust to your spice level)
  • 1 small red onion, chopped
  • 3 cloves garlic, minced
  • ½ cup apple cider vinegar
  • 2 tbsp honey or maple syrup
  • Juice of 1 lime
  • ½ tsp salt
  • ½ tsp black pepper
  • 1 tbsp olive oil

Instructions

  1. Prep the habaneros carefully: Wear gloves and remove the seeds for milder heat.
  2. Sauté the aromatics: In a saucepan, heat olive oil and add chopped onion and garlic. Cook until fragrant.
  3. Add the fruit and vinegar: Stir in blueberries, chopped habaneros, vinegar, salt, and pepper. Bring to a simmer.
  4. Sweeten and blend: Add honey and lime juice. Simmer for 10–15 minutes, then blend until smooth.
  5. Strain (optional): For a silky texture, strain the sauce through a fine mesh sieve.
  6. Bottle and store: Pour into sterilized bottles and refrigerate for up to 3 months.

Why It Works: The Flavor Science

The tang of vinegar opens up your taste buds, letting the fruit’s sweetness and pepper’s heat shine in balance. Blueberries add natural pectin, giving the sauce body without thickeners. Meanwhile, habaneros—known for their citrusy and floral undertones—complement the berries instead of overwhelming them.

Each spoonful offers a layered experience: the initial sweetness, the creeping heat, and finally, a bright, tangy finish.


Best Ways to Use Blueberry Habanero Hot Sauce

  • Brush on grilled chicken or pork chops for a sticky, glossy glaze.
  • Drizzle over goat cheese crostini or baked brie for a gourmet appetizer.
  • Toss with crispy wings for a fruit-forward twist on buffalo sauce.
  • Add to vinaigrettes or marinades for depth and heat.
  • Mix into cocktails—yes, a dash in a margarita or Bloody Mary adds unexpected depth!

Tips for Perfecting the Original

  • Balance sweetness: If using very ripe blueberries, reduce honey slightly.
  • Adjust heat: Remove pepper seeds or reduce quantity for mild heat lovers.
  • Preserve color: Cook on medium heat to maintain the sauce’s vivid purple hue.
  • Boost aroma: A pinch of smoked paprika or coriander can add a subtle layer.

Part 2: Creative Variations, Pairings & Expert Tips

Creative Twists on Blueberry Habanero Sauce

Once you master the base recipe, the possibilities are endless. Here are some regional and creative variations to explore:

1. Smoky Blueberry Habanero BBQ Glaze

Add 1 tablespoon of molasses and ½ teaspoon smoked paprika. This creates a rich glaze perfect for ribs or grilled eggplant, with a sweet-smoky backbone and lingering heat.

2. Blueberry Bourbon Hot Sauce

Splash in 2 tablespoons of bourbon near the end of cooking. The alcohol enhances the berries’ flavor, adding caramel and oak notes ideal for steak or roasted duck.

3. Blueberry Habanero Jam

Use less vinegar (only ¼ cup) and add 2 tablespoons of sugar for a spreadable texture. Perfect on biscuits, charcuterie, or as a spicy PB&J upgrade.

4. Blueberry Mango Habanero Fusion

Add ½ cup diced mango for a tropical, citrusy version with a bright orange-purple hue—an Instagram-worthy twist that pairs beautifully with shrimp or tacos.

5. Garlic-Infused Blueberry Hot Sauce

Simmer extra roasted garlic cloves into the base for a savory, bold variation. The garlicky undertone pairs beautifully with roasted vegetables or lamb.


Pairing Ideas: What to Serve It With

This sauce is as versatile as it is flavorful. Think beyond the obvious and use it as your kitchen’s secret weapon:

Dish TypeBest UseFlavor Result
Grilled MeatsGlaze over chicken, pork, or steakSweet heat caramelization
SeafoodDrizzle over salmon, shrimp tacosBright, fruity contrast
BreakfastMix into avocado toast or scrambled eggsTangy morning kick
Cheese BoardsPair with brie, goat cheese, or cheddarSweet-savory harmony
DessertsA few drops over cheesecake or ice creamShockingly good sweet heat

Presentation & Serving Ideas

  • Elegant Drizzle: Use a squeeze bottle to artistically swirl it over plates before plating protein.
  • Mini Bottles for Gifts: Homemade batches in glass bottles make stunning gifts for spice lovers.
  • Layered Sauce Bar: Pair alongside mango or pineapple-based sauces for a colorful tasting flight.
  • Color Pop Garnish: A dash on a white plate elevates presentation dramatically.

Pairing Drinks

  • Craft Beers: Blueberry ales, citrus IPAs, or wheat beers complement the fruity spice.
  • Cocktails: Add a dash to a mezcal margarita or blueberry mojito for adventurous heat.
  • Non-Alcoholic: Sparkling lemonade or iced hibiscus tea make perfect cool-down partners.

Batching, Bottling & Shelf Life

For those who love to gift or sell sauces:

  • Batch Scaling: Double or triple the recipe without altering proportions.
  • Sterilization: Use heat-sterilized glass bottles and hot-fill them to extend shelf life up to 6 months.
  • Label Ideas: “Sweet Heat Series – Blueberry Habanero” or “Fireberry Fusion” are catchy product names.

Fun Facts & Trivia

  • Blueberries are native to North America and were called “star berries” by early settlers due to their star-shaped blossom ends.
  • Habaneros rank 100,000–350,000 Scoville units, offering intense heat yet floral complexity.
  • This sauce is a favorite among craft hot sauce makers in the Pacific Northwest and Ontario, where blueberry farms thrive.

Final Thoughts: A Sauce Worth Savoring

The Blueberry Habanero Hot Sauce isn’t just a condiment—it’s an experience. Each spoonful blends the lush sweetness of summer berries with the bold heat of Caribbean spice. It’s the kind of sauce that makes ordinary meals unforgettable, proving that opposites—sweet and spicy—don’t just attract, they ignite.

If you’re looking for a show-stopping homemade sauce that’s as gorgeous as it is delicious, this is the one. Whether you’re glazing ribs, dressing up brunch, or surprising guests with a sweet-hot dessert drizzle, this sauce promises one thing: flavor that lingers and memories that last.


💡Pro Tip: Pair your Blueberry Habanero Hot Sauce with roasted garlic aioli or creamy cheese dips to balance the heat and enhance the fruity depth.


Tropical Fire: Master the Mango Habanero Hot Sauce Recipe

the Mango Habanero Hot Sauce

I. Introduction: The Perfect Balance of Sweet and Heat

Mango Habanero Hot Sauce is the ultimate example of culinary harmony. It’s a sauce that surprises and delights, starting with a burst of tropical sweetness and finishing with the intense, fruity kick of the habanero pepper. It’s the ideal condiment for grilling season, tacos, or anything that needs a vibrant punch of sweet heat.

Forget the thin, watery store-bought versions. This recipe is thick, glossy, and fresh, using a quick-simmer method to achieve deep flavor without requiring days of fermentation. You can easily adjust the heat level to suit your palate, making it a powerful yet approachable favorite.

II. The Mango Habanero Hot Sauce Master Recipe

This recipe yields approximately 1.5 cups of vibrant, fresh hot sauce.

IngredientsQuantityNotes & Purpose
Ripe Mangoes2, peeled and choppedProvides bulk, sweetness, and tropical flavor.
Orange Habanero Peppers3–4The heat factor. (Use 2 for mild; keep seeds for maximum heat).
White Vinegar½ cupThe acid base; crucial for brightness and preservation.
Lime Juice2 tbspAdds fresh, necessary citrus tang.
Small Onion1, choppedAromatic foundation.
Garlic2 clovesDepth of savory flavor.
Honey (or Sugar)1 tbspEnhances sweetness and balances the vinegar’s sharp edge.
Salt1 tspFlavor enhancer.
Oil1 tbspFor sautéing aromatics.

Step-by-Step Instructions

Gemini Generated Image 1zc511zc511zc511
  1. Sauté Aromatics: Heat the oil in a medium saucepan over medium heat. Add the chopped onion and minced garlic. Sauté for 3–4 minutes until the onion is soft and fragrant. Do not let the garlic burn.
  2. Soften the Fruit & Chiles: Add the chopped mango and habaneros (see tip below for heat prep). Cook for an additional 3–4 minutes, stirring constantly, until the mango begins to slightly soften.
  3. Blend the Base: Carefully transfer the entire cooked mixture (including any oil) to a high-speed blender. Add the vinegar, lime juice, honey, and salt.
  4. Process to Smoothness: Blend on high speed until the sauce is completely smooth. If you desire a thinner, more pourable texture, add a splash of water or extra vinegar as needed.
  5. Simmer for Depth: Pour the blended sauce back into the same saucepan. Simmer on low heat for 5 minutes, stirring occasionally. This quick simmer allows the flavors to deepen and the sauce to thicken slightly.
  6. Cool and Bottle: Remove from heat and allow the sauce to cool completely. Once cool, pour it into a clean glass jar or bottle. Store in the refrigerator for up to 3 weeks.

III. Mastering the Tropical Fire: Tips & Techniques

The secret to a great Mango Habanero sauce lies in preparation and balancing the intense flavors.

🌶️ Controlling the Heat

The habanero is a powerhouse, typically measuring 100,000–350,000 Scoville Heat Units (SHU). To manage the heat:

  • Remove the Placenta: The majority of the capsaicin (the compound that creates heat) resides in the placenta (the white membrane) that holds the seeds, not the seeds themselves. Always wear gloves when handling habaneros!
  • For Mild Heat: Cut the habaneros in half, scoop out all seeds and white membrane, and discard them before cooking.
  • For Extreme Heat: Leave all seeds and membranes intact.

🥭 The Importance of Ripe Mangoes

Always use ripe, soft mangoes. Ripe mangoes have a higher sugar content and natural pectin, which helps the sauce thicken naturally without needing cornstarch. Unripe mangoes will be too fibrous and tart, requiring much more added sugar.

🍶 Vinegar & Preservation

The vinegar and lime juice are essential not just for flavor, but for preservation. The high acidity lowers the sauce’s pH, making it safe to store in the refrigerator for several weeks. Do not reduce the amount of vinegar in the recipe, or the shelf life will be severely compromised.


IV. Culinary Applications: Beyond the Bottle

Gemini Generated Image w0qf4zw0qf4zw0qf 1

This sauce is incredibly versatile and can be used in numerous ways to add a sweet, smoky, and spicy element to your cooking:

  • Taco Topper: It’s the perfect sweet heat for pork carnitas or fish tacos.
  • Grilling Glaze: Brush it onto grilled chicken thighs or pork chops during the last few minutes of cooking for a glossy, caramelized finish.
  • Dipping Sauce: Mix a spoonful into mayonnaise to create an incredible spicy mayo for sweet potato fries or coconut shrimp.
  • Marinade: Use it as a quick, vibrant marinade base for tofu or shrimp skewers.

The Ultimate Guide to Homemade Pickles: Quick, Easy, and Bursting with Flavor!

Homemade Pickles
6 Homemade Pickles

Introduction: Why Homemade Pickles are the Best

Tired of the one-note flavor and questionable ingredients in store-bought pickles? It’s time to unlock the world of homemade pickling! Making your own pickles is surprisingly quick, incredibly easy, and allows you to customize every crunchy, tangy bite. Whether you’re a beginner cook or a seasoned home chef, our collection of fast refrigerator pickle recipes will transform simple vegetables into vibrant, crunchy culinary staples.

Pickles are more than just a burger topping; they are a flavor powerhouse, an essential snack, and a fantastic way to preserve your favorite vegetables. Homemade pickles offer superior crunch and fresher, bolder flavors—all without the need for complex, time-consuming canning methods!


🥕 The Six Essential Quick Pickle Recipes

ingredients

Inspired by our favorite quick and easy methods, these recipes focus on the simplicity of the refrigerator pickle—ready in just a day or two! The beauty is in the customizable brine and spices.

Pickle VarietyKey IngredientsFlavor ProfileUses
Classic Dill PicklesCucumbers, Fresh Dill, Garlic cloves, White vinegarSharp, Tangy, HerbySandwiches, Burgers, Classic Snack
Sweet Bread & Butter PicklesSliced Cucumbers & Onions, Apple Cider Vinegar, Granulated sugar, Red chili flakesSweet, Tangy, Subtle HeatHot Dogs, Tuna Salad, BBQ Sides
Spicy Garlic DillCucumbers, Fresh dill, Garlic cloves, Red pepper flakesTangy, Pungent, Fiery KickCharcuterie boards, Spicy Snack
Quick Refrigerator PicklesSliced Cucumbers, Dill, Vinegar, SugarMild, Light, Crisp, VersatileSide salad, Wraps, Snack straight from the jar
Pickled Red OnionsRed onions, Red wine vinegar, Sugar, SaltVibrant, Sweet-Sour, PiquantTacos, Salads, Chili, Avocado Toast
Tangy Green Tomato PicklesGreen tomatoes, Pickling spice, Vinegar, SugarRobust, Savory, Complex SpiceFried Chicken, Cold Cuts, Southern dishes

1. Classic Dill Pickles with recipe comment

The quintessential pickle! Perfect for first-time picklers.

  • Veggies: Whole or sliced pickling cucumbers.
  • Brine Base: Equal parts White Vinegar and Water (5% acidity). Use a ratio of about 1 Tbsp of Kosher/Pickling Salt and 1/2 tsp Sugar per cup of liquid.
  • Spices & Flavor: 2–3 fresh garlic cloves (smashed), a few sprigs of fresh dill, 1 tsp mustard seeds, 1 tsp black peppercorns per jar.
  • Quick Note: Always use pickling or kosher salt, as iodized salt can cloud your brine!

2. Pickled Red Onions with recipe comment

A vibrant, tangy topping ready in hours!

  • Veggies: 1 large red onion, thinly sliced.
  • Brine Base: 3/4 cup Red Wine Vinegar, 1/4 cup Water. Use 1 Tbsp Sugar and 1/2 tsp Salt.
  • Spices & Flavor: Optional: 1/2 tsp red pepper flakes for heat.
  • Quick Note: Pouring hot brine over the onions softens them slightly and gives them that beautiful bright pink color faster.

📝 The Simple Secret to Quick Pickling (The Brine Ratio)

The “refrigerator” or “quick” pickle method is all about the brine, which preserves your vegetables without the need for traditional water-bath canning.

The Basic Quick Brine Formula

IngredientRoleSuggested Ratio (Approx.)
VinegarAcidity (Preservation & Tang)1 Part (e.g., 1 cup)
WaterDilution (Balance Acidity)1 Part (e.g., 1 cup)
SaltSeasoning & Crispness1-2 Tbsp per 2 cups of Brine
SugarBalance Sharpness (Optional/Adjustable)1/2 – 2 Tbsp per 2 cups of Brine

Step-by-Step Instructions

  1. Prep Your Veggies: Wash and slice your chosen vegetable (cucumbers, onions, carrots, etc.) and pack them tightly into a clean glass jar.
  2. Add Aromatics: Drop in your favorite fresh herbs and spices (dill, garlic, chili flakes, peppercorns, etc.) directly into the jar.
  3. Make the Brine: In a small saucepan, combine your water, vinegar, salt, and sugar. Heat over medium heat, stirring until the salt and sugar are completely dissolved. Bring it just to a simmer, not a rolling boil.
  4. Pour and Chill: Carefully pour the hot brine over the vegetables in the jar, ensuring they are fully submerged. Leave about 1/2 inch of headspace.
  5. Seal and Wait: Seal the jar with a tight-fitting lid. Allow the jar to cool to room temperature on the counter (about 1 hour), then transfer it to the refrigerator.

Pro Tip: The flavor truly develops after 24 hours, but the pickles are best consumed after 2-3 days. Refrigerator pickles will keep for up to one month in the fridge!

💡 Customizing Your Pickling Experience

The possibilities are endless once you master the basic brine! Experiment with:

  • Vinegar Swaps: Use Apple Cider Vinegar for a sweeter, fruitier flavor (great for sweet pickles) or Rice Vinegar for a mild, Asian-inspired tang.
  • Spice Blends: Try Coriander Seed and Bay Leaves for depth, or Turmeric for a beautiful yellow color and earthy flavor.
  • Different Veggies: Don’t stop at cucumbers! Pickled carrots, radishes, cauliflower florets, and green beans are all delicious and maintain their crunch wonderfully.

🍽️ Creative Uses for Your Homemade Pickles

🥒 Using Spicy Garlic Dill Pickles

These bold, crunchy pickles add a perfect kick of heat and tang to savory dishes.

  • The Ultimate Sandwich/Burger Upgrade: Chop a few spears and mix them into your favorite burger or chicken salad recipe. The acidity and spice cut through richness beautifully.Recipe Comment: Try making a spicy pickle aioli! Finely mince a quarter cup of the pickles and mix with a half cup of mayonnaise and a dash of the pickle brine. It’s an incredible dipping sauce for fries or a spread for roast beef sandwiches.
  • Charcuterie Boards & Snacks: Slice them into thin chips and arrange them on a cheese board, especially alongside creamy cheeses like Brie or aged cheddar.
  • Bloody Mary Garnish: Replace the standard olive with a long spear of your spicy garlic dill pickle for a pungent, flavorful garnish that takes your cocktail up a notch.

🧅 Using Pickled Red Onions

Their vibrant color and balanced sweet-sour flavor make them a versatile garnish.

  • Taco & Fajita Topping: The classic use! A spoonful of pickled red onions cuts through the richness of any meat filling (carnitas, barbacoa, or grilled chicken).
  • Avocado Toast & Eggs: Pile a generous amount on your morning avocado toast, scrambled eggs, or breakfast burrito for a burst of color and tangy contrast.Recipe Comment: Mix the pickled onions with some crumbled cotija cheese and fresh cilantro for a simple, bright salsa that pairs perfectly with black beans and rice.
  • Salad Upgrade: Use them to top any green salad or grain bowl. The light red wine vinegar brine is fantastic over a classic Cobb or Greek-inspired salad.

🍽️ Conclusion: Your Crunch Awaits

Homemade pickles are a simple way to elevate your cooking, add a burst of flavor to any meal, and enjoy the freshest, crunchiest vegetables imaginable. With the basic brine formula and these six easy recipes, you’re ready to start pickling today. Happy crunching!

Ready to try your first batch of tangy, homemade goodness?


Best Apple Crisp Recipe Ever (2025 Guide): Simple, Delicious, and Perfectly Crunchy!

Best Apple Crisp Recipe Ever
Gemini Generated Image rui7rarui7rarui7

I. Introduction: The Unsung Hero of Fall Desserts

Apple crisp is more than just a dessert; it’s a nostalgic experience. While apple pie demands painstaking crust work, the apple crisp (or “apple crumble,” as it’s known in the UK) delivers the same incredible combination of warm, spiced, tender fruit and comforting sweetness with minimal fuss.

Its rise in popularity can be traced back to World War II, when butter and flour were rationed, making the intricate pastry crust of an apple pie too expensive. The simple streusel topping became a resourceful, delicious substitute. Today, this dessert is cherished for its ease, its adaptability, and that perfect textural contrast: a rich, bubbly, soft filling cradled beneath a crunchy, buttery, golden-brown oat topping.

This guide will provide you with the master recipe and the professional tips you need to create the perfect apple crisp—a cozy, sweet masterpiece that will fill your home with the scent of autumn.

II. The Master Apple Crisp Recipe

This recipe is designed for a deep 8×8-inch baking dish or a 9-inch pie plate, yielding 6 to 8 servings.

Part 1: The Apple Filling

IngredientsQuantityNotes
Apples6 large (about 2.5 lbs)A mix of tart (Granny Smith) and sweet (Honeycrisp, Fuji) is best.
Lemon Juice1 TablespoonPrevents browning and brightens flavor.
All-Purpose Flour2 TablespoonsThickens the bubbling apple juices.
Granulated Sugar1/2 cupAdjust based on your apple sweetness.
Ground Cinnamon1 teaspoonClassic warm spice.
Ground Nutmeg1/4 teaspoonAdds depth.
Water or Cider2 Tablespoons (optional)Helps start the bubbling process.

Part 2: The Crunchy Oat Topping

IngredientsQuantityNotes
All-Purpose Flour3/4 cupProvides structure for the crumble.
Old-Fashioned Rolled Oats3/4 cupEssential for the “crisp” texture. Do not use instant oats.
Light Brown Sugar (Packed)1/2 cupAdds deep, molasses-like flavor and moisture.
Ground Cinnamon1/2 teaspoon
Cold Unsalted Butter1/2 cup (1 stick), cubedMust be cold to create distinct crumbs.
Pinch of Salt1/4 teaspoonBalances sweetness.

III. Step-by-Step Instructions

Gemini Generated Image u3cjkdu3cjkdu3cj

Step 1: Prep & Preheat

  1. Preheat your oven to 375°F (190°C). Lightly grease your 8×8-inch baking dish with butter or cooking spray.

Step 2: Prepare the Topping

  1. In a medium bowl, whisk together the flour, oats, brown sugar, cinnamon, and salt.
  2. Add the cold, cubed butter to the dry ingredients. Use a pastry blender, two forks, or your fingertips to “cut in” the butter until the mixture resembles coarse, pea-sized crumbs. Tip: Do not overmix. You want some distinct clumps for texture. Place the topping in the refrigerator while you prepare the filling.

Step 3: Prepare the Filling

  1. Peel, core, and slice the apples into uniform pieces, about 1/4 to 1/2 inch thick. Uniformity is key for even cooking.
  2. In a large bowl, toss the sliced apples with the lemon juice.
  3. Add the flour, granulated sugar, cinnamon, nutmeg, and water/cider (if using). Toss until the apples are evenly coated and the spices are well-distributed.

Step 4: Assemble & Bake

  1. Pour the apple filling into the prepared baking dish, spreading it into an even layer.
  2. Sprinkle the chilled oat topping evenly over the apples, covering the entire surface.
  3. Place the dish on a baking sheet (to catch any bubbling juices). Bake for 40 to 50 minutes.
  4. The crisp is done when the topping is golden brown, the apples are tender when pierced with a fork, and the juices are visibly bubbling around the edges.

Step 5: Cool & Serve

  1. Remove the crisp from the oven and let it cool for at least 15 minutes. This rest period is crucial for the internal juices to cool down and thicken into that wonderful, gooey sauce.
  2. Serve warm with vanilla ice cream or a dollop of fresh whipped cream.

IV. The Science of the Perfect Crisp: Ingredients Explained

Gemini Generated Image q8r4juq8r4juq8r4

1. The Apple Choice: Sweet vs. Tart

The best crisp uses a combination of tart and sweet apples. Tart apples (like Granny Smith) hold their shape well and their acidity balances the sweetness of the topping. Sweet apples (like Honeycrisp, Gala, or Fuji) break down a bit more, creating a tender texture and adding complex flavor.

  • Professional Tip: Avoid soft apples like Red Delicious, as they will turn into a mushy applesauce consistency during baking.

2. The Topping Texture: Oats vs. Crumble

The difference between an Apple Crisp and an Apple Crumble is the oat content. A crisp topping contains oats, which dry out and stiffen as they bake, creating the signature crunchy texture. A crumble topping (streusel) typically contains only flour, sugar, and butter, resulting in a softer, cake-like crumb. Use Old-Fashioned Rolled Oats for the best chewiness and crunch—do not use instant oats!

3. The Gooey Sauce: The Role of Starch

The juices that collect at the bottom of the dish transform into sauce thanks to the flour added to the filling. As the apples release moisture (due to the heat and sugar), the flour acts as a thickener, preventing a watery result. If your filling seems dry, a few tablespoons of water or cider help kickstart this bubbling process.


V. Advanced Tips & Troubleshooting

IssueCauseSolution
Topping is SoggyApples released too much moisture, or the crisp was covered while baking.Tip: Bake the crisp uncovered. If you are freezing/refrigerating a raw crisp, lay a paper towel on top of the apple filling before adding the streusel to absorb excess moisture.
Apples are Still HardSlices were too thick, or the oven was too hot (browning the top too quickly).Solution: Cut slices thinner (1/4 inch). If the top browns too quickly, loosely tent the dish with aluminum foil for the last 15 minutes to allow the apples to tenderize without burning the topping.
Filling is WateryNot enough flour, or apples were not given enough time to cool and thicken.Solution: Always allow the crisp to cool for 15-20 minutes after baking; the sauce thickens significantly as it cools. Next time, add a teaspoon of cornstarch along with the flour.
Make It Gluten-FreeVariation: Substitute the all-purpose flour in both the filling and the topping with a 1:1 gluten-free baking blend.

VI. Serving, Storage, and Variations

Gemini Generated Image pmhnkkpmhnkkpmhn

Serving Suggestions

  • Classic Comfort: A generous scoop of high-quality vanilla ice cream is non-negotiable.
  • Extra Indulgence: A drizzle of homemade caramel sauce or salted bourbon sauce.
  • Simple & Light: A dollop of fresh whipped cream or crème fraîche.

Storage & Reheating

  • Room Temp: Apple crisp will keep, tightly covered, at room temperature for up to 2 days.
  • Refrigerated: Store in the fridge for up to 5 days.
  • Reheating: To revive the crunch, reheat uncovered in a 350°F (175°C) oven for 10-15 minutes until the topping is crisp and the filling is bubbly.

Variations (Beyond Apple)

The “crisp” topping is versatile! Try substituting the apple filling with other seasonal fruits:

  • Berry Crisp: Mixed blueberries, raspberries, and blackberries.
  • Stone Fruit: Sliced peaches or plums in the summer.
  • Pear and Ginger: Use firm pears and add a teaspoon of fresh or ground ginger to the filling.

Common Mistakes to Avoid

  • Using the wrong apples (soft apples make it mushy).
  • Adding too much liquid.
  • Overbaking (burns the topping).
  • Forgetting to rest after baking (flavors need to settle).

Healthier Versions of Apple Crisp

For a lighter dessert:

  • Use whole-grain oats and almond flour.
  • Swap sugar with maple syrup or coconut sugar.
  • Use coconut oil instead of butter.
  • Add nuts like almonds or walnuts for extra nutrition.

Nutritional Information (Per Serving)

NutrientAmount
Calories320 kcal
Fat12g
Carbohydrates55g
Protein3g
Fiber5g

Frequently Asked Questions (FAQs)

1. Can I make Apple Crisp ahead of time?
Yes! Assemble the layers and refrigerate for up to 24 hours before baking.

2. How do I keep the topping crispy?
Bake uncovered and reheat in the oven, not the microwave.

3. What’s the best apple combination?
Granny Smith + Honeycrisp = perfect balance of tart and sweet.

4. Can I make Apple Crisp without oats?
Yes, replace oats with chopped nuts or extra flour for a crumble texture.

5. Can I freeze Apple Crisp?
Freeze the unbaked version, then bake directly from frozen when ready.

6. Is Apple Crisp the same as Apple Pie?
No. Apple Crisp has a crumbly oat topping, while apple pie has a traditional crust.


Conclusion

Apple Crisp is more than just a dessert—it’s a celebration of cozy flavors, warm spices, and sweet nostalgia. With this simple recipe, you’ll create a dessert that’s crisp on top, tender inside, and guaranteed to impress every guest. Whether it’s fall or any season, a bowl of homemade Apple Crisp always brings comfort.

Delicious Dinner Recipes: Quick & Easy Meals for Any Night

Delicious Dinner Recipes
Table of Contents
Gemini Generated Image t8td4at8td4at8td

I. Introduction: Reclaiming the Weeknight Dinner

The clock hits 6 PM, and the challenge begins: How do you create a genuinely delicious, nutritious, and satisfying dinner without spending an hour at the stove or ending up with a mountain of dishes? The answer lies in mastering a few core cooking methodologies.

This ultimate guide will empower you to conquer the weeknight dinner dilemma by focusing on four essential pillars of quick, easy cooking. We will break down the techniques behind the Sheet Pan Solution, the 30-Minute Pasta Fix, the One-Pot Comfort Meal, and the Vegetarian Quick-Cook. By mastering one recipe from each pillar, you unlock the ability to plan and execute stress-free meals any night of the week.


II. Pillar 1: The Sheet Pan Solution — One-Pan Lemon Herb Chicken

The sheet pan meal is the ultimate low-effort, low-cleanup cooking method. By combining protein and vegetables on a single tray, you create a perfectly balanced, wholesome meal with minimal fuss.

Recipe Spotlight: One-Pan Lemon Herb Chicken

This is the quintessential sheet pan recipe, emphasizing dry heat roasting for maximum flavor and crisp skin.

Core IngredientsFocus
Chicken (Whole or Parts)The Protein
Lemon • Herbs (Rosemary, Thyme)The Flavor Base/Acid
Potatoes • CarrotsThe Starch & Root Veg
Olive Oil • SeasoningThe Fat/Fat-Soluble Carrier

Detailed Technique Deep Dive: Roast Mastery (Approx. 350 Words)

Success with sheet pan chicken relies on understanding how different ingredients cook at different rates.

  1. Uniformity is Key (The Starch Rule): The biggest mistake in sheet pan cooking is uneven cooking. Ensure potatoes and carrots are cut into uniform, bite-sized pieces (no larger than 1 inch). Dense root vegetables should be cut smaller than softer vegetables like broccoli or asparagus.
  2. The High-Heat Sear (425°F/220°C): Roasting at a high temperature is critical to achieving crispy chicken skin and tenderizing the vegetables simultaneously. Use the high heat to create the Maillard reaction—that deep, savory brown crust—on all surfaces.
  3. The Power of Acid and Herb: Pat the chicken (or chicken parts) completely dry before seasoning. Tossing it with lemon zest and a generous amount of fresh herbs (rosemary and thyme are classic) allows the aromatic oils to deeply penetrate the skin and meat, leading to a much more flavorful result than a simple salt rub.

Advanced Tips & Troubleshooting:

  • For Chicken Parts: If using breasts, which cook faster than legs/thighs, toss them in half the oil and add them to the sheet pan 15 minutes after the root vegetables have started roasting.
  • Preventing a Steamed Pan: Do not overcrowd the sheet pan. Use two pans if necessary; overcrowding traps moisture and steams the ingredients, preventing the desired crispness.
  • The Final Lemon Slice: Add fresh lemon slices directly to the pan during the last 15 minutes of roasting; the heat caramelizes the lemon, softening the acid into a delicious drizzle.

III. Pillar 2: The 30-Minute Pasta Fix — Quick Shrimp Scampi Pasta

Gemini Generated Image 2a983a2a983a2a98

Pasta is the perfect foundation for a lightning-fast meal. By using a quick-cooking protein like shrimp and leveraging the technique of emulsification, you can build a rich, glossy sauce in the time it takes the noodles to boil.

Recipe Spotlight: Quick Shrimp Scampi Pasta

This scampi is a masterclass in building a balanced, glossy sauce.

Core IngredientsFocus
ShrimpThe Quick Protein
Pasta (Linguine/Spaghetti)The Starch Base
Garlic • Butter • LemonThe Sauce Foundation
White Wine • ParsleyThe Acidity/Garnish

Detailed Technique Deep Dive: Emulsion & Finishing (Approx. 350 Words)

  1. Building the Fond: Start by searing the shrimp in butter and a little oil. This leaves behind browned bits (fond) that are essential for flavor. Remove the shrimp before it’s fully cooked (when it just starts to curl into a “C” shape).
  2. The Wine Deglaze: Add the white wine (or chicken broth) to the pan and scrape up all those flavorful brown bits. This deglazing process adds a layer of depth and savory complexity.
  3. The Scampi Sauce Secret (Emulsion): This is the key. Once the garlic and lemon juice are added, use a ladleful of starchy pasta water (the water the noodles boiled in). Whisking the butter into the starchy water and acid creates a smooth, thick, opaque sauce that clings to the pasta, eliminating the need for heavy cream.

Advanced Tips & Troubleshooting:

  • Perfect Shrimp Timing: Shrimp cook in 2-4 minutes. If you add them back to the sauce too early, they will be rubbery. Add the partially cooked shrimp back into the sauce during the final 60 seconds of cooking, allowing them to finish gently in the warm sauce.
  • Salt Management: Since pasta water is usually heavily salted, taste the sauce before adding any additional salt.
  • Flavor Boost: Finish with a grating of fresh Parmesan cheese and a generous sprinkle of fresh parsley for brightness.

IV. Pillar 3: The One-Pot Comfort Meal — Hearty Beef & Veggie Chili

Gemini Generated Image kjm8h2kjm8h2kjm8

Comfort food doesn’t have to take all day. A hearty chili can achieve deep, complex flavor with focused technique and a short, controlled simmer.

Recipe Spotlight: Hearty Beef & Veggie Chili

This recipe relies on seasoning and layering to deliver a complex, savory flavor.

Core IngredientsFocus
Ground BeefThe Protein/Richness
Tomatoes • BrothThe Liquid Base/Acid
Chili Spices • CornThe Flavor/Texture
Beans • Bell PeppersThe Fiber/Body

Detailed Technique Deep Dive: Building Deep Flavor Fast (Approx. 400 Words)

  1. Maximal Browning (The Sear): Do not steam your ground beef. Brown it in batches, if necessary, and ensure a dark, deep-brown crust forms before draining any fat. This browning step creates crucial, savory umami that will define the chili’s final flavor.
  2. The Spice Bloom: After browning the meat and softening the onions and peppers, add the chili spices (chili powder, cumin, oregano) directly to the pot with the meat. Cook the spices for 1-2 minutes, stirring continuously. This step—the spice bloom—wakes up the fat-soluble flavor compounds, making the entire chili more fragrant and robust.
  3. The Short Simmer: Unlike traditional chili that simmers for 6+ hours, this weeknight version benefits from a focused, 20-30 minute simmer after the tomatoes and broth are added. This time is just enough to soften the peppers, infuse the liquids with the spice blend, and allow the flavors to marry sufficiently.

Advanced Tips & Troubleshooting:

  • Thickening: If your chili is too soupy, remove the lid for the last 10 minutes of simmering to allow the liquid to reduce. Alternatively, mash about half a cup of the beans against the side of the pot and stir them back in; the starch will thicken the chili naturally.
  • The Secret Ingredient: For a more authentic, earthy flavor, stir in a spoonful of masa harina (corn flour, optional) or even a square of high-quality dark chocolate during the simmer.
  • Topping is Essential: Serve with sour cream, shredded cheese (cheddar/Monterey Jack blend), and fresh cilantro to provide textural and temperature contrast.

V. Pillar 4: The Vegetarian Quick-Cook — Creamy Sundried Tomato Gnocchi

Gemini Generated Image m4mr83m4mr83m4mr

A quick vegetarian option should be satisfying, rich, and fast. Pre-made gnocchi is a secret weapon that cooks in minutes and readily absorbs creamy sauces, making this dish both easy and luxurious.

Recipe Spotlight: Creamy Sundried Tomato Gnocchi

A velvety, decadent dish that requires almost zero knife work.

Core IngredientsFocus
Gnocchi (Potato Dumplings)The Starch Base
Sundried Tomatoes • Garlic • BasilThe Flavor Foundation
Cream • Parmesan • SpinachThe Creamy Body

Detailed Technique Deep Dive: Flavor Extraction and Quick Reduction (Approx. 350 Words)

  1. Flavor Extraction: Start by heating the skillet with the oil from the jar of sundried tomatoes, if available. This instantly infuses the pan with deep, concentrated tomato and herb flavor. Sautéing the minced garlic and sliced sundried tomatoes in this oil creates the aromatic base.
  2. The Gnocchi Method: Gnocchi is done when it floats to the surface (usually 2-3 minutes). Drain it and add it directly to the skillet with the sauce base.
  3. The Cream Reduction: Add the cream and a spoonful of starchy gnocchi water to the skillet. Allow it to simmer and reduce for a few minutes. As the cream thickens and clings to the gnocchi, the starches from the potato dumplings also contribute to the velvety texture.

Advanced Tips & Troubleshooting:

  • Boosting Nutrients: Stir in a handful of fresh spinach or arugula during the last minute of cooking; the residual heat will wilt the greens perfectly.
  • Enhancing Tang: A spoonful of cream cheese or goat cheese stirred into the warm sauce adds a delicious tanginess and enhances the creamy texture.
  • Crispy Finish: For an elevated texture, pan-fry the boiled gnocchi in a separate skillet with butter until the dumplings are slightly golden and crispy on the outside, then toss them in the creamy sauce.

VI. Conclusion: Your Weeknight Meal Toolkit

You are now equipped with the four foundational techniques for quick and easy weeknight meals. Each method—from the hands-off sheet pan roast to the simple pasta emulsion—is designed to maximize flavor while minimizing effort and cleanup.

No matter how busy your night is, you have a blueprint for a delicious, home-cooked meal.